
You know that part of every morning, where your kid is hanging on the vanity side like a toy rock climber, you are half asleep and there is even somebody brushing their teeth on the floor. Yeah. My home for too long was that.
I have also finally installed a slide-away step under the bathroom vanity, and I very much regret that I did not do it three years ago.
It is also the kind of upgrade that makes it seem almost embarrassingly easy once it is installed – installation has a few details that can make you stumble in without prior knowledge.
So let me walk you through the whole thing, the way I wish someone had walked me through it.
First, What Exactly Is a Slide-Away Step?
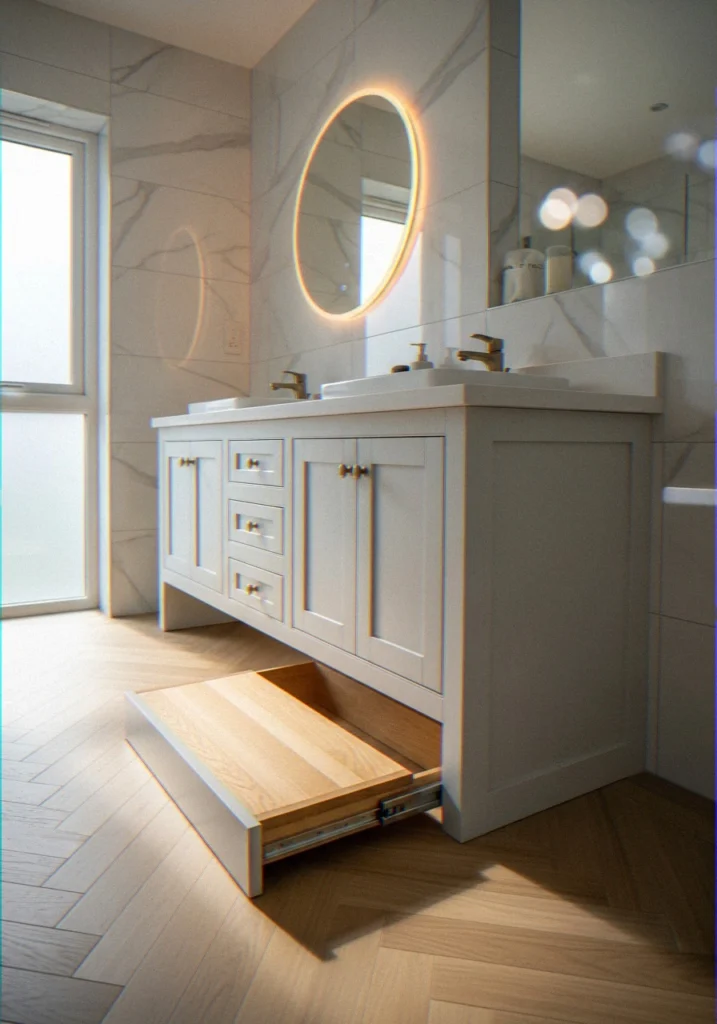
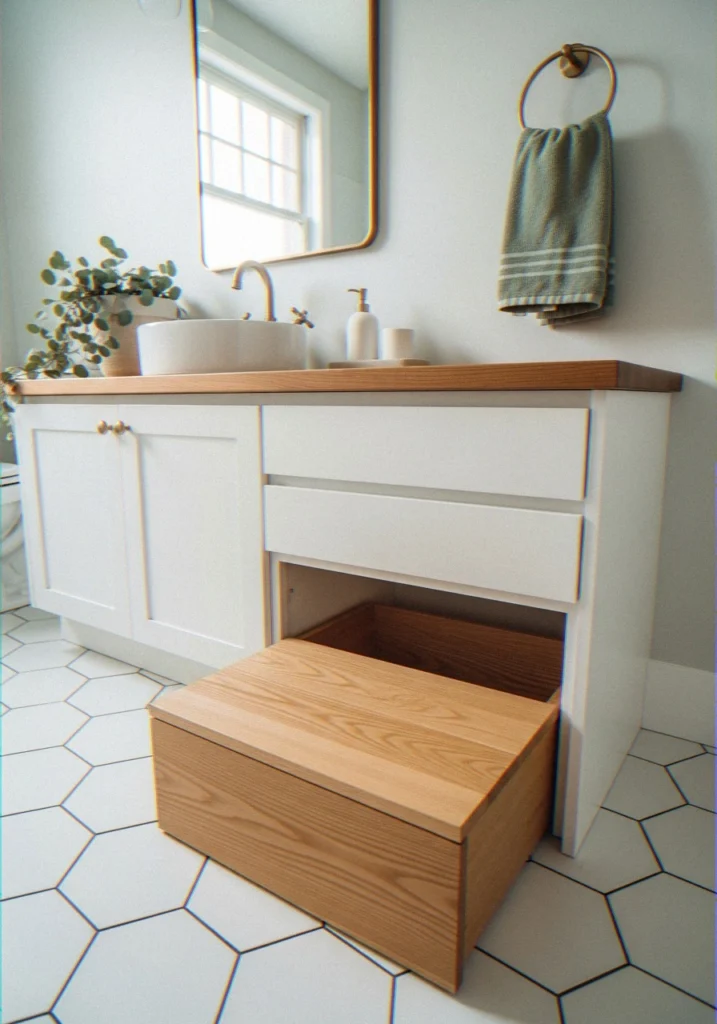
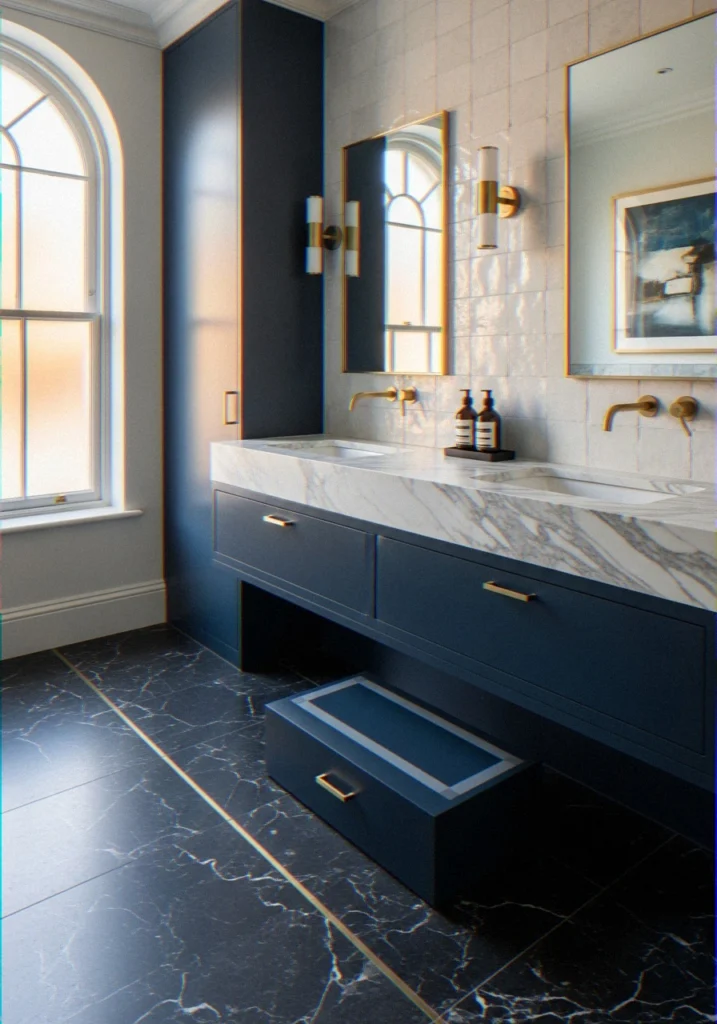
When you have been searching under such words as hideaway solutions cabinet step stool or under cabinet step stool, you are referring to the same product that has a couple of other names. It is basically a system that hides entirely out of view that is under the toe kick of your vanity.
Pull it out when somebody needs a boost and put it back in when they do not. No mess, no rugged floor, no hideous plastic stool pushed out of place.
I’ve seen them marketed as bathroom vanity with built-in step stool setups, and honestly that term makes it sound fancier than it is.
The mechanism is simple — it’s basically a drawer without a face. But when it works, it works beautifully.
Here’s a quick reference for the core specs before you buy anything:

What You Need Before You Start

Preparation isn’t the fun part — I know. But walking into this without the right supplies is the fastest way to turn a two-hour project into an all-day ordeal. Ask me how I know.
The tools
- Electric drill and a set of drill bits
- Tape measure (a cheap one is fine)
- Pencil for marking — seriously, don’t skip this
- Level (even a small torpedo level works)
- Flathead screwdriver or pry bar for the toe kick panel
- 120-grit sandpaper
- Paint or stain to match your cabinet finish
What to measure before you buy
This is the step most people skip, and it’s the one that costs them a return trip to the hardware store. Measure the height, width, and depth of your toe kick opening before you order anything.
Most standard vanities have a 3.5- to 4-inch toe kick height, but not all. And the depth needs to clear any plumbing running through that space — shine a flashlight in there before you assume it’s clear.
Step-by-Step: The Full Install
Okay, here we go. I’m going to be real with you — this is a beginner-to-intermediate DIY job. If you’ve ever hung a shelf or put together flat-pack furniture, you have the skills for this.
Step 1: Remove the toe kick panel
The vanity toe kick panels are attached using clips or a small number of finishing nails. It can be popped off using a flathead screwdriver.
In case yours is glued, cut a line along the edges with a utility knife first or you will tear the cabinet finish and that is a very irritating thing to repair.
Set the panel aside. You might be able to reuse it with some trimming, or you’ll cut a new piece of MDF later. Either way, you’ll need it off to access the cavity behind it.
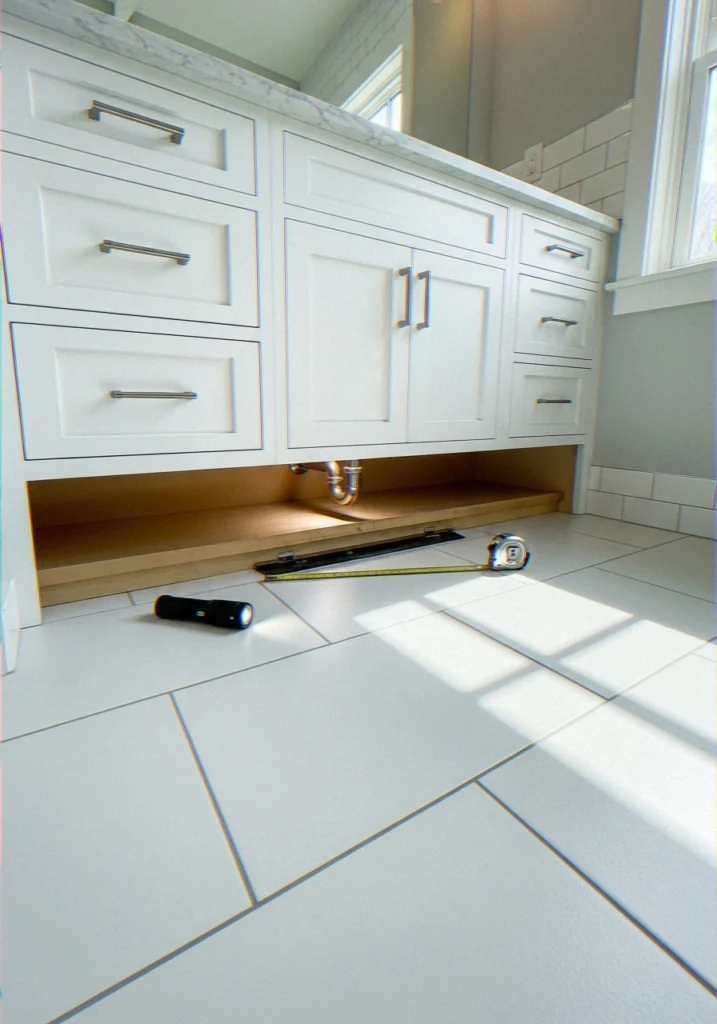
Step 2: Check inside the cavity
Pour a flashlight on the toe kick space first. Find plumbing pipes, electrical wiring, or any type of floor leveling material that may hinder the route of the step. When the pipes are run in the middle, put into consideration offsetting the step to either side. Whenever you are not sure of what you are looking at in there, call a plumber, it is not worth the chance.
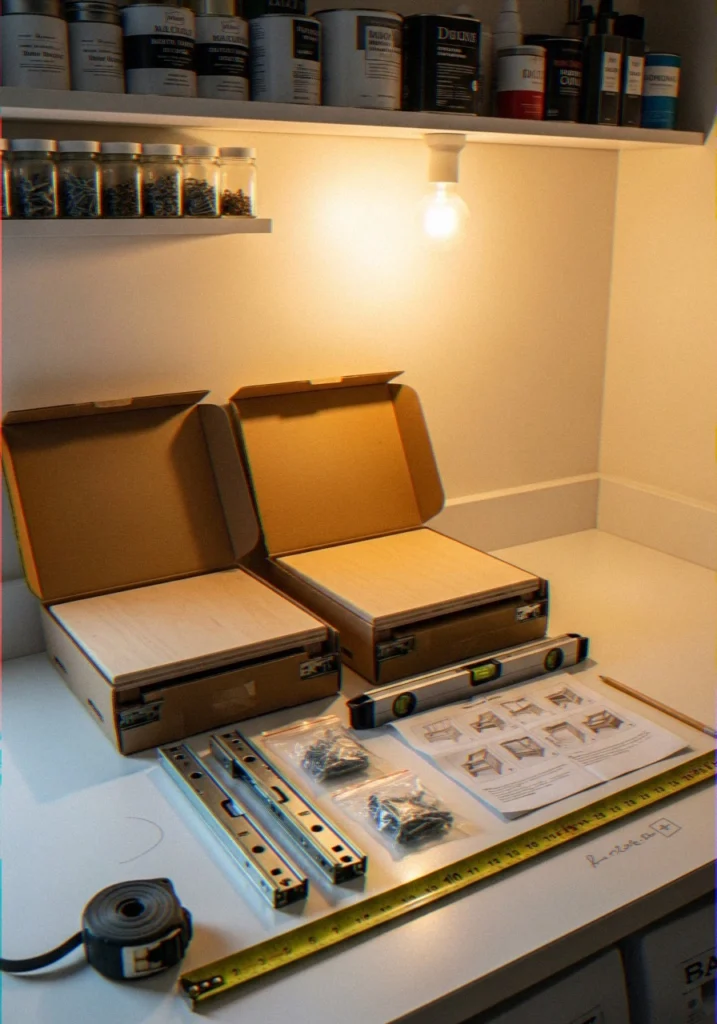
Step 3: Assemble the step kit
Most hide away solutions kits come partially assembled. You’ll typically need to:
- Attach the side rails to the step platform
- Snap or screw the ball-bearing drawer slides into position
- Set the slides to the correct width for your vanity opening
The Family Handyman has a solid drawer slide installation guide that I bookmarked before my own install — it really helped me understand how the slide mechanism works if you’ve never dealt with one before.
Step 4: Mount the drawer slides inside the cabinet
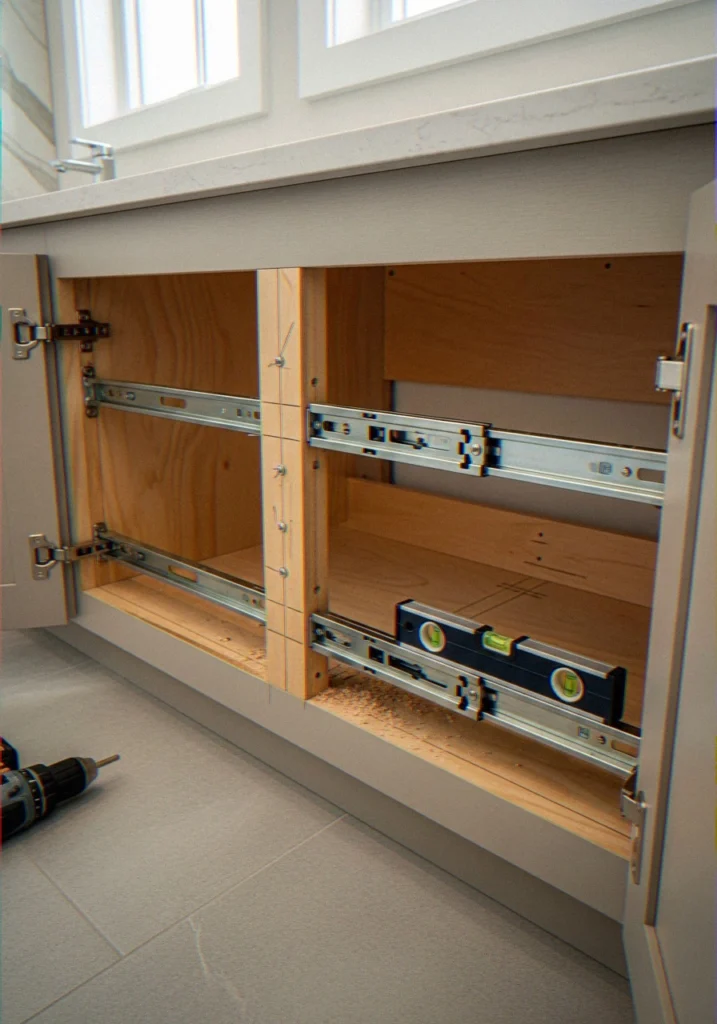
This is where precision matters most. Mark your mounting line on the inside of the toe kick frame. Pre-drill pilot holes — skip this step and you risk splitting the wood, which is exactly as annoying as it sounds.
Attach the fixed side of each slide using wood screws.
Then grab your level. Both slides need to be at the exact same height. Even a few millimeters off and the step will bind or slide crookedly.
I got cocky on this step and skipped the level check on my first attempt. I had to redo it. Use the level.
Step 5: Attach the step to the slides
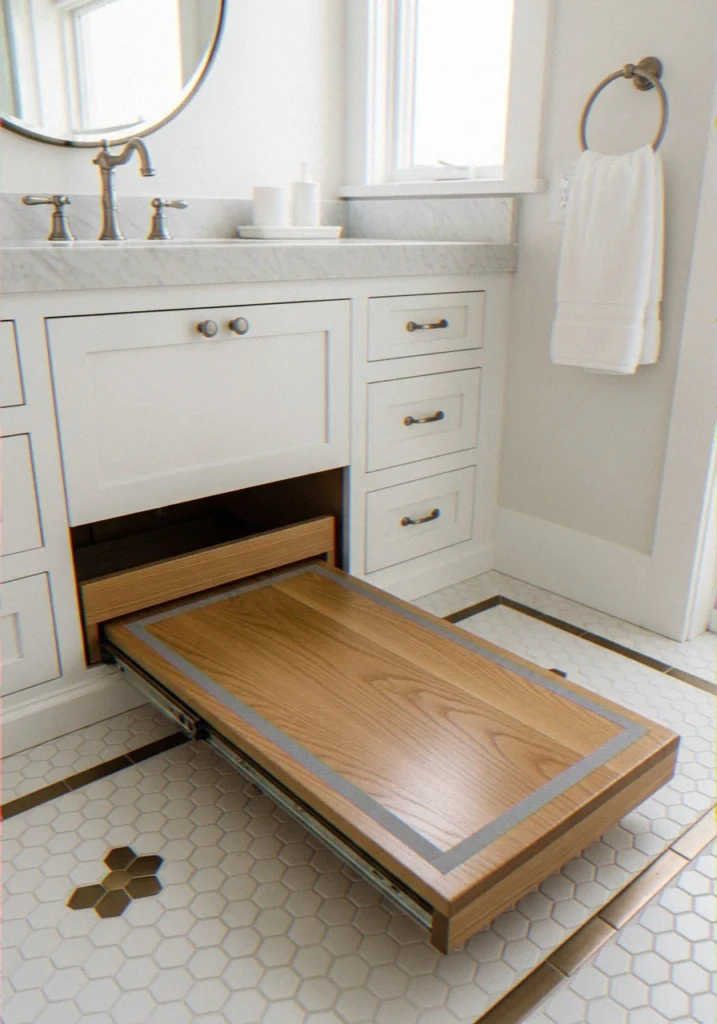
Insert the platform in the loaded slides. It must move in and out without any catching or binding. When it is stiff, make sure that both slides are absolutely even with each other and the step is no more than 1/4-inch wider than the cavity on either side.
Once it glides cleanly, mark the screw holes on the step platform, remove it, pre-drill, and reattach the step to the moving portion of the slides. You’re almost there.
Step 6: Install a stop mechanism
Most quality kits include a built-in stop that prevents the step from sliding all the way out.
If yours doesn’t, add a small wood block glued inside the slide channel at the back, or use a simple rope stop. FYI — if kids are using this step, the stop mechanism is non-negotiable. Don’t skip it.
Step 7: Reinstall the toe kick panel
If your original panel still fits around the step opening, great — reattach it.
If not, trim it with a jigsaw or cut a new piece of MDF to fit. Sand every cut edge smooth, then paint or stain to match your cabinet. This finishing work takes maybe 20 minutes but makes the difference between looking DIY and looking built-in.
Making It Look Like It Was Always There
Here’s an honest truth — a kids bathroom vanity with pull out step that looks slapped on is almost worse than having no step at all. A few finishing details go a long way toward making it look intentional.
Match your finish exactly. Make a snapshot of the door of your cabinet to a paint store and request matching of the paint.
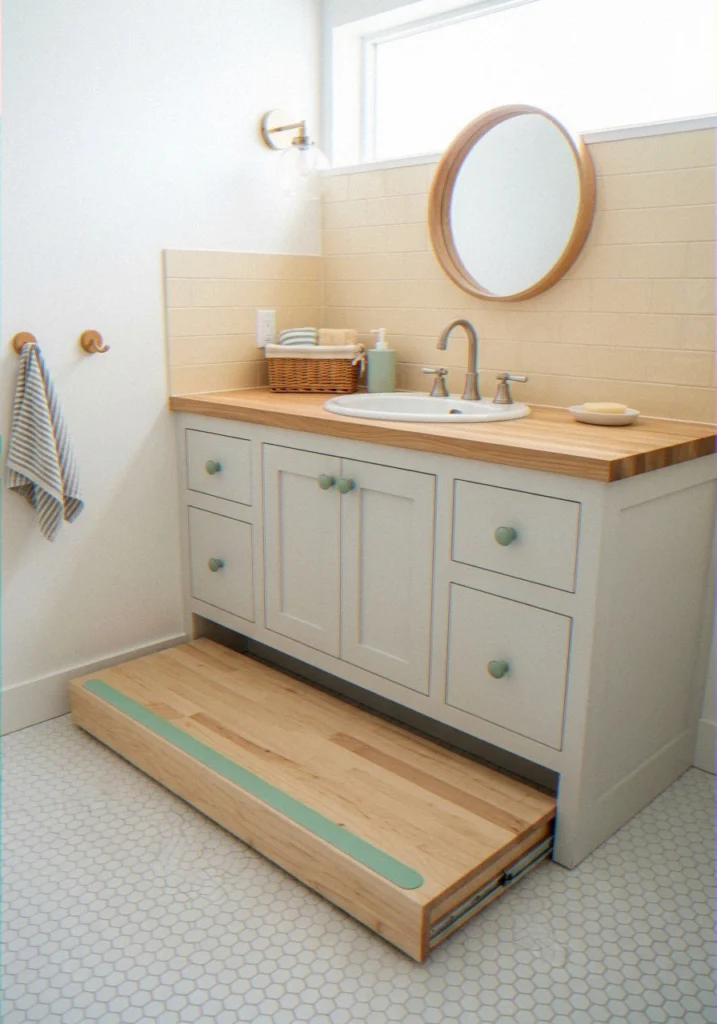
They tend to be very accurate and it is almost free. Step This needs to have a little recessed finger pull on the front face to easily slide around on, a small chrome or brushed nickel pull looks neat and deliberate.
Most importantly: add non-slip grip tape to the step surface. Bathroom floors get wet. The step will too. 3M Safety-Walk tape is what I used — it comes in neutral gray and beige and holds up well in humid environments. I’ve had mine for over a year with no peeling.
People Also Search For: Similar Products Worth Knowin
If you’ve been searching around for this project, you’ve probably seen some of these terms come up. Here’s how they all connect:
Hideaway Solutions cabinet step stool — This is actually a brand name that’s become a bit of a generic term, similar to how people say “Kleenex.” Hideaway Solutions makes pre-built pull-out steps that install directly into toe kick spaces. Great option if you want a ready-made kit rather than sourcing components separately.
Under cabinet step stool — The broader category term. This covers everything from slide-away steps to fold-down platforms.
If you’re searching this term, you’re in the right space — just make sure whatever you find specifies “drawer slide” or “pull-out” style if you want the fully concealed look.
Bathroom vanity with built-in step stool — This refers to vanities that come pre-configured with a pull-out step from the factory.
If you’re still in the shopping phase for a new vanity, it’s worth searching this term — some manufacturers include the step as a standard feature, especially in kid-focused bathroom furniture lines.
Kids bathroom vanity with pull out step — The most specific version of the search. Products marketed this way tend to be sized and styled for children’s bathrooms, often with lower counter heights and brighter finishes.
If you’re outfitting a dedicated kids’ bathroom from scratch, this is worth a separate look.
Common Mistakes I’ve Seen (and Made
Look, everyone makes at least one mistake on a first install. Here are the ones that come up most often:
- Buying before measuring — the single most common error, and the most avoidable
- Skipping pilot holes — this splits cabinet wood and creates extra repair work
- Not checking the level — off-level slides cause binding every single time
- Ignoring the weight rating — most steps support 150–200 lbs, which is fine for kids but worth confirming if adults will use it regularly
- No non-slip surface — wet bathrooms and smooth wood are a bad combination
FAQ: People Also Ask
What are common DIY vanity mistakes?
The largest that I have personally encountered and observed in all the DIY forums are the following; not measuring before buying, not making pilot holes when drilling into cabinet wood and not sealing and finishing cut edges on MDF. MDF expands as it takes moisture and a bathroom is practically a wet machine.
In case you are making new panels to your toe kick area, paint all sides using primer before painting. A second classic error: before attaching a vanity to the wall, it is always worth making sure that it is a level surface placed there.
Even a vanity a little crooked in the eye will leave all the drawers sliding open by themselves – irritating eternally.
You can find a great overview of common vanity errors over at This Old House’s bathroom renovation section — they go deep on installation pitfalls that most beginner guides skip.
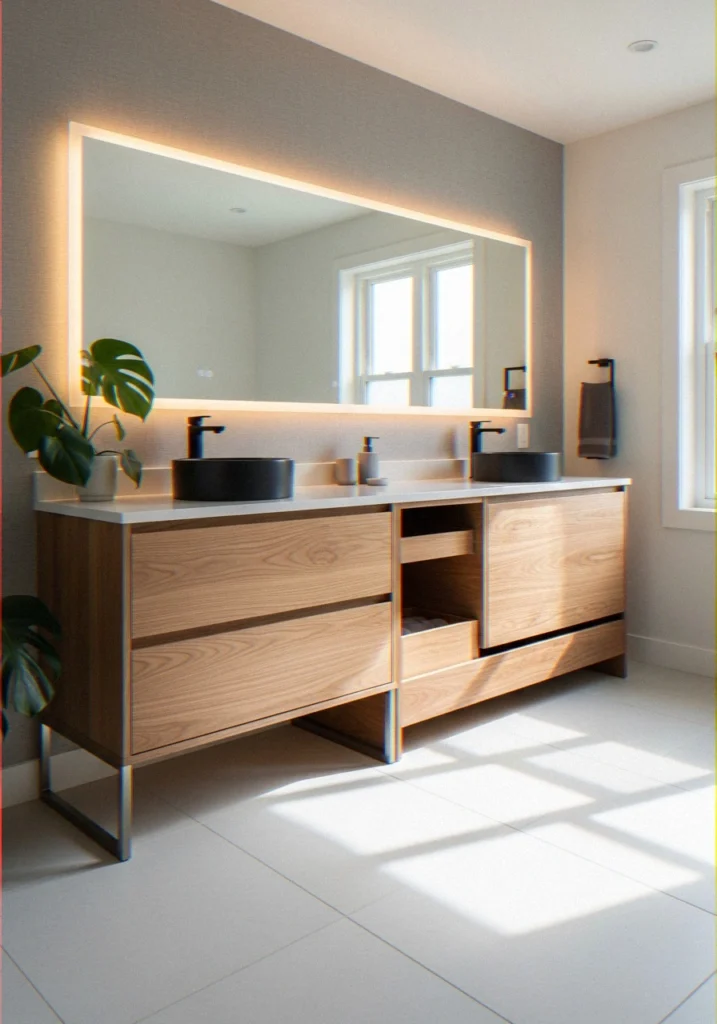
How to put legs on a bathroom vanity?
Putting legs on a bathroom vanity is more doable than it sounds, and it transforms the look from built-in cabinet to furniture-style piece.
You’ll need to remove the existing toe kick panel, attach a leg mounting plate or hanger bolt to each corner of the vanity base, and then thread on your chosen legs.
Furniture-style legs typically screw into 5/16-inch hanger bolts — make sure the bolts are embedded into solid wood, not just MDF or particleboard, or they’ll strip out over time.
One thing to know: adding legs removes the toe kick cavity entirely, which means no slide-away step.
If a pull-out step is part of your plan, keep the toe kick and skip the legs. It’s one or the other — you can’t have both in most standard vanity configurations.
Should a bathroom vanity have a toe kick?
Yes, and this is why it really does not merely matter in aesthetics.
The toe kick – that inbuilt hole at the bottom of a vanity cabinet – allows one to rest near the counter without his or her feet bumping into the face of the cabinet. Otherwise you would stand a few inches further away, where it is much more difficult than it sounds to reach a mirror or sink. It also leaves the visual load of the cabinet on the floor, which makes the entire piece appear to be lighter and more purposeful.
Slide-away steps, little secret storage drawers, and part of the plumbing access points are also cohabiting here, on a practical standpoint, however, the toe kick cavity.
It can be removed and replaced with bare legs, which is a legitimate design decision, but utility is lost altogether. In my opinion, however, in a family bathroom, in particular, it is nearly always more prudent to keep the toe kick.
Explore More Home Inspiration
How to Balance a Large Flat Screen TV on a Short Living Room Wall
How to Organize Open Kitchen Shelving to Look Decorative and Functional
How to Organize Outdoor Garden Tools in a Small Apartment Balcony Box
How to secure a vanity to a wall without screws?
This comes up more than you’d expect — usually in rental situations, or when someone’s dealing with tile walls where drilling feels risky.
The honest answer is: the safest method still involves some fastening, but you have options. Construction adhesive applied to the wall side of the vanity back can hold a lighter vanity in place — brands like Liquid Nails Heavy Duty are rated for this kind of load. For heavier vanities, adhesive alone isn’t reliable long-term.
An alternative solution should be becoming a more viable no-damage solution to renters who use furniture anti- tip straps attached to wall studs. they are used frequently on dressers and bookshelves, and work on vanities, also, they can be almost invisible on their installation, and make the piece firm without a wall permanently damaged.
Another alternative that has been adopted by some individuals: non-slip rubber matting in the area between the floor and vanity, and placing it in strategic places against another wall. Not ideal, but practical in situations that are not high-risk.
Final Thoughts
One of those projects that have a significantly good payoff to effort ratio is to install a slide-away step to the bathroom vanity. You waste a few hours one or another, you measure, you have your level standing around, and all the mornings thereafter work a little better on account of it.
My daughter can reach the sink on her own now. My bathroom floor is clear. The step disappears completely when it’s not in use.
If that sounds like something your morning routine needs, go grab that tape measure right now and check your toe kick clearance. That’s literally the only thing standing between you and a done project.
Go for it — you’ve got this.