
So you’ve got a balcony the size of a yoga mat, a collection of garden tools that somehow multiplied overnight, and zero clue where to put any of it. Sound familiar? Yeah, I’ve been there — standing on my tiny fifth-floor balcony, literally tripping over a trowel while trying to water my tomatoes. Not my finest moment.
Here’s the thing: a small balcony doesn’t have to mean chaos. With the right approach to organizing your balcony storage box, you can keep every tool in its place and still have room to actually enjoy your little outdoor paradise. Let me walk you through exactly how I do it.
Why Your Balcony Box Is More Powerful Than You Think
The majority of the population uses their storeroom in the balcony like a trash bin – dump all the things in, close the door and act as though nothing has gone wrong. That is however one of the least used storage facilities belonging to a balcony gardener as far as I am concerned.
A standard deck box holds anywhere from 70 to 150 gallons of space. That’s actually a lot of room when you organize it smartly. The problem isn’t the box — it’s the system (or lack of one) inside it.
Think of your balcony box as a tool station, not a storage bin. That mindset shift changes everything about how you pack and access your gear.
Step 1: Take Everything Out First (Yes, Everything)
I understand that this seems like a statement of the obvious, but hear me out. You have to do a complete audit on what you actually have before you organize anything. When I last had to do so, I discovered three pairs of identical gloves, a rake of the hand, which I did not remember purchasing, and about 47 plant labels.
Pull everything out and sort it into categories:
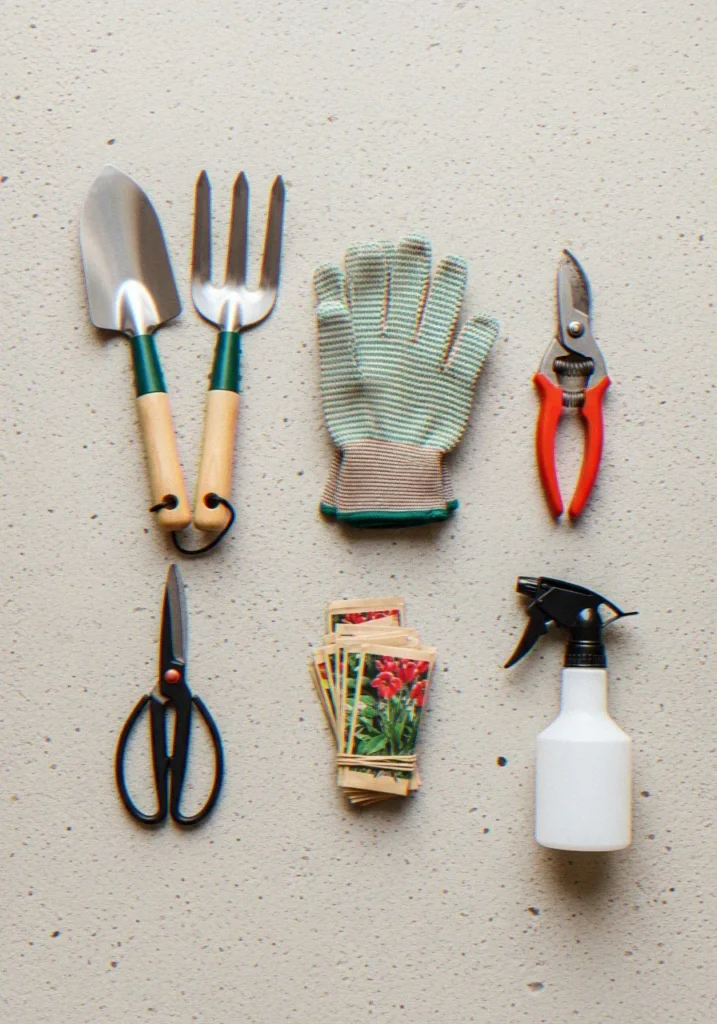
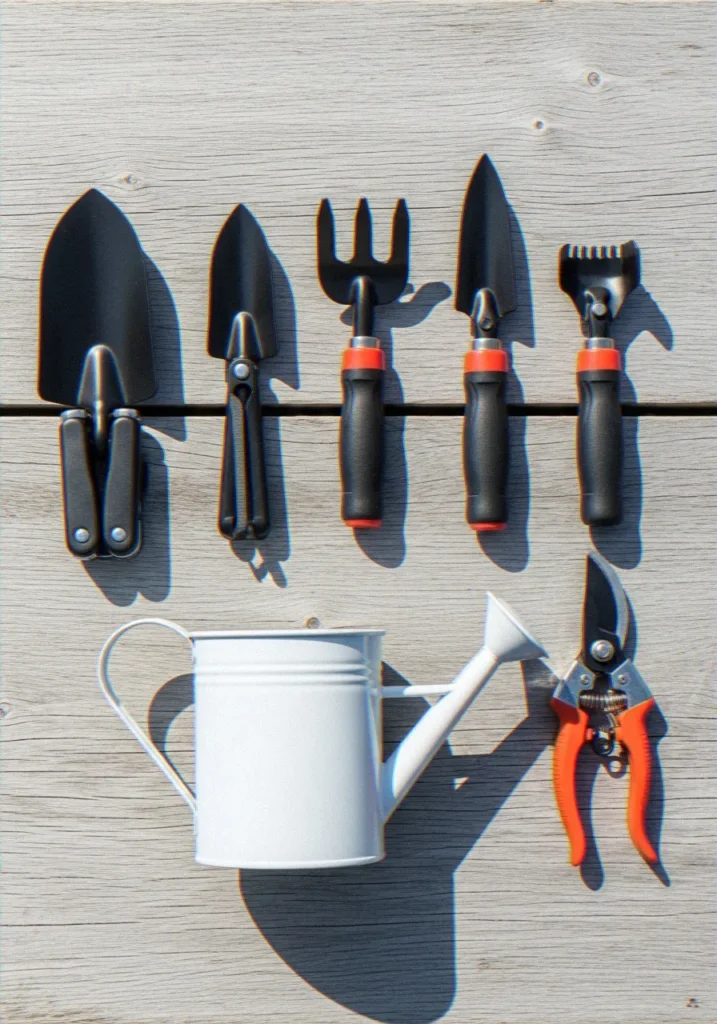
- Digging tools — trowels, cultivators, hand forks
- Watering tools — small watering cans, spray bottles, drip attachments
- Cutting tools — pruning shears, scissors, snips
- Planting supplies — seeds, bulbs, plant food, stakes
- Protective gear — gloves, kneeling pads, aprons
Once you see it all laid out, you’ll quickly spot duplicates and things you honestly don’t need on the balcony. Donate or relocate anything that doesn’t belong in your outdoor growing space.
Step 2: Measure Your Box Before You Buy Any Organizers
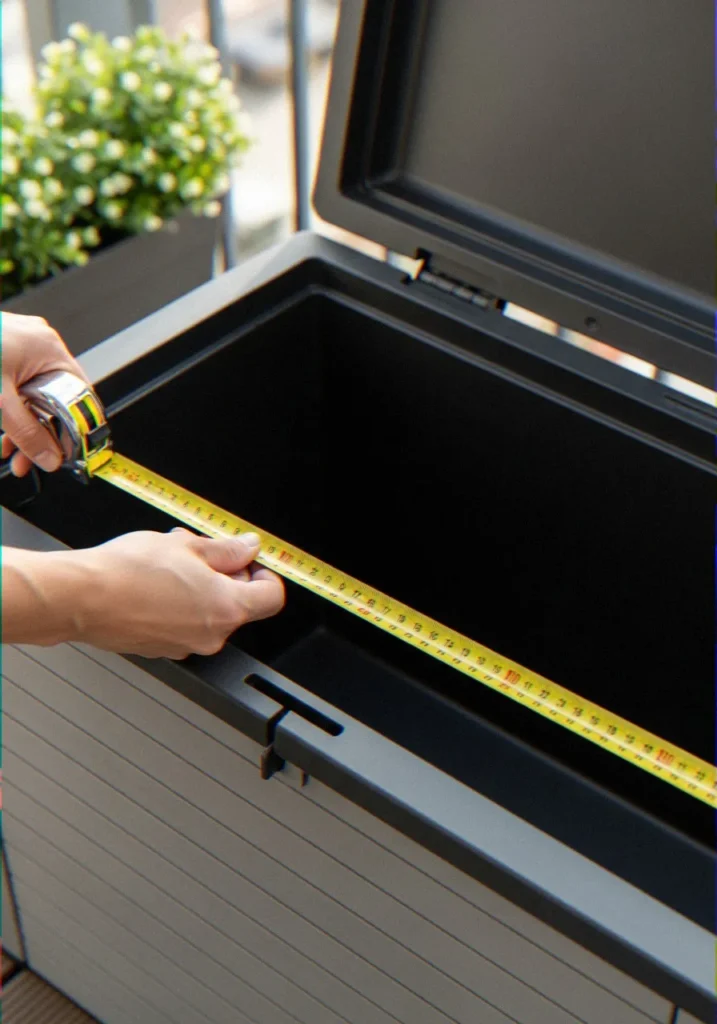
This is the step most people skip — and then they end up with organizers that don’t fit. I learned this the hard way after buying a pegboard insert that was a full two inches too wide. Not a fun afternoon.
Measure the interior length, width, and depth of your storage box. Write these numbers down and keep them on your phone. When you’re shopping for dividers, bins, or hanging organizers, you’ll have exactly what you need.
A few dimensions worth noting:
- Most compact deck boxes run around 50–60 inches wide and 20–24 inches deep
- Vertical tool organizers typically need at least 12 inches of depth to stand upright
- Stackable bins work best when the box interior is at least 18 inches tall
Step 3: Use Vertical Space With a Tool Insert or Divider
Here’s where the magic happens. The biggest mistake balcony gardeners make is stacking everything horizontally and then digging through a pile every time they need the pruners. Sound familiar? 🙂
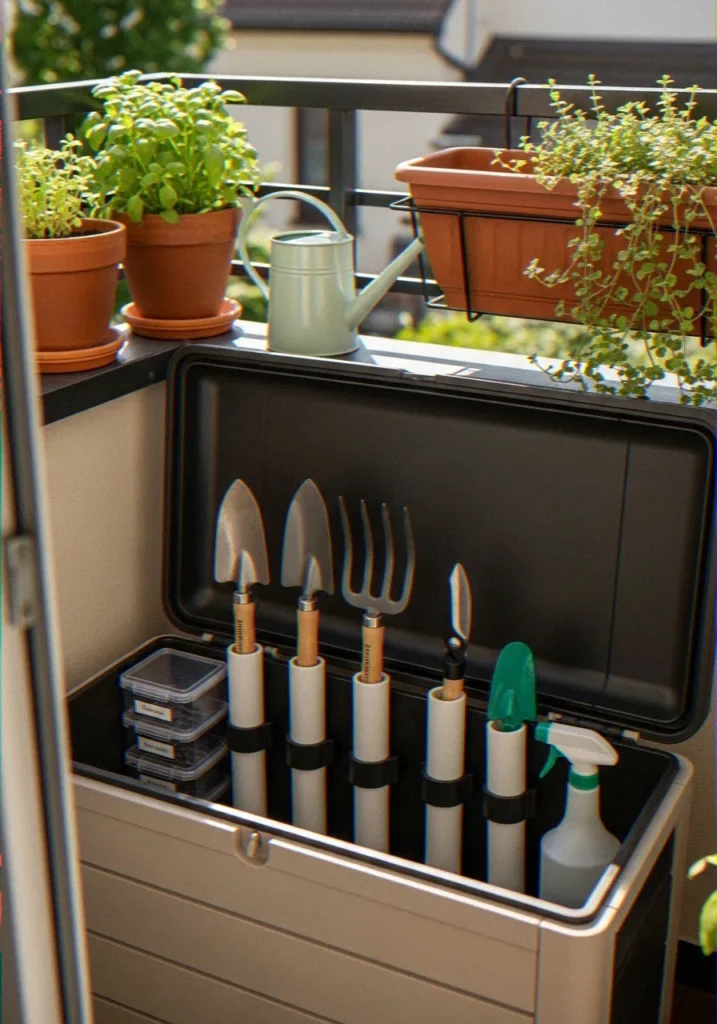
Use a vertical tool organizer or DIY divider system to stand tools upright. You can find fabric tool rolls, adjustable pegboard inserts, or even simple PVC pipe sections cut to length and glued to a base board. I personally use a fabric tool roll for my smaller hand tools — it rolls out flat when I need it and ties up neatly when I’m done.
DIY Vertical Divider Option
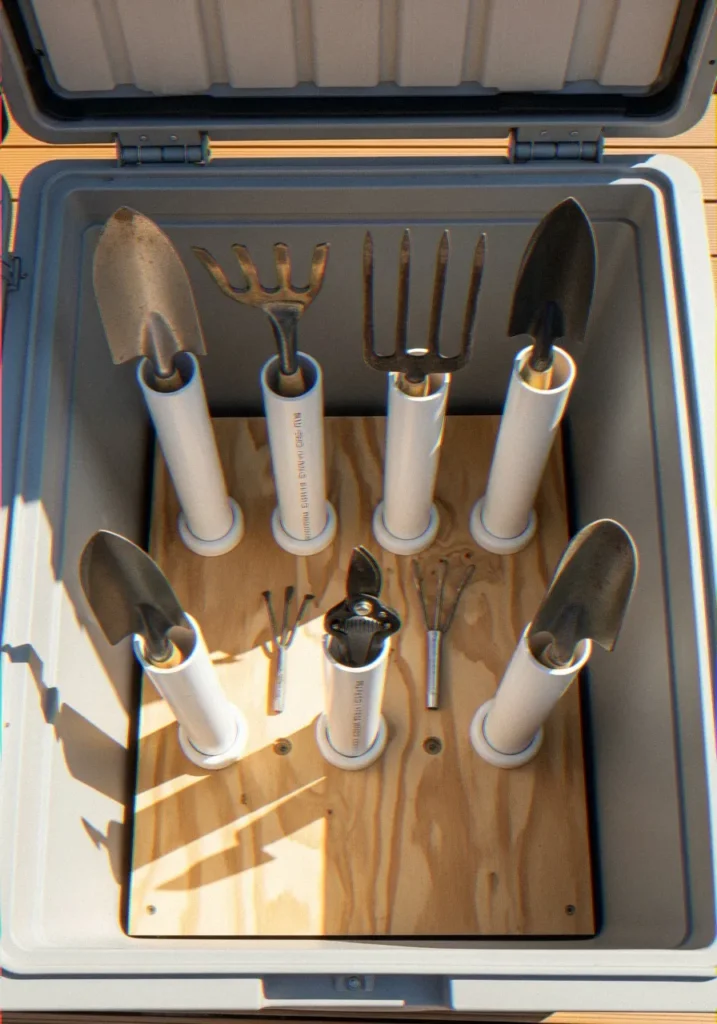
If you enjoy a little weekend project, here’s what I built for about $12:
- Cut a piece of plywood to fit the bottom of your box
- Glue sections of 3-inch PVC pipe (about 10 inches tall) in a row across the board
- Place the board inside your box so the pipes stand upright
- Insert tools handle-down into each pipe section
Simple, cheap, and surprisingly effective. Each tool gets its own slot — no more digging around.
Step 4: Assign Zones Inside the Box
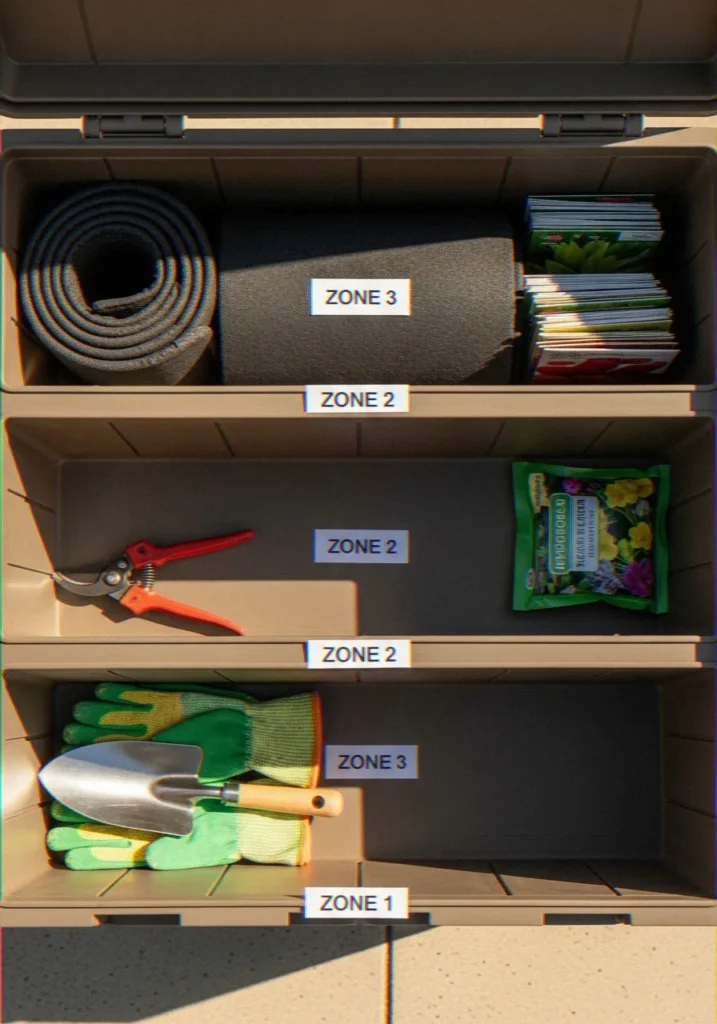
Once you’ve got your vertical storage sorted, divide the remaining space into dedicated zones. I treat my box like a mini kitchen — everything has a home, and putting it back in the right spot takes two seconds.
Here’s how I zone my box:
- Zone 1 (front/easy access): Tools I use daily — trowel, watering can nozzle, gloves
- Zone 2 (middle section): Weekly-use items — pruning shears, plant food, stakes
- Zone 3 (back/bottom): Seasonal or rarely-used items — bulbs, extra seeds, kneeling pad
The front-to-back frequency rule is a game changer. You stop rummaging, and you always know where to look.
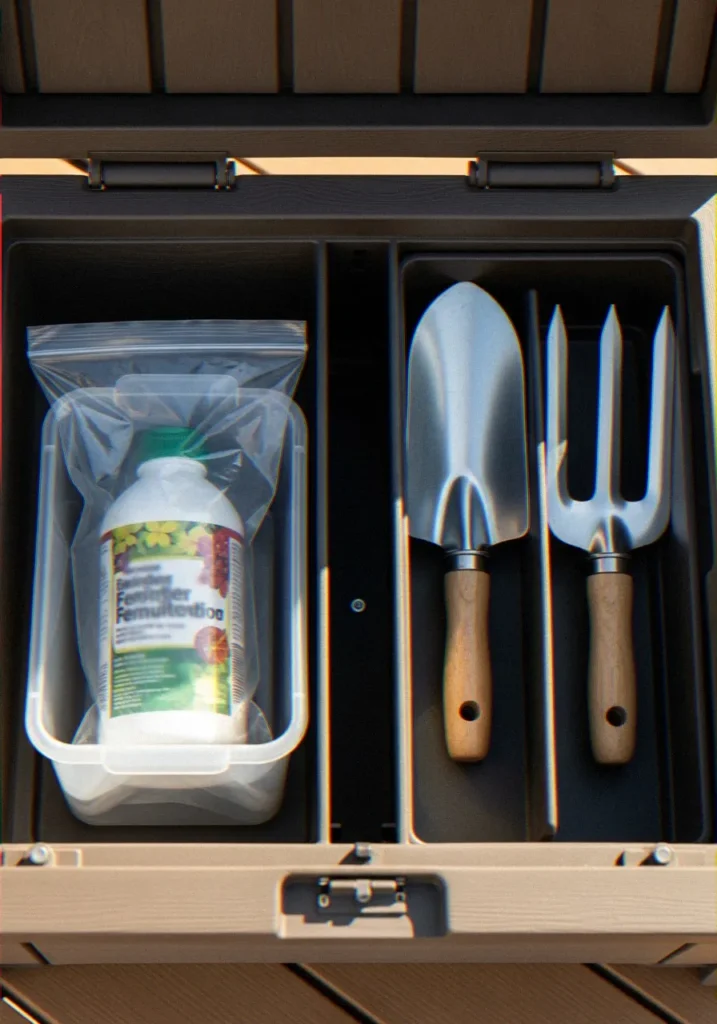
Step 5: Use Small Bins and Pouches for Loose Items
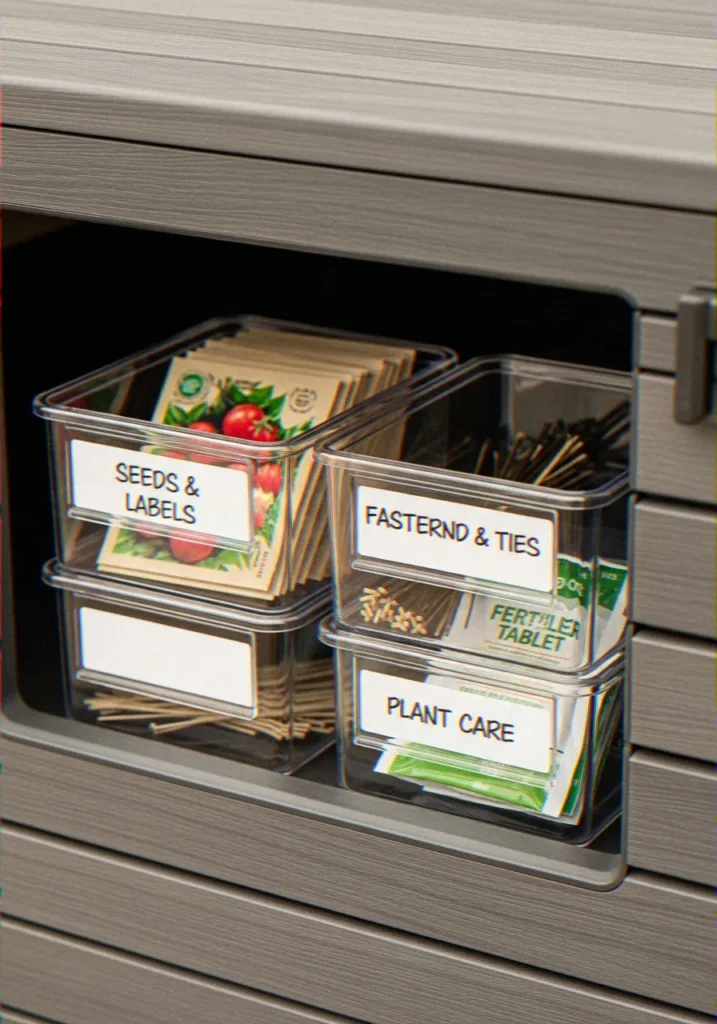
Loose seeds, twist ties, spare labels, tiny fertilizer packets — these things are the glitter of the gardening world. They get everywhere. FYI, a handful of small ziplock pouches or stackable mini bins will save your sanity.
I use a set of three small clear plastic bins that stack inside my box. Each one has a label:
- Seeds & labels
- Fasteners & ties
- Plant care (fertilizer tablets, root powder, etc.)
Clear bins are your best friend here — you can see exactly what’s inside without opening every container. No more mystery bags of unidentified white powder (it’s fertilizer, I promise).
Step 6: Protect Your Tools From Moisture
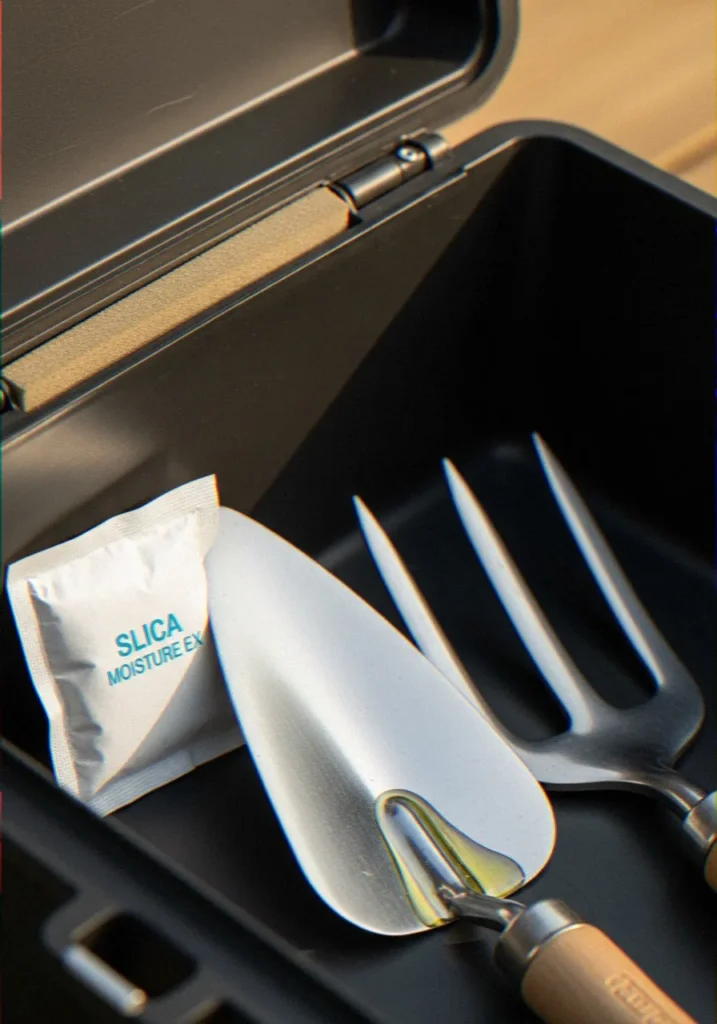
The following is what many a balcony gardener fails to think about: even good-quality storage boxes admit of humidity, particularly during the rainy season. And moisture their foe is metal tools. There was a pair of pruning shears that I left in a moist box all through one wet winter that I ruined. Never again.
A few ways to keep moisture out:
- Place a moisture-absorbing packet (silica gel) inside the box and replace it every few months
- Coat metal tool heads lightly with a food-grade mineral oil before storing
- Keep tools off the bottom of the box by storing them on your vertical insert or in bins
- If your box lid doesn’t seal well, add a weatherstrip foam tape around the inner rim
These small steps add years to the life of your tools — and honestly, good pruning shears aren’t cheap.
Step 7: Label Everything (Seriously)
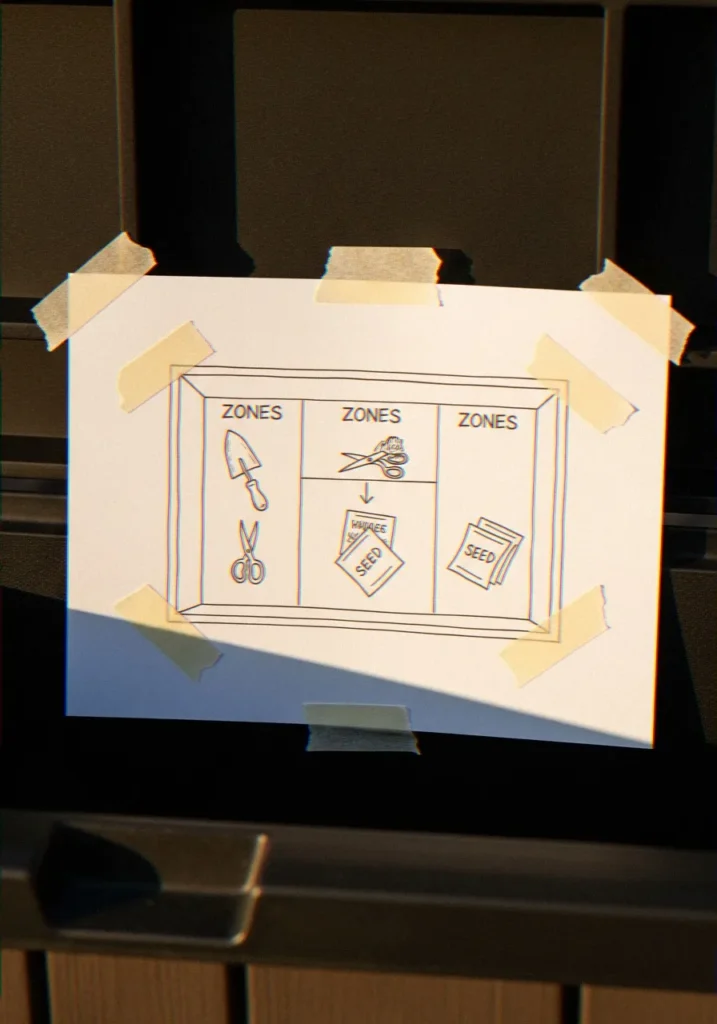
I used to think labels were overkill. Then I spent ten minutes looking for my seed packets while my coffee went cold, and I changed my tune fast. Labeling each zone and each bin takes about fifteen minutes total and saves you hours of frustration over the course of a growing season.
Either use a simple labeling machine or as an alternative, masking tape and a marker. Place stick labels on the front side of bins in a way that they are seen when you open the lid of the box. A simple diagram can also be added on the inside of the box lid of where everything lives, I drew mine with a Sharpie on a cardstock and used a piece of tape to secure it on the box lid. Low tech, high payoff.
Bonus: Best Tools That Actually Fit Well in Balcony
Boxes
Not all garden tools are made equal when it comes to compact storage. Through trial and error (emphasis on error), here are the tool types I’ve found work best:
- Folding tools — collapsible trowels and rakes take up half the space
- Multi-head tool systems — one handle, multiple attachments, massive space saver
- Compact watering cans — 1–2 liter capacity fits neatly without monopolizing the box
- Short-handled pruners — avoid long-handled loppers for a balcony setup
If you’re still rocking full-size tools designed for a backyard garden, it might be time for an upgrade. Your balcony box (and your shins) will thank you :/
Wrapping It Up
It does not require much effort to organize garden tools in a small box on the balcony in the apartment and requires only some intention to do it. Begin with a question of what you have, count your area, take to the ceiling, designate areas, guard your equipment against dampness, and label everything with prominent lettering. That’s really it.
I’ve followed this system for two growing seasons now, and I genuinely enjoy going out to my balcony garden every morning. Nothing is buried, nothing is rusted, and I don’t trip over anything anymore. Small wins, but they matter.
Now go dig out that box, empty it completely, and give your tools the organized home they deserve. Your future self — the one who can find the trowel in three seconds flat — will be very grateful.
Frequently Asked Questions
Can You Store Liquid Fertilizer With Metal Tools in an Outdoor Balcony Box?
Short answer: I wouldn’t recommend it — and I speak from experience. Liquid fertilizers, especially organic ones, can leak from even “sealed” bottles when temperatures fluctuate. That moisture and chemical exposure will corrode your metal tools faster than you’d expect.
Here’s what I do instead:
- Store liquid fertilizers in a separate sealed plastic bin inside the box, away from metal tools
- Double-bag bottles in ziplock bags as a backup leak barrier
- Keep the fertilizer in Zone 3 (the back/bottom), well away from daily-use tools
- Always check bottle caps are fully tightened before putting them away
When a bottle leaks out the damage remains in the bin and does not rust your entire tools collection. It only takes thirty seconds to turn on and it avoids several headaches in the future.
How to Store Tools in a Small Apartment?
Your apartment is small and every inch matters, even the space where your garden equipment is stored. The trick is to think up-down and apply the multi-purpose storage solution that does not consume your living space.
Here are the approaches I’ve personally tested:
- Balcony storage box — the obvious MVP for anyone with outdoor space, keeps tools weatherproofed and out of sight
- Over-the-door organizers — hang a shoe organizer on the inside of a closet or laundry door for small hand tools and packets
- Wall-mounted magnetic strips — great for metal tools like scissors, snips, and trowels if you have a utility wall or enclosed balcony
- Tall narrow cabinets — a slim broom cabinet in a corner holds long-handled tools without stealing floor space
- Fabric tool rolls — perfect for drawer or under-bed storage; roll up your hand tools and stash them flat
The golden rule for small apartment tool storage? Keep outdoor tools outdoors whenever possible. Bringing muddy, damp tools inside creates mess and storage problems you don’t need.
How to Display Plants in a Small Apartment?
This one makes me particularly excited – the reason is that it is more fun to showcase the plants in a tiny apartment than in a large house. You must be creative, and you will create more attractive things with creativity than setting pots on a window sill.
My favorite small apartment plant display methods:
- Tiered plant stands — stack three levels of greenery in the footprint of one pot; I have a three-tier bamboo stand in my corner that holds six plants
- Window ledge shelving — add a floating shelf across a sunny window to double or triple your light-exposure display space
- Hanging planters — ceiling hooks and macramé hangers get plants off surfaces entirely, freeing up table and floor space
- Balcony railing planters — clip-on railing boxes turn dead vertical space into a living wall without using any floor area
- Bookshelf integration — mix plants with books and objects on existing shelves; trailing plants like pothos or string of hearts look incredible cascading down from a high shelf
The biggest display mistake I see? Clustering all plants in one corner and calling it done. Spreading greenery across different heights and zones around the apartment makes it feel like a lush, intentional space rather than a plant hoarder’s corner.
Garden Tool Storage Ideas for Small Spaces
Small rooms require clever storage – and there are ingenious ways of doing it than the majority of us think. Two years living in a small apartment with a balcony garden has taught me the following concepts work:
- PVC pipe organizer in a box — as I described earlier, cut and glue pipe sections to a plywood base for a custom vertical tool holder that fits your exact box dimensions
- Pegboard insert — a small pegboard cut to fit inside a storage box lid or against a balcony wall holds tools on hooks and keeps everything visible
- Tension rod dividers — add spring tension rods inside a box to create vertical slot sections without any drilling or cutting
- Magnetic tool bar — mount a magnetic strip on an interior balcony wall to hold metal hand tools within arm’s reach
- Tool apron on a hook — hang a canvas garden apron on a single hook; the multiple pockets hold a full set of hand tools in one flat package
- Repurposed utensil caddies — kitchen utensil holders or cutlery caddies work brilliantly for small garden tools in a storage box
The best storage ideas share one trait: they take tools off the bottom of a pile and make each one individually accessible. That’s the whole game.
How to Hang Hand Tools Inside the Lid of a Balcony Storage Box?
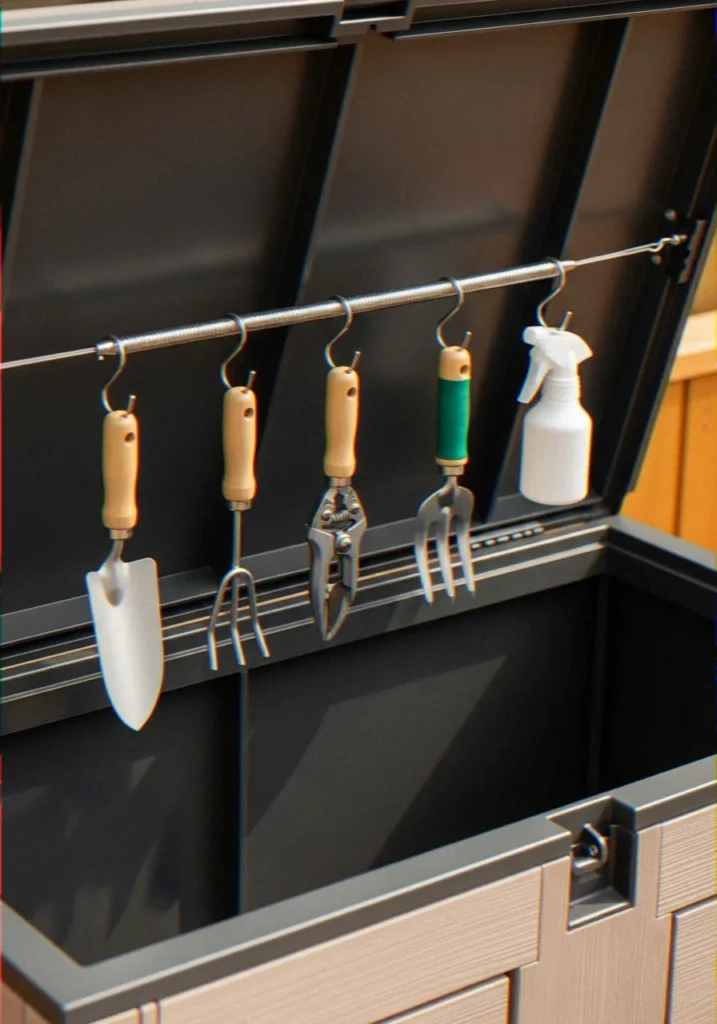
This is one of my favorite space hacks, and it turns completely wasted real estate — the inside of your box lid — into prime storage. Here’s exactly how I set mine up:
What you’ll need:
- Small adhesive hooks (Command hooks work well and won’t damage the box)
- A thin strip of pegboard cut to lid width (optional, for a more robust setup)
- Zip ties or bungee cords as a backup retention method
Step-by-step process:
- Clean the inside lid surface with rubbing alcohol and let it dry completely — adhesive won’t bond to a dusty or damp surface
- Map out your layout before sticking anything down; hold your tools up to the lid and figure out spacing
- Press on adhesive hooks firmly and let them cure for 24 hours before loading any weight
- Hang lightweight tools only — trowels, hand forks, snips, spray bottles; don’t try to hang heavy items on adhesive hooks
- Add a bungee cord across the tools as a safety net so nothing falls when you open the lid
Pro tip from my own setup: I use a combination of S-hooks on a small tension rod wedged across the lid width. It holds six hand tools perfectly and requires zero drilling or adhesive. Takes about five minutes to install and five seconds to remove.
What Size Outdoor Deck Box Do I Need for Apartment Balcony Gardening Tools?
It is really one of the most frequent items that I receive as a question by new balcony gardeners – and one that is worth getting correct, before you spend any money. Buy too small and you are frustrated, buy too large and the box takes up the whole balcony.
Here’s my sizing guide based on balcony type:
- Very small balcony (under 30 sq ft): Go for a 50–70 gallon box (roughly 50 inches wide). It fits a full set of hand tools, supplies, and one small watering can without dominating the space.
- Medium balcony (30–60 sq ft): A 70–100 gallon box gives you room for tools, seasonal supplies, and even doubles as extra seating with a cushion on top.
- Large balcony (60+ sq ft): A 100–150 gallon box handles everything — tools, cushions, bags of potting mix, the works.
Beyond size, look for these features:
- Weather-resistant resin or treated wood — plastic resin is the most durable and lowest maintenance for outdoor use
- A lid with a piston hinge — this keeps the lid open hands-free while you rummage inside (trust me, you want this feature)
- Ventilation slits — small airflow gaps prevent mold and reduce condensation buildup around your tools
- A flat, weight-bearing lid — so the box doubles as a bench or side table
My personal box is a 90-gallon resin deck box, and after two years of heavy use, it handles my full tool kit plus a season’s worth of potting mix without complaint. For most apartment balcony gardeners, something in the 70–100 gallon range hits the sweet spot between capacity and footprint.
4 thoughts on “How to Organize Outdoor Garden Tools in a Small Apartment Balcony Box”