
Thus every time it pours, a lake is formed in your driveway? Yep, I know, I did that, stood at my window and could see water creeping up to the garage door, as though it were one of the house.
I continued to reason that something smarter than letting the drain keep up with me must exist. It happens that permeable pavements are the smarter solution. And frankly, as soon as I knew the way they operate I could not believe that I had been putting up with ordinary asphalt that long.
What Are Permeable Pavers, Anyway?
Let me explain this the way I wish someone had explained it to me — no jargon, no engineering degree required.
Permeable pavers are specially designed paving units that let rainwater pass through them or between their gaps, straight down into the ground below.
Unlike your standard concrete or asphalt driveway — which basically acts as a giant water slide aimed at your garage — permeable pavers send water down instead of sideways.
Think of them as the responsible older sibling of regular pavement. They do the same job on the surface, but they actually think about the consequences.
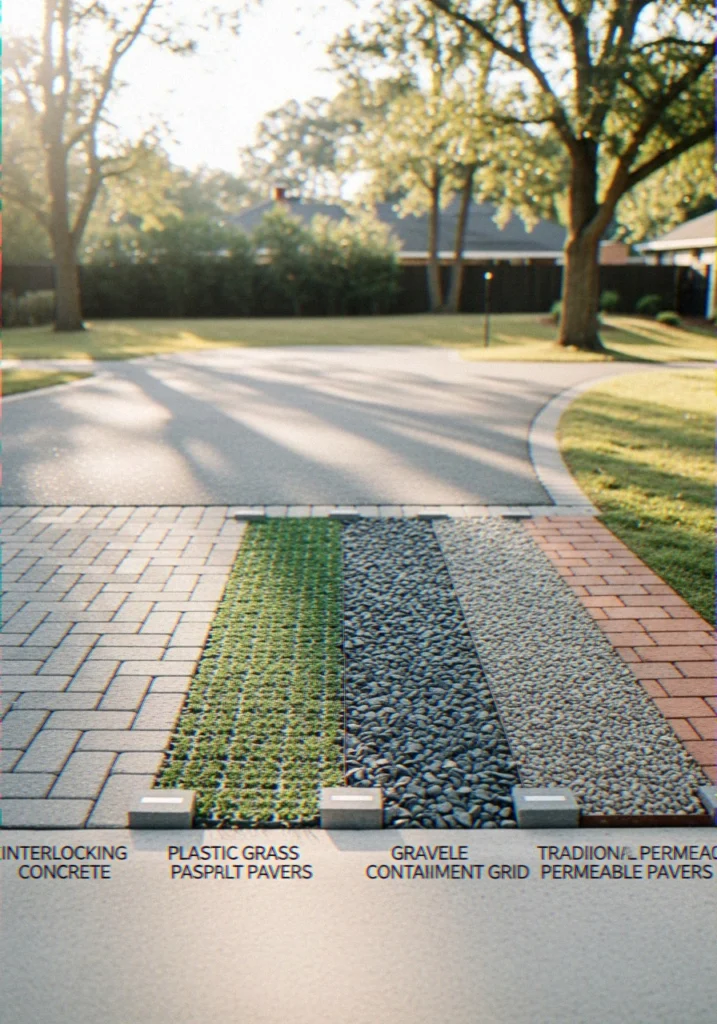
Types of Permeable Pavers
| Type | Best For | Cost Range | Durability |
|---|---|---|---|
| Interlocking Concrete Pavers | Heavy vehicles, long driveways | $$–$$$ | Very High |
| Plastic Grid Pavers | Eco-friendly setups, light traffic | $ | Moderate |
| Permeable Asphalt | Budget installs, large areas | $$ | High |
| Gravel-Filled Systems | DIY projects, low traffic | $ | Moderate |
| Brick Permeable Pavers | Aesthetic-focused driveways | $$$ | High |
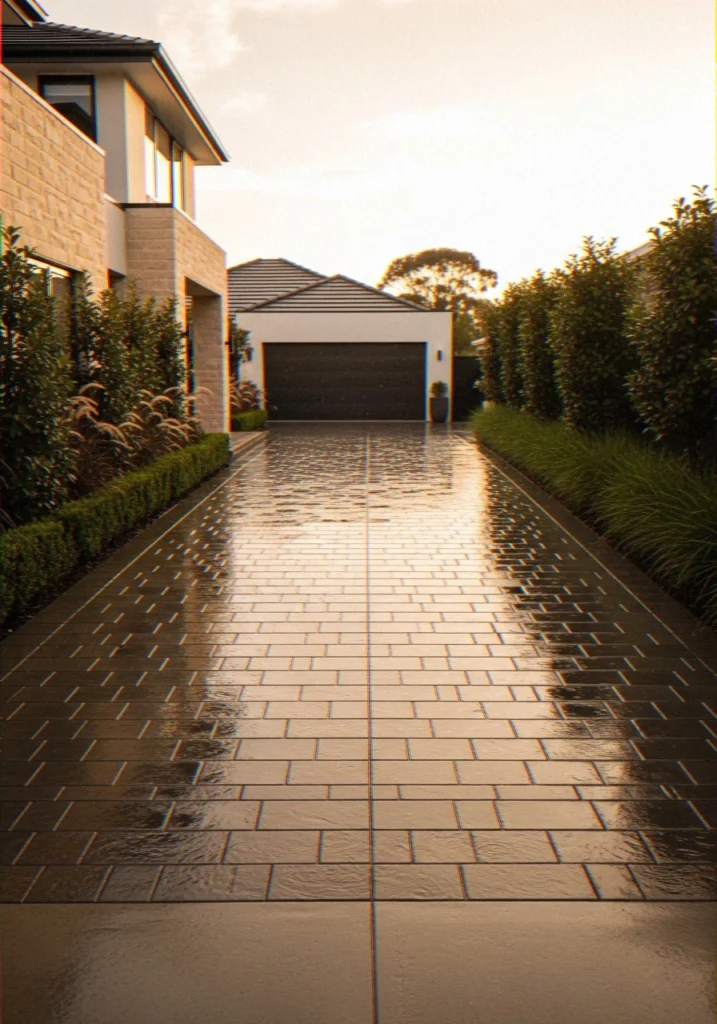
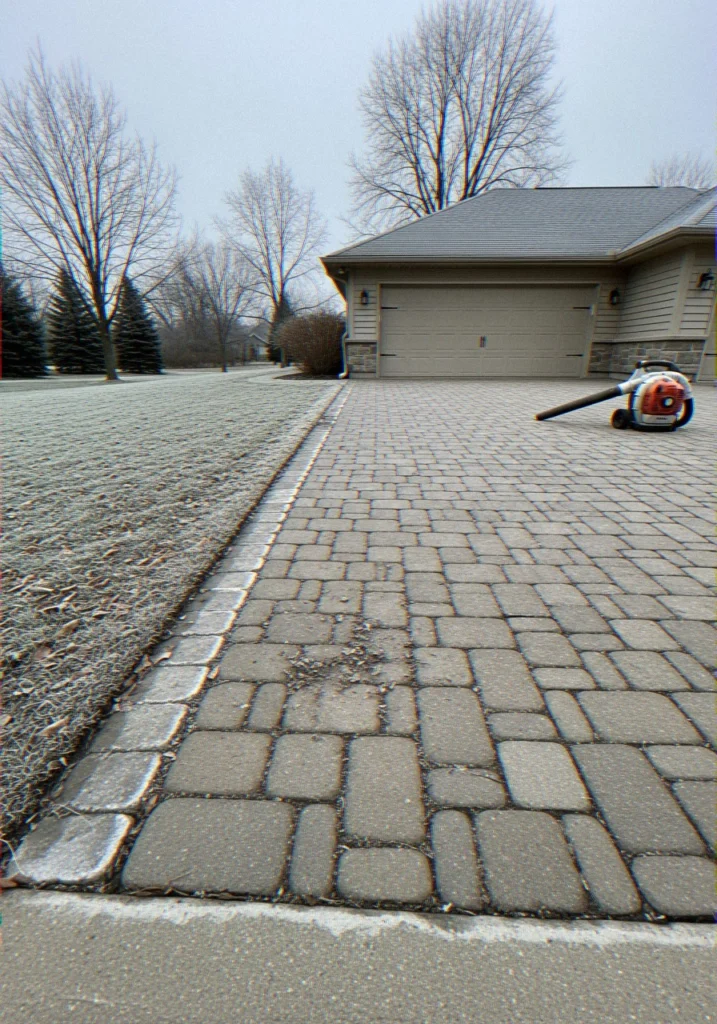
I personally chose interlocking concrete permeable pavers for my driveway. They handled my SUV without flinching, looked sharp year-round, and most importantly — my flooding problem disappeared after the very first heavy rain. No regrets whatsoever.

Why Does Your Driveway Flood in the First Place?
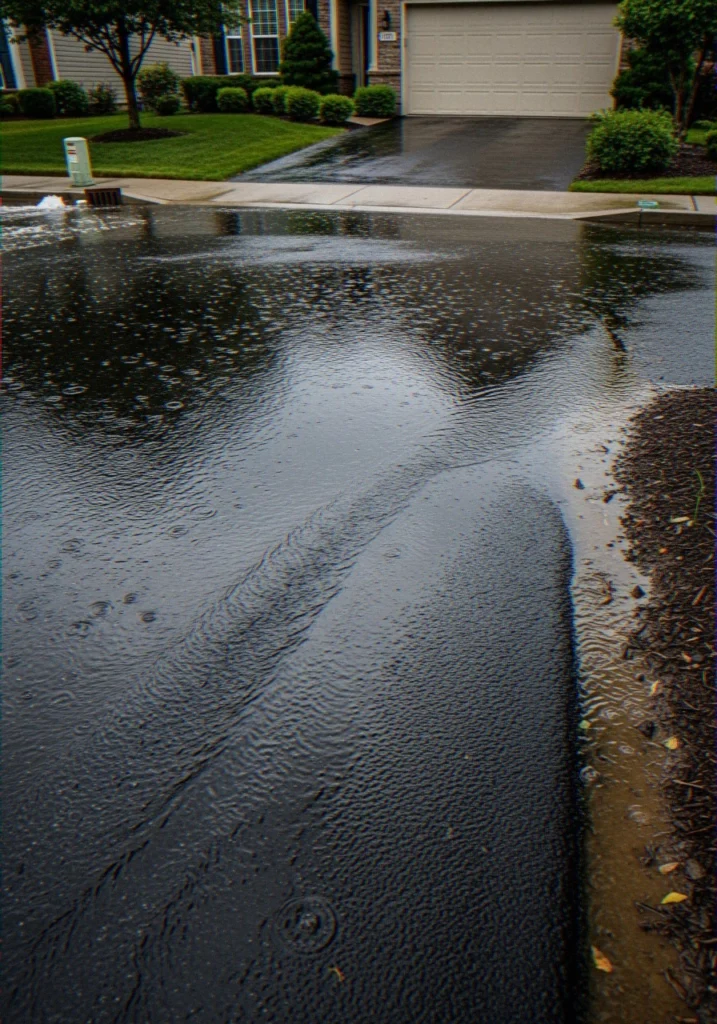
Here’s the uncomfortable truth: your standard driveway is basically waterproofed against you. Traditional impervious surfaces like asphalt and poured concrete absorb absolutely nothing.
Every single drop of rain becomes runoff, and that runoff has to go somewhere. Usually, that somewhere is your garage, your yard, or your neighbor’s property — none of which are great options.
According to the EPA’s stormwater management resources, impervious surfaces are a primary driver of urban flooding and water quality problems. I didn’t fully appreciate how serious this was until my neighbor’s basement flooded twice in one season from driveway runoff alone.
The usual culprits behind driveway flooding:
- Poor grading that directs water toward your home instead of away from it
- Compacted soil underneath that’s lost its ability to absorb anything
- Overwhelmed municipal storm drains during heavy downpours
- Zero drainage planning in the original driveway design
Sealing up these issues with conventional practices? Costly, short-lived, and quite frankly wearying to go through every few years. Porous pavements address the issue on the ground.
How Permeable Pavers Actually Prevent Flooding
| 📊 Quick Stats: Permeable Pavers vs. Traditional Pavement | |
|---|---|
| Surface Runoff Reduction | Up to 90% |
| Lifespan (well-maintained) | 30–40 years |
| Traditional Driveway Lifespan | 10–15 years |
| Avg. Installed Cost | $10–$30/sq ft |
| Stormwater Filtration | Removes up to 80% of pollutants |
| Flood Risk Reduction | Significant in moderate rain events |
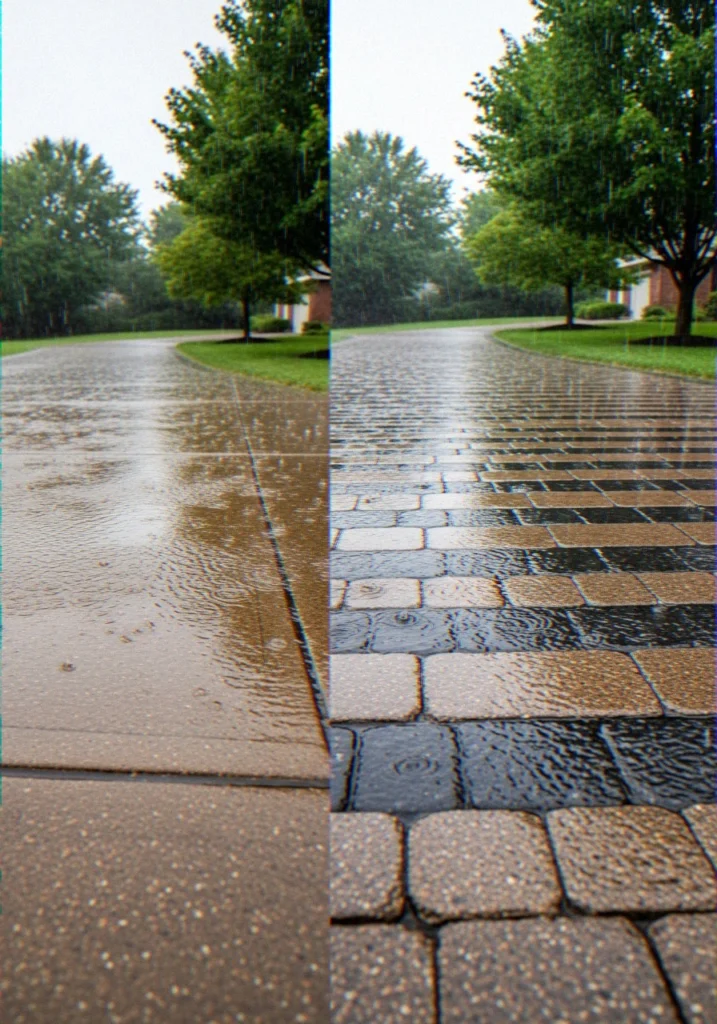
All right, this is where I become really excited– since the first time I watched a torrentuous downpour on my new porous driveway and watched the water just disappear into the earth rather than collect on it, I stood there in a good solid minute just enjoying it.
It is dramatic, though, having been years of stress in the face of floods, it was a genuine triumph.
The Infiltration Process, Step by Step
When rain hits a permeable paver surface, here’s exactly what happens:
- Water enters the gaps between pavers or passes through the porous paver material itself
- It moves through a coarse aggregate layer — usually crushed stone — sitting just below the surface
- The stone subbase stores water temporarily, acting like an underground reservoir
- Water slowly infiltrates into native soil at a rate the ground can actually handle
- Overflow routes laterally to a drain or rain garden if the soil gets saturated
This process can reduce surface runoff by up to 90% according to industry research. That’s the difference between a flooded driveway and a completely dry one during moderate-to-heavy rain events.
Why the Subbase Is the Real Hero

Here is one of the aspects that I did not fully understand until I had my system installed: the subbase system supports most of the heavy load under the pavers.
An adequately built subbase generally comprises of a layer of geotextile fabric at the bottom to stop soil movement, a layer of thick storage of coarse crushed rock (such as #57 or 2 aggregate) to store water, a layer of finer choker course to bed, then the pavers over it.
Jump over the subbase or skim over it, and you will have very costly ornamental rocks of permeable paving. Believe me, the forework is all.
Permeable Pavement Examples in Real Life
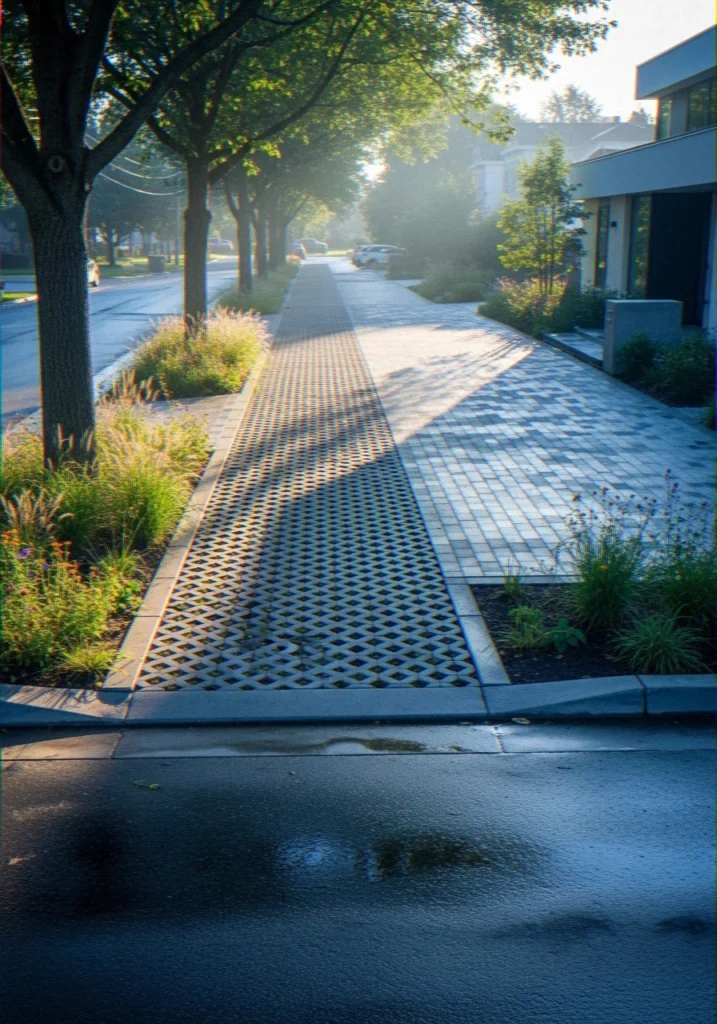
One thing I love about permeable pavement is how versatile it actually looks in real-world applications. This isn’t just a utilitarian solution — it’s being used in some genuinely attractive setups.
Real-world permeable pavement examples:
- Residential driveways using interlocking concrete pavers with open joints filled with crushed granite — clean, modern, highly functional
- Commercial parking lots built with permeable asphalt that handles thousands of gallons of runoff per storm event
- Urban streetscapes in cities like Philadelphia and Chicago, where permeable pavers replace traditional curb cuts to manage stormwater at a neighborhood level
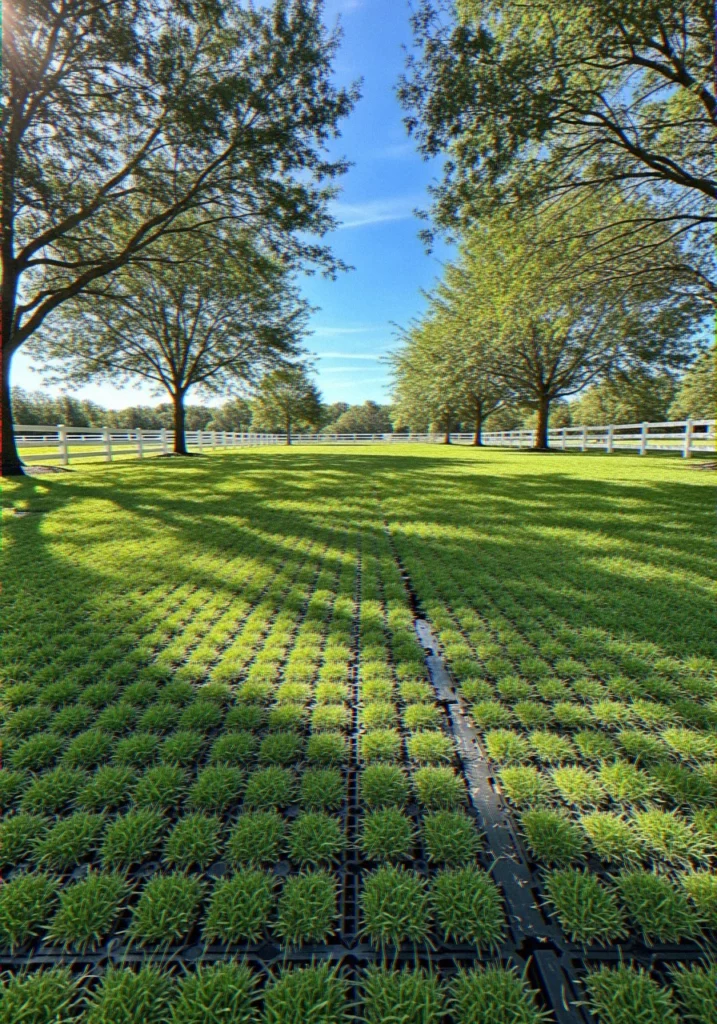
- Grass-filled plastic grid systems on overflow parking areas — vehicles park on them without killing the grass, and rainwater drains naturally through the root system
- Gravel driveway systems using containment grids to keep gravel in place while still achieving excellent permeability
The Interlocking Concrete Pavement Institute has a solid library of case studies if you want to see how these systems perform in different climates and soil conditions. Worth a browse before you commit to a design.
How Permeable Pavement Works: The Science (Made Simple)
Science may seem a frightening word, but just bear with me on this point it is the place where the whole machine fits.
Conventional pavement forms what engineers refer to as an impervious layer of pavement i.e. water cannot penetrate it at any point.
All the drops become surface runoff and increase in speed, collects pollutants and fills drainage systems.
Permeable pavement flips this entirely. It creates what’s called controlled infiltration — water moves through the pavement structure at a rate that mimics natural ground absorption.
The coarse aggregate subbase acts as a temporary storage reservoir during peak rainfall, then slowly releases water into the soil over several hours.
This time-delay effect is what prevents flooding. Instead of all the rain hitting your drain at once, the water gets spread out over time, and your drainage system can actually keep pace. It’s genuinely clever engineering disguised as a driveway. 🙂
How to Install Permeable Pavers: A Real Walkthroug
I won’t pretend installation is a casual weekend project — it genuinely isn’t if you want it done right. But breaking it into clear steps makes it far less overwhelming than it looks at first glance.
Step 1: Assess Your Soil Type
Your soil type determines almost everything about your design. Sandy soils drain fast and are ideal for full infiltration systems.
Clay-heavy soils drain slowly and usually require a perforated pipe drainage layer or connection to a dry well. Check your soil type free using the USDA Web Soil Survey — it’s surprisingly detailed and saved me a lot of guesswork before my own install.
Step 2: Design Your Drainage Plan
Map out where water currently pools and decide on your system type. You have two main approaches: full infiltration, where everything soaks into the ground (best for sandy soils), or partial infiltration with overflow, where excess routes to a rain garden or drain. IMO, partial infiltration with a backup overflow is always the smarter call.
Weather doesn’t care about your drainage assumptions.
Step 3: Excavate and Build Your Subbase
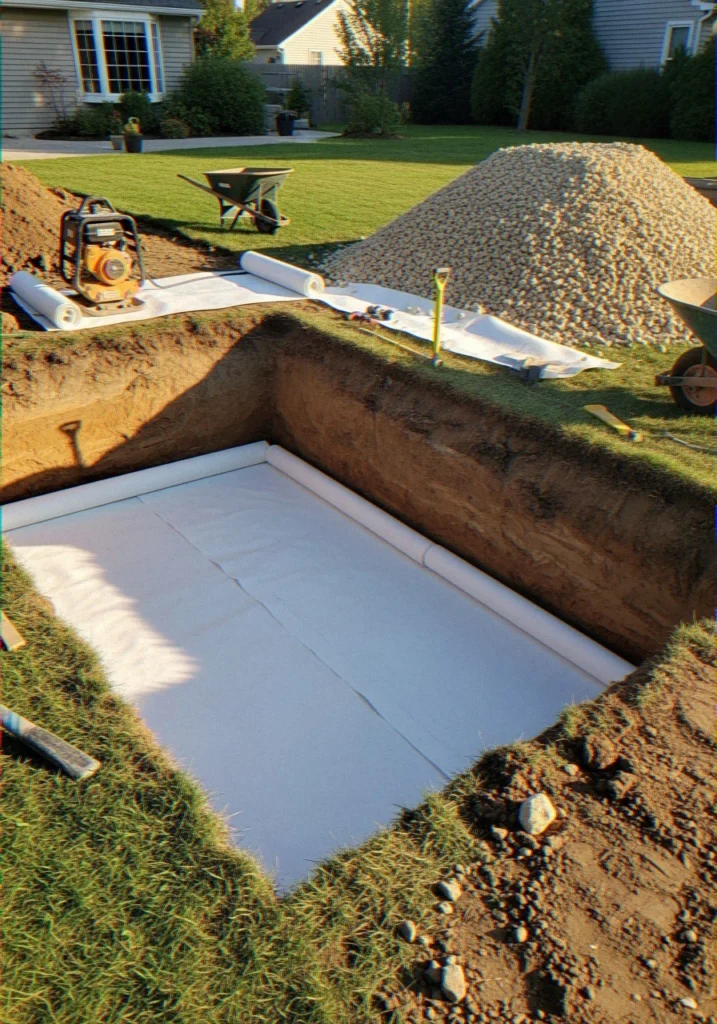
Excavate to a depth of 12 to 24 inches depending on your climate and expected traffic load. Colder climates need deeper excavation to handle freeze-thaw cycles without heaving.
Line the bottom and sides with geotextile fabric — this keeps soil out of your aggregate while still letting water through. Then fill your reservoir layer with coarse crushed stone.
Step 4: Install the Pavers Correctly
Choose pavers meeting ASTM C936 standards for permeable interlocking concrete pavers. Space them with 6mm–10mm gaps and fill joints with permeable aggregate, not regular sand.
This is the most common mistake I see in DIY installs — sand clogs the joints within a season and kills your drainage performance completely. FYI — don’t skip this detail. It matters more than most people realize.
Step 5: Add Edge Restraints and Test
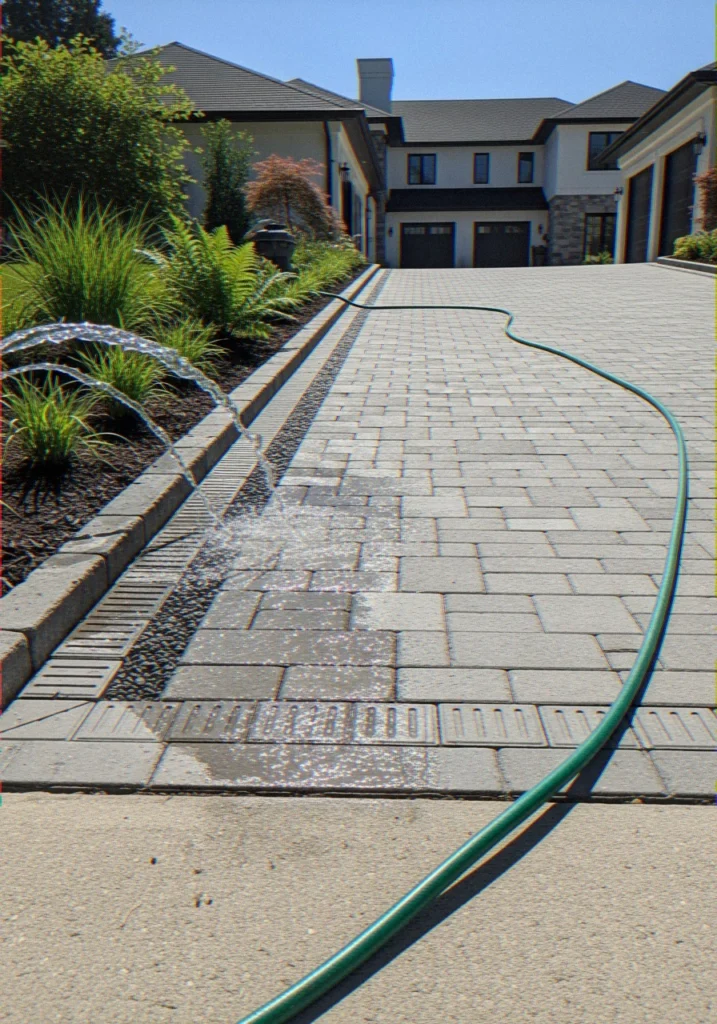
Install edge restraints to prevent lateral shifting over time. Then run a garden hose over the finished surface and watch.
Water should disappear almost instantly. If you see pooling anywhere, investigate that section before calling the job done. A quick fix now saves a headache later.
How to Make Permeable Pavement: DIY vs. Professional Instal
It is a question that I frequently receive as a query on the side of my friends after they look at my driveway.
Is it possible to D.I.Y. permeable pavement? Brief response: yes, in the smaller areas and simpler systems.
Longer answer: that is, it will depend on the amount of excavation and drainage engineering you actually require on your site.
DIY-friendly permeable options:
- Gravel driveways with containment grid systems (very manageable for most homeowners)
- Plastic grass-grid paver systems for low-traffic areas
- Small permeable patio sections using bagged aggregate and rented plate compactors
Best left to professionals:
- Full driveway installs over clay soil requiring perforated pipe drainage
- Systems connected to dry wells or municipal stormwater infrastructure
- Any install requiring significant grading changes
If you do hire a contractor, make sure they have specific experience with permeable systems — not just general paving experience.
The subbase design is specialized, and a regular paving crew won’t necessarily get it right without that background.
Benefits of Permeable Pavement Worth Talking About

Beyond the obvious flood prevention angle, permeable pavement delivers a surprising list of benefits that I genuinely didn’t fully appreciate until I had my own system running for a full year.
Here’s what makes it worth the investment:
- Dramatically reduces surface runoff — up to 90% less stormwater leaving your property
- Filters pollutants naturally — the aggregate layer traps oils, sediment, and heavy metals before they reach groundwater
- Reduces urban heat island effect — porous surfaces stay cooler than dense asphalt in summer
- Recharges groundwater — helps replenish local aquifers instead of wasting rainfall as runoff
- Eliminates puddles and ice patches — water drains so fast that standing water (and the ice it creates in winter) becomes much less of an issue
- Low long-term maintenance — no crack sealing, no resurfacing cycles, no annual patching
Only the environmental benefits are considerable. However, in truth, I see the most about me on a daily basis in the form of the daily quality-of-life enhancement, i.e. no puddles, no ice, no worry about flooding.
Disadvantages of Permeable Pavement: Let’s Be Honest
Aye, I am not here to sell you without telling you the whole story. Permeable pavement is truly wonderful, but there are actual disadvantages that you should be aware of beforehand. There is no use denying the fact.
The honest disadvantages:
- Higher upfront cost — typically 20–50% more expensive than traditional paving at installation
- Not ideal for very steep slopes — water moves too fast to infiltrate properly on steep grades
- Clay soil complications — heavy clay requires more complex drainage engineering and added cost
- Joint maintenance required — debris and sediment can clog joints over time without regular cleaning
- Cold climate considerations — some permeable systems require specific designs to handle freeze-thaw without joint damage
- Limited contractor expertise — not every paving contractor knows permeable systems well, which creates installation risk
None of these are dealbreakers in most situations, but they’re real factors worth weighing against your specific site conditions and budget.
What Is the Cheapest Permeable Driveway Option?

Okay, let’s talk budget — because not everyone has the funds for a full interlocking concrete paver install, and that’s completely fine. There are legitimate, effective permeable options at lower price points.
Most affordable permeable driveway options, ranked:
- Gravel driveway with containment grid — $2–$5 per sq ft, highly permeable, easy DIY install
- Permeable asphalt — $3–$8 per sq ft installed, looks like regular asphalt but drains
- Plastic grass grid pavers — $3–$7 per sq ft, great for light traffic and eco-friendly setups
- Permeable concrete — $5–$10 per sq ft, solid mid-range option with good longevity
- Interlocking concrete permeable pavers — $10–$30 per sq ft, premium performance and aesthetics
When budget is your overriding factor then a gravel system with a containment grid will offer you true flood prevention at a small fraction of the price of pavers.
It will never be a winner in any beauty contest, yet it is very effective. Sections can always be upgraded with budget.
Maintenance: Genuinely Easier Than You’d Expect
Another fact that I had not completely realized when I installed my permeable drive way was that it would require a lot less maintenance than my previous asphalt.
Explore More Cozy Ideas
Can You Put a Dining Table in the Middle of a Large Rectangular Living Room?
10 Best Curtain Colors for Agreeable Gray Walls and Dark Brown Furniture
25 Smart Ways to Light a Living Room With Sloped Ceilings and No Overhead Wiring
No annual crack sealing. No patching crumbling edges. No resealing at every three year intervals. Only periodical maintenance in order to maintain the drainage performance high.
Your annual permeable paver maintenance checklist:
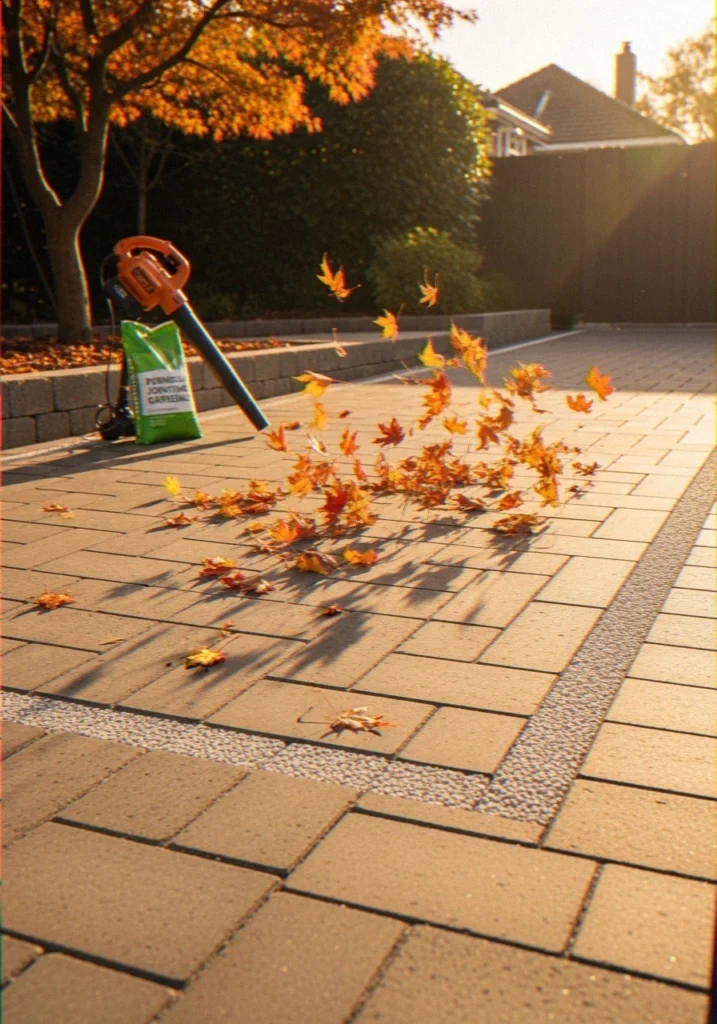
- Blow or vacuum debris from joints twice a year — leaves and fine sediment are permeability’s worst enemy
- Top up joint aggregate annually or whenever levels look low
- Power wash gently if you notice reduced water infiltration after heavy rain
- Inspect edges for shifting or frost heaving, especially after your first winter post-install
- Check overflow routes to make sure connected drains or rain gardens aren’t blocked
According to the ICPI, a properly maintained permeable paver system lasts 30 to 40 years. Compare that to a standard asphalt driveway needing resurfacing every 10–15 years, and the math gets pretty interesting pretty fast.
FAQ: People Also Ask
What are the disadvantages of permeable pavers?
Permeable pavers cost more upfront than traditional paving — typically 20–50% more depending on the system.
They require periodic joint maintenance to prevent sediment clogging, and they’re not ideal for very steep slopes or heavy clay soil without additional drainage engineering.
Cold climates can create freeze-thaw stress on some systems if not properly designed. Finding a contractor with genuine permeable paver experience can also be a challenge in some regions.
How to stop a driveway from flooding?
The best long-term option is the replacement of impervious paving with a permeable one – permeable pavers, permeable asphalt, or a gravel containment grid system.
To alleviate the symptoms immediately without an entire replacement, you can add the channel drains at the low points, regrade the driveway slope in places above all structures or place a French drain system at the edges of the driveway.
The best and the most enduring combination is surface regrading with permeable paving upgrade.
Are permeable pavers good for driveways?
Yes — they’re excellent for driveways, and IMO one of the most practical driveway investments available.
They handle regular vehicle traffic well (especially interlocking concrete pavers rated for heavy loads), dramatically reduce flooding and runoff, eliminate standing water and ice patches, and last significantly longer than traditional asphalt.
The higher upfront cost is real, but the long-term performance, lower maintenance burden, and environmental benefits make them genuinely worthwhile for most homeowners dealing with drainage issues.
What is the cheapest permeable driveway option?
A gravel driveway with a plastic containment grid system is your most budget-friendly permeable option, running roughly $2–$5 per square foot for materials.
It delivers strong drainage performance and works well for low-to-moderate traffic driveways.
Permeable asphalt comes in as a close second at $3–$8 per square foot installed, offering better aesthetics while still providing solid permeability.
Both are significantly cheaper than interlocking concrete pavers but still solve the core flooding problem effectively.
Final Thoughts: Make the Switch Before the Next Storm

If your driveway floods regularly, causes runoff headaches, or you’re just tired of watching water do whatever it wants around your home — permeable pavers are one of the best decisions you can make for your property.
They work with natural water cycles instead of fighting them, and that philosophy pays dividends every single time it rains.
It is true that the initial price is more expensive. Yes, the installation needs actual planning and the correct implementation.
But being in my driveway and seeing zero water anywhere on a down pour? It is an emotion that is never tired of.

Do your soil assessment, invest properly in your subbase, choose the right paver type for your budget, and don’t cut corners on installation.
Get those details right, and you’ll have a driveway that genuinely protects yourhome for the next 30–40 years. That’s not a bad return on investment by any measure.
Now go fix that driveway — your garage floor, your sanity, and honestly your neighbors will thank you. 🙂