
Open plan living looks absolutely killer in magazine spreads. But the second you actually move into one, you realise nobody told you where the “living room” ends and the kitchen begins.
😅 I’ve been there. Literally stood in the middle of my flat holding a sofa cushion going, “…where does this go?” Trust me, you’re not alone.
You don’t need a single brick, partition wall, or contractor to fix it, which is good news.
You can make real, cozy zones with a few smart tricks, some of which are cheap and some of which aren’t. Let’s get started.
Quick zoning methods at a glance
Here’s the info table before we go deep — a fast reference you can come back to:—

Why Zoning Actually Matters (More Than You Think)
Open plan spaces are beautiful — until they’re not. Without any definition, a big open room can feel weirdly clinical, like a showroom floor rather than someone’s actual home.
I’ve seen it countless times. You’ve got a sofa, adining table, maybe a little desk tucked in a corner, and the whole thing just looks like furniture randomly dumped in a warehouse. 😅This is fixed by zoning.
It gives each area a reason to be there, a purpose, and a personality. Your brain really does respond to spatial cues, like a pool of warm light, a rug underfoot, or the back of a sofa facing you. It then quickly figures out where it is.
It’s not just fluff about interior design. It’s a study of the mind.
Use Area Rugs — Seriously, Start Here
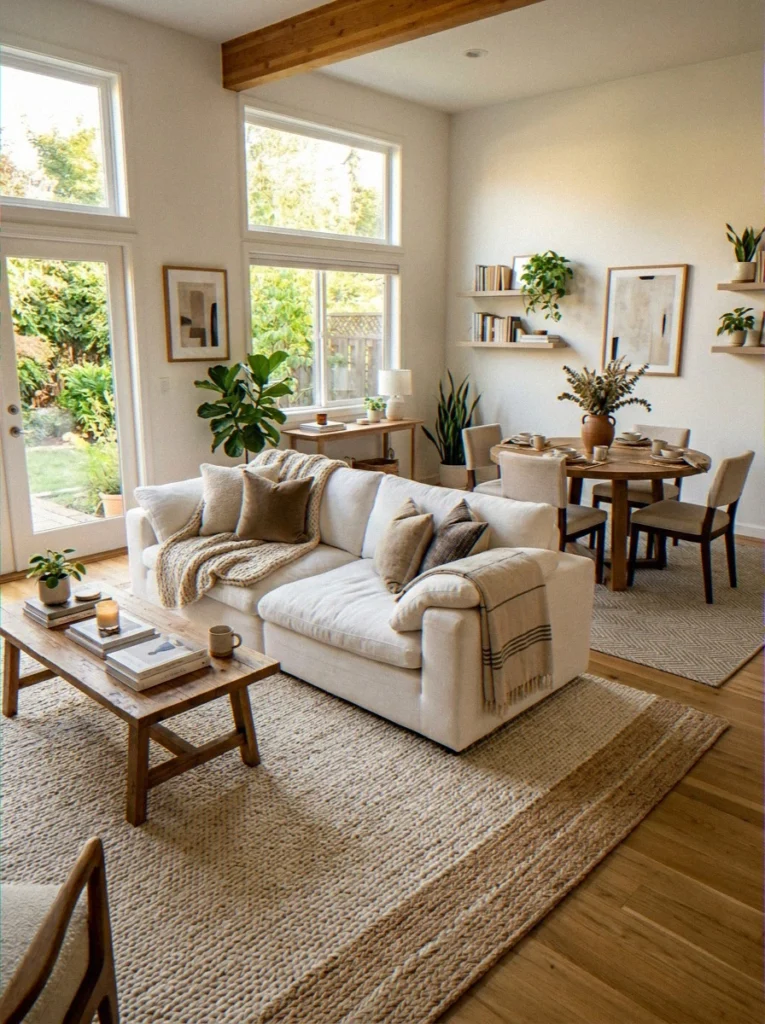
Bro, if there’s one thing I’d tell anyone moving into an open plan space, it’s this: buy a rug before anything else.
A well-sized area rug planted under your sofa group creates a zone immediately. No tools, no planning permission, no faff.
“Well-sized” is the most important word there.
The first time I bought a rug, I made the mistake of getting one that was way too small. It looked like a doormat floating in a sea of floor.
The rug in the living area should be big enough for all four legs of every seat, or at least all four legs of the front sofa.
That’s the area. Finished.
Rug sizing that actually works
- Living area: Go bigger than feels comfortable. At minimum, all front sofa legs on the rug — ideally all four legs of every seat. I tried the “front legs only” approach and it looked weirdly unfinished, not gonna lie.
- Dining area: The rug needs to extend at least 60cm beyond the table on every side so the chairs don’t fall off when pulled out. I learned this the embarrassing way with dinner guests.
- Two zones, two rugs: Pick complementary textures or tones rather than matching sets — identical rugs will make zones blend rather than contrast.
- Layering rugs: A jute base under a smaller patterned rug adds depth and texture to the living zone. Looks ace, costs less than you’d think.
For rug sizing guidance with actual room visuals, Houzz has a really solid guide that helped me get my proportions right.
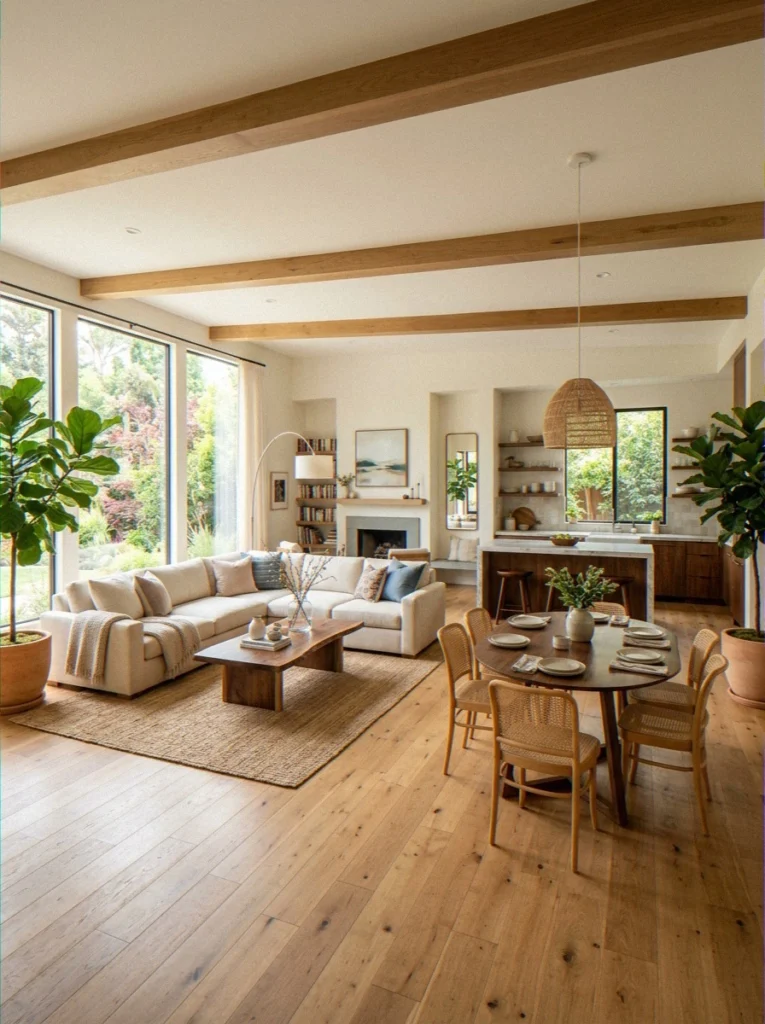
Furniture Layout Is Free Architecture
What no one tells you up front is that in an open plan room, your furniture is your walls.
Take the sofa away from the wall and turn it so that the back of it faces the wall.
This will separate your lounge from whatever is behind it. You’ve just made two spaces.
This honestly changed everything for me. I floated my 3-seater about 40cm off the wall, facing the TV zone, and the back of it naturally created a corridor into the kitchen-diner. Guests who’d never even heard the word “zoning” just… instinctively understood the layout.
Smart furniture moves to try
- Back of sofa facing the dining or kitchen area — the single most effective zero-cost trick
- A console table placed along the sofa’s back adds a surface and reinforces the boundary
- Bookshelves or sideboards placed perpendicular to the room flow act like low, open dividers
- A chaise longue at a slight angle signals “this is the lounge” without you saying a word
- Bar carts or trolleys can loosely mark a kitchen-to-living boundary in smaller flats — flexible and actually useful
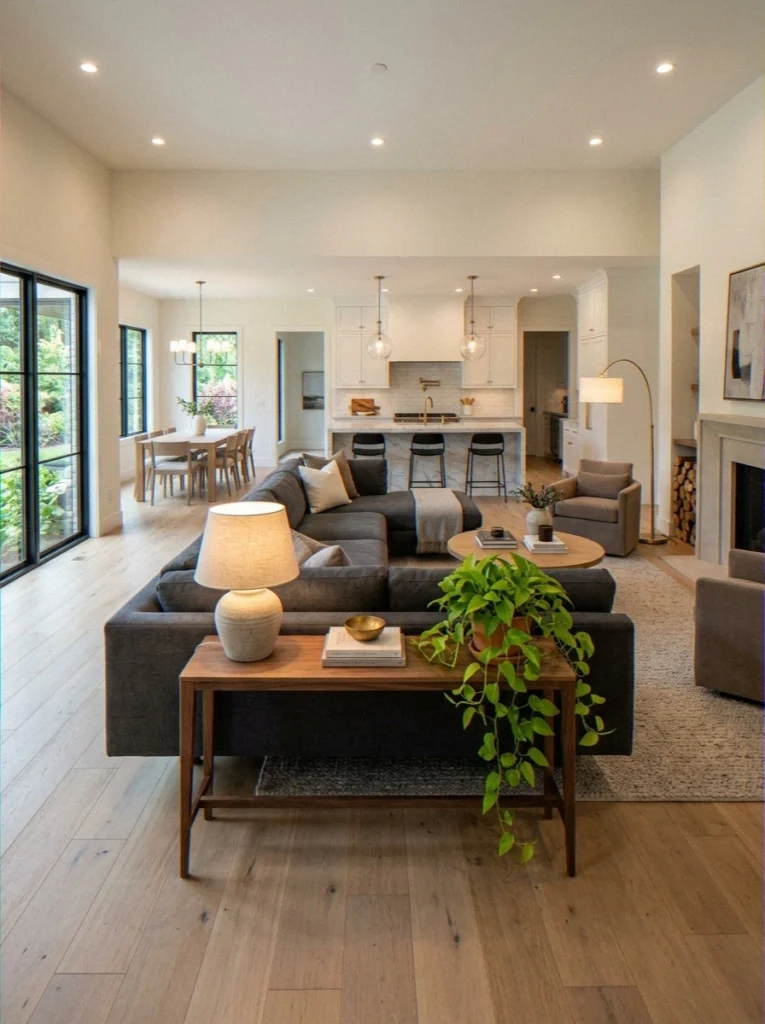
Separating Kitchen and Living Room in a Small Apartment
Right, this one comes up a lot — especially for people in London, NYC, or any city where “open plan” is just estate agent speak for “we knocked a wall down.” 🙃
The kitchen-to-living boundary is the trickiest because there’s usually no natural anchor point. Here’s what genuinely works:
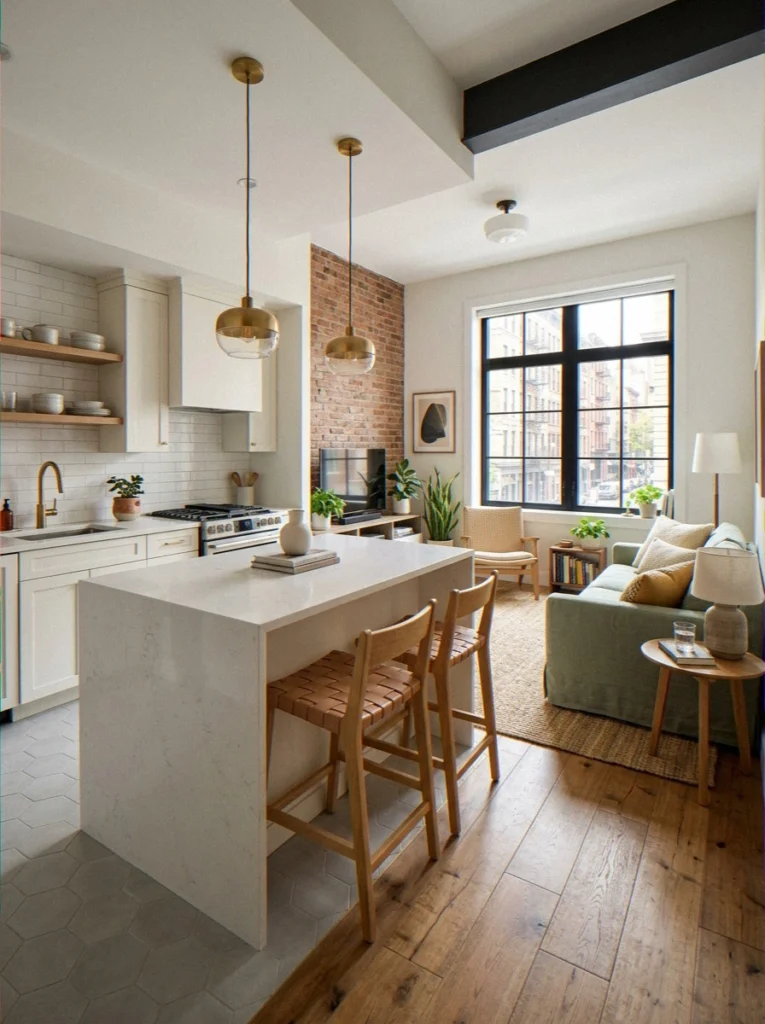
Use a kitchen island or breakfast bar as the dividing line. Even a narrow peninsula counter, or a freestanding butcher’s block, creates a physical and visual boundary between the cooking zone and the relaxing zone.
I put a small island unit in my last place (IKEA, about £200) and it completely transformed the spatial logic of the flat.
The best and most permanent solution is to change the flooring. In the kitchen, use tiles; in the lounge, use wood or carpet.
It’s a bigger job and not easy to undo, but it makes it clear that the room is different more than almost anything else. If you rent, this obviously won’t work, so use the other methods.
A counter-height shelf unit between the two zones is a brilliant middle ground — defines the boundary, gives you storage, and still lets light and conversation flow through.
Don’t go taller than counter height or it starts feeling oppressive in a small space.
Open Kitchen Partition Ideas That Don’t Block Light
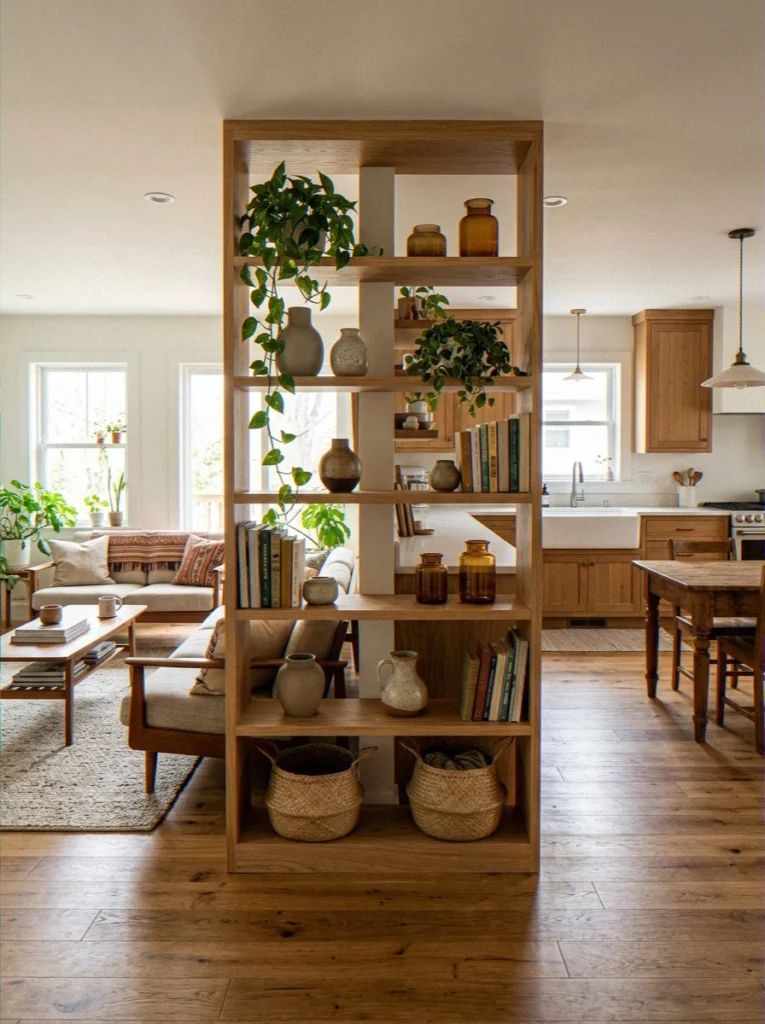
Speaking of the kitchen-living boundary — if you want something that reads as a partition without actually being one, open shelving is your best friend here.
An open-backed shelf unit (no solid back panel) placed between zones creates a visual screen while light, air, and conversation still pass through it.
This feels so much less claustrophobic than a solid room divider, and honestly looks killer styled properly.
A few variations worth knowing:
- Tall open shelving (150–180cm): Defines zones strongly, still feels airy. Dress both sides — remember it faces two areas.
- Half-wall shelf combo: A low solid base with open shelving on top. Provides visual grounding while maintaining openness above.
- Hanging pendant shelves: Suspended from the ceiling, these are wildly cool and genuinely architectural without requiring any structural work.
- Glass-panel dividers: Not shelving exactly, but glass partition screens give the “partition” feeling while passing 100% of the light through. Slightly more of a commitment but the result is insane.
I really think the pendant shelf trend peaked in 2021 and is starting to feel a bit overdone now. But a classic open bookcase will always be in style.
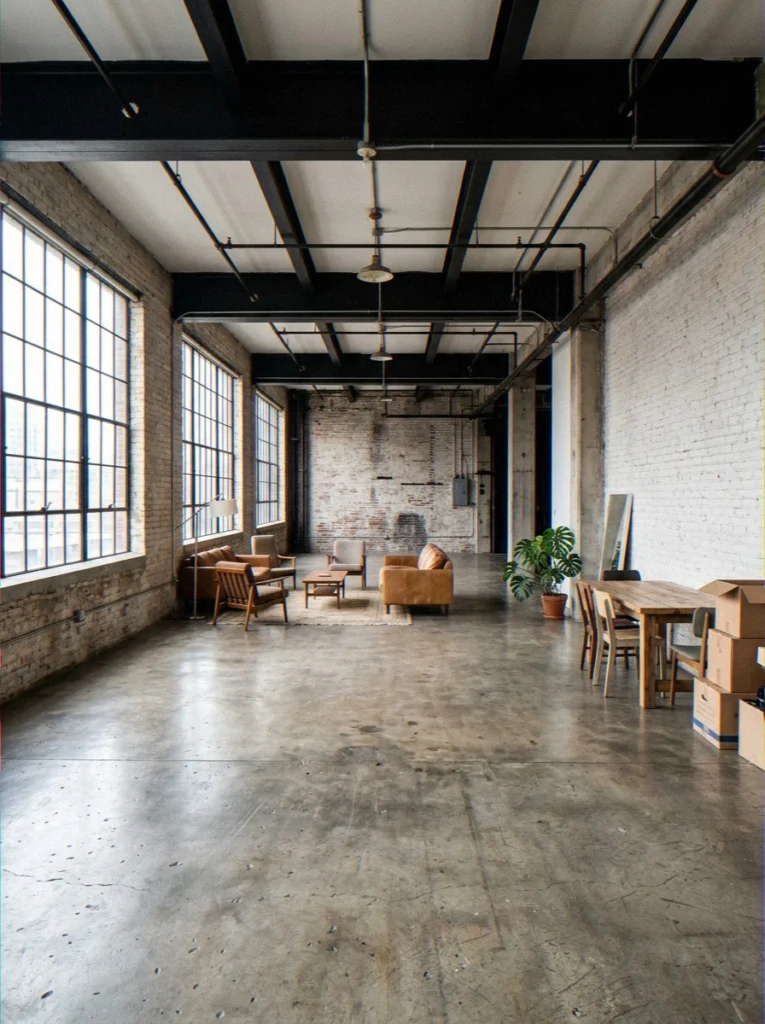
Temporary Partition for Living Room — Flexible Options
Not everyone wants a permanent solution. Renters, people who move a lot, anyone who just likes being able to reconfigure — here are the best temporary partition options that don’t require a single hole in the wall:
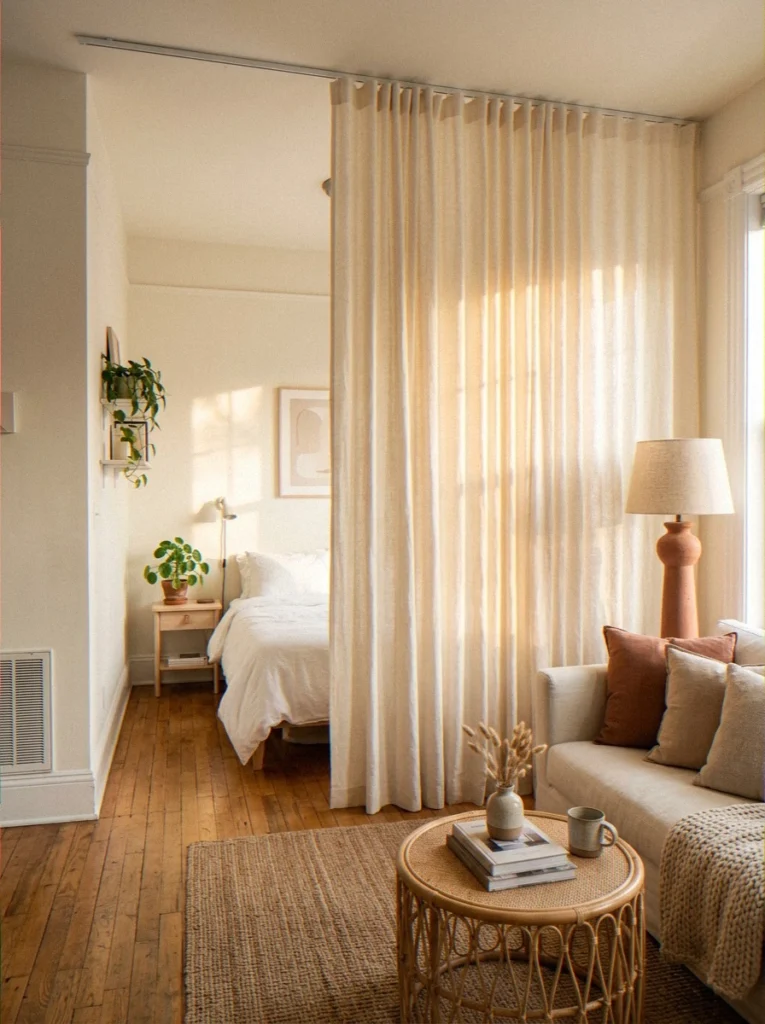
Ceiling-mounted curtain tracks.
This is my favorite for people who rent. You put up a track on the ceiling and hang curtains from the floor to the ceiling. For lighter curtains, you can use Command strips, and for smaller spans, you can use tension rods.
Close them to separate; open them to let things flow. Great for hiding a corner of your home office at night or making a sleeping area in a studio.
Freestanding folding screens. Massively underrated.
A solid 3-panel screen from a decent furniture shop can define a corner workspace or reading nook without any installation. Mine cost about £80 and I’ve moved it four times between flats. Genuinely useful.
Freestanding bookcase dividers. KALLAX on its side, Billy units configured as a room divider — flat pack furniture has been silently solving this problem for years.
Heavy enough to stay put, open enough to not feel like a wall.
Tall plants and planters. Don’t laugh. A row of tall fiddle leaf figs or olive trees in large planters actually does delineate space. It’s soft, organic, and adds life to the room. I’ve seen this done really well in loft apartments. Just don’t forget to water them, unlike me.
Lighting Zones: The Most Underrated Trick in the Book
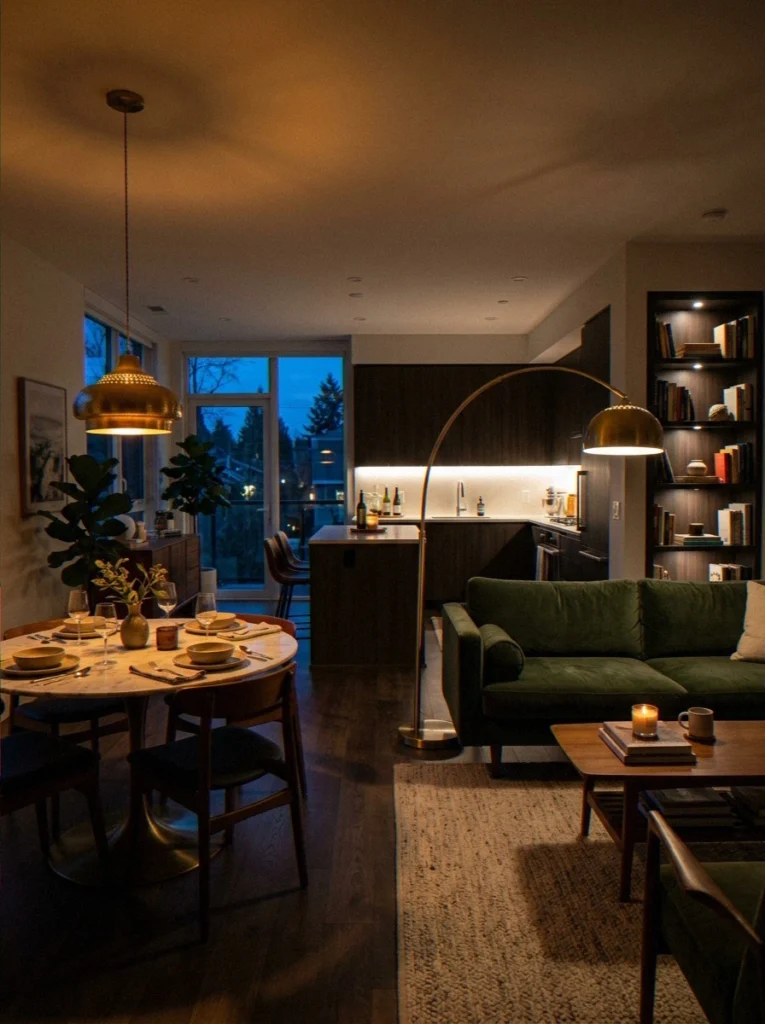
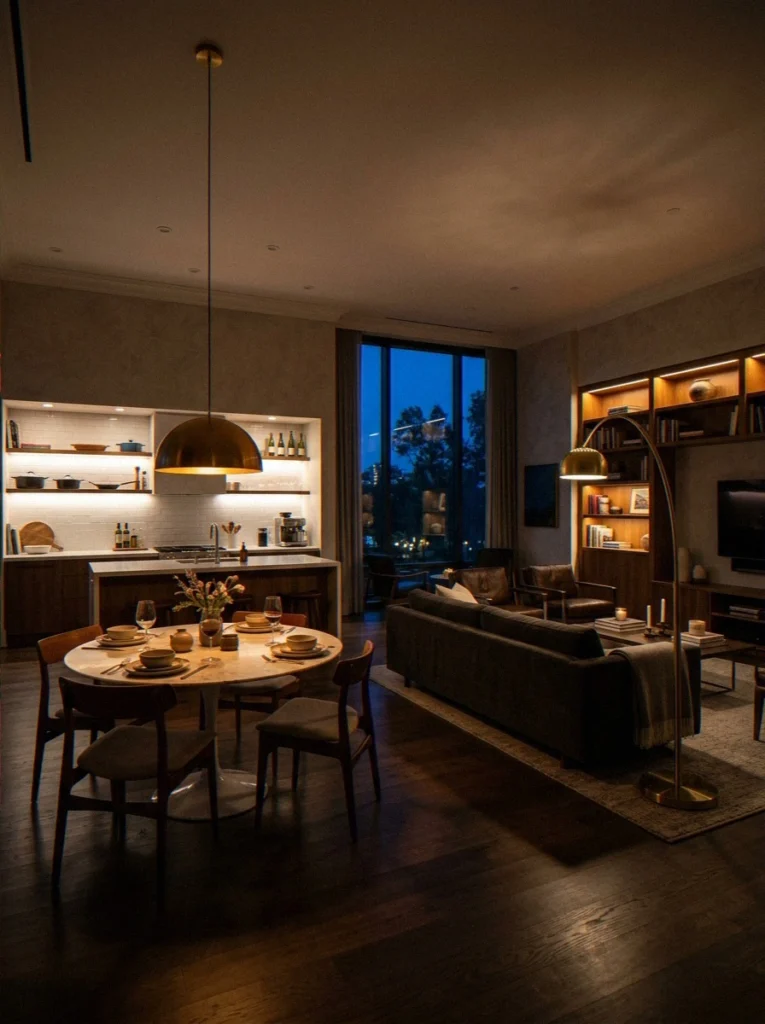
Light, not walls, is what restaurants use to separate tables. A warm pendant hanging over your table makes a space even in a room that is completely open. Your house works in the same way.
Each zone should have its own anchor light source. This is non-negotiable if you want zones to feel intentional.
- Living area: A floor lamp beside the sofa plus a table lamp on the side table. The combination creates warmth and depth without overhead harshness.
- Dining zone: A pendant hung low (roughly 70–80cm above the tabletop) is the single most zone-defining fixture you can add. I hung one in my last place and the room immediately made sense.
- Kitchen counter zone: Under-cabinet lighting draws the eye to the work surface and clearly signals “cooking happens here.”
- Reading nook or desk: A focused arc floor lamp physically points at the zone and psychologically says “this is a different space.”
For real-room pendant lighting ideas, Lights.co.uk’s open plan guide is one of the better practical resources I’ve found — actual room examples, not just product photos.
Paint and Colour: Cheapest Zone Creator Alive
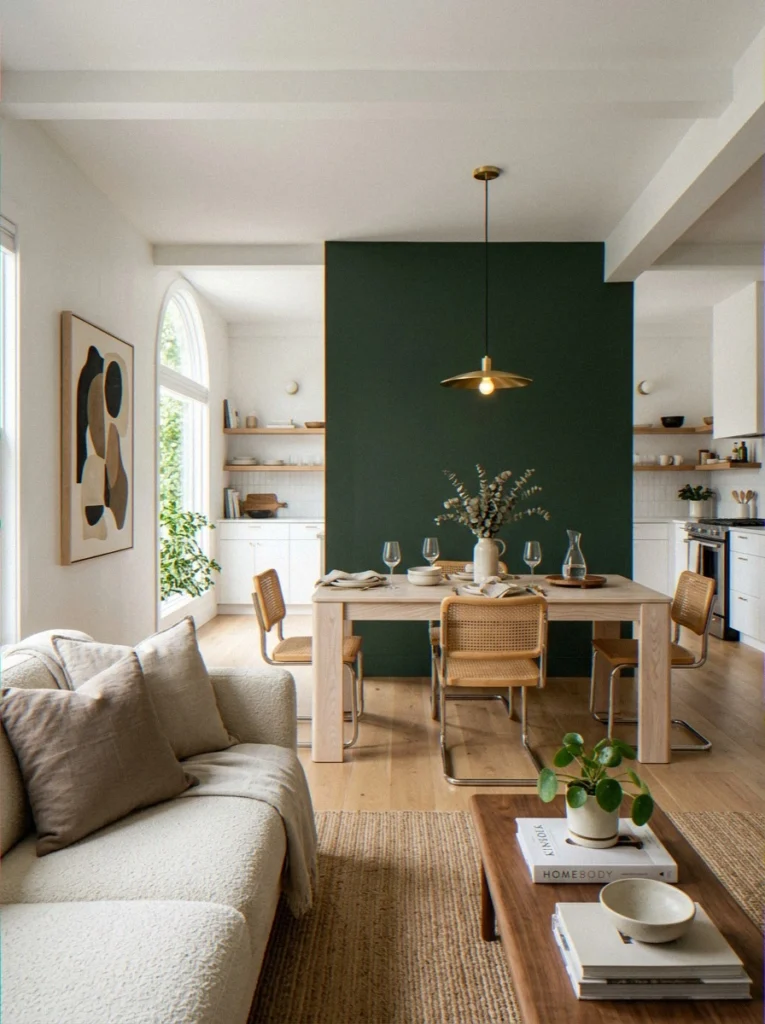
You can zone a room with nothing but a tin of paint and one accent wall. Seriously. When the wall behind your dining table is painted a deep teal or warm terracotta, and the rest of the room is white, your brain immediately files that corner as “dining zone.” It’s visual shorthand that costs about £25.
Half-wall painted sections are trending right now — a colour block to dado rail height, crisp line above. Looks incredibly sophisticated and takes a weekend. I did this in my home office corner and it completely separated the “work brain” from the “rest brain” without building anything at all.
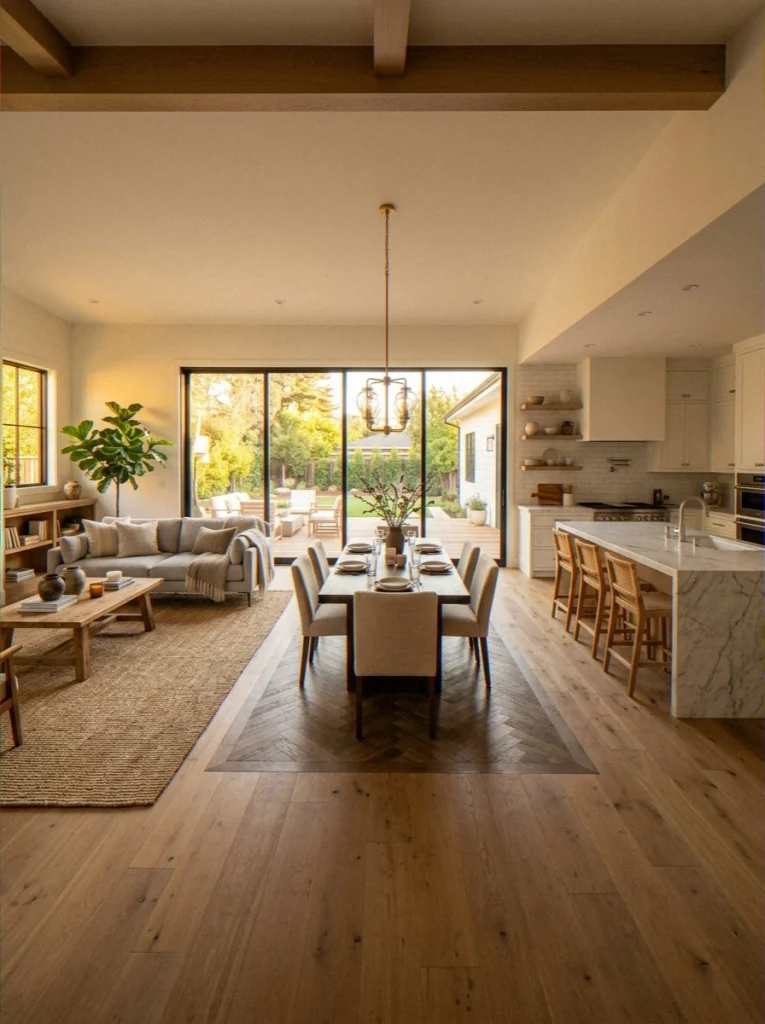
Also worth remembering: flooring changes work identically. Tiles transitioning to wood, herringbone parquet ending at a rug edge — these are invisible walls you walk over.
Layering Methods Together — This Is the Real Secret
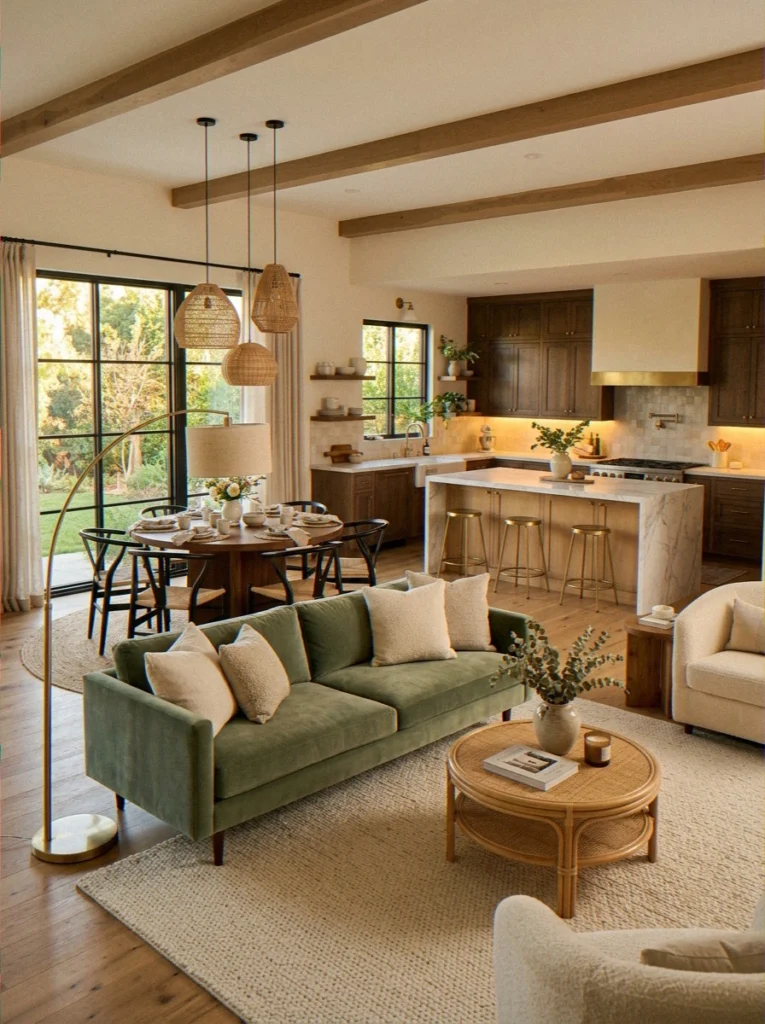
Honestly, one method alone is fine. Two or three together? That’s where it gets genuinely impressive.
Think in three planes: floor, ceiling, and vertical. A rug handles the floor. A pendant handles the ceiling. The back of a sofa or a shelf unit handles the vertical. Lock all three and you’ve built a room without a single wall. Wow!
Explore more ideas
22 Stunning Landscaping Around Raised Deck Backyard Ideas for Dreamy Yards
19 TOP Landscaping Around Raised Deck Backyard Ideas You’ll Love
24 Beautiful Landscaping Around Raised Deck Backyard Ideas That Wow
My go-to combinations:
- Dining zone: Pendant light + a distinct rug + a different wall colour behind = completely convincing separate room
- Living zone: Large rug + floated sofa + floor lamp in the corner
- Work corner: Curtain track + task light + a bookshelf along one side
Common Mistakes I’ve Watched People Make
- Rug that’s too small — makes the zone feel half-hearted and amateur
- Pendant hung too high — loses all its anchoring power above about 80cm from the table
- Too many competing styles — different rugs in clashing patterns make the room feel chaotic rather than organised
- Zoning each area so tightly there’s no breathing room — leave flow between zones or the whole “open plan” point is lost
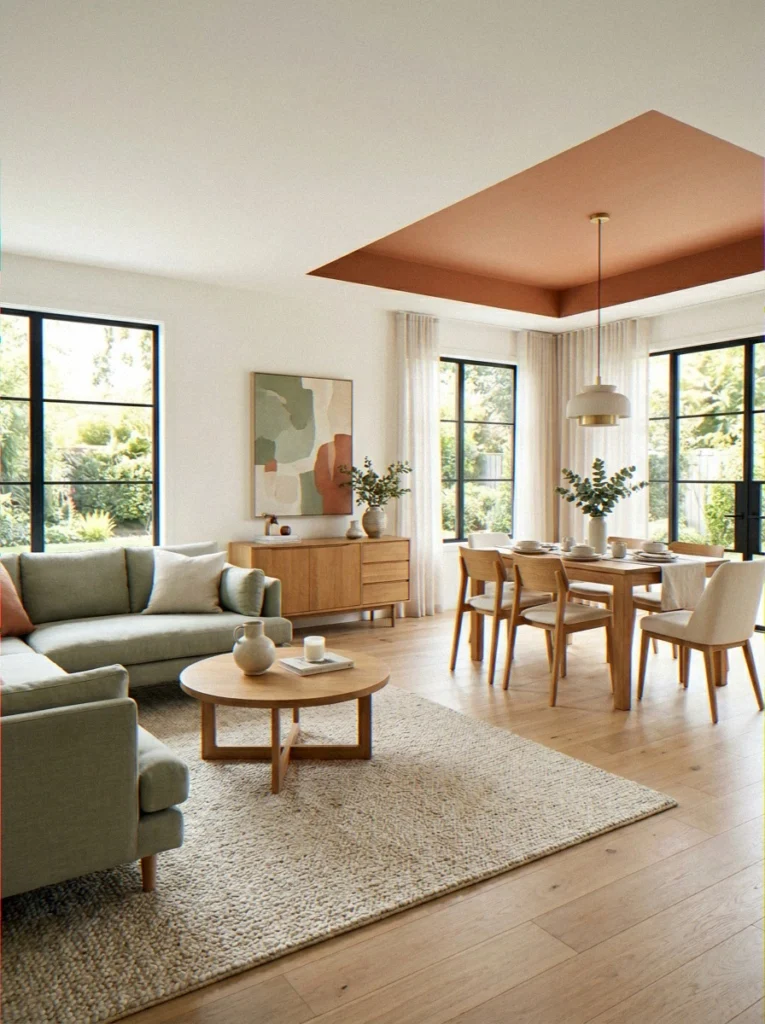
- Ignoring the ceiling entirely — a painted ceiling section or even a different light fitting can zone a space just as effectively as anything on the floor
FAQ — People Also Ask
How do I zone an open-plan room?
Using a mix of floor anchors (area rugs), ceiling anchors (pendant lighting), and vertical elements (the back of a sofa, a shelf unit, or a curtain) is the best way to divide up an open-plan room.
You don’t need walls; each zone should have its own way of looking at things. First, figure out how many zones you need (like a lounge, dining room, or office).
Then, use at least two of the three planes—floor, ceiling, and vertical—to anchor each zone. A rug and a pendant light are often all you need to make a dining area. A lounge has a sofa that floats and a floor lamp.
If you keep it consistent and on purpose, the zones will be clear even in a completely open space.
How to divide a room without using walls?
There are several killer ways to divide a room without touching a single brick:
- Area rugs define different zones underfoot — each zone gets its own rug
- Furniture placement uses the backs of sofas, bookshelves, or console tables as soft dividers
- Curtain tracks mounted from the ceiling give you a flexible, fully reversible partition
- Open shelving units create a visual screen while maintaining light and airflow
- Lighting anchors zones psychologically — a pendant over a dining table zones it more powerfully than most physical dividers
- Paint and colour on accent walls visually separate spaces without any physical intervention
- Freestanding folding screens are the best temporary option for renters or people who like flexibility
The general rule: combine two or three methods for a convincing result. One alone works — multiple together feels architectural.
What is the 3/4/5 rule in interior design?
The 3/4/5 rule in interior design is a proportion guideline used mainly for colour distribution in a room. It works like this:
- 60% of the room should be the dominant colour (usually walls, large furniture, flooring)
- 30% should be a secondary colour (sofas, curtains, accent rugs)
- 10% should be an accent colour (cushions, artwork, smaller accessories)
Some designers refer to this as the 60-30-10 rule, and the “3/4/5” version is a simplified ratio shorthand for the same concept.
Applied to open plan zoning, it’s useful for making sure zones feel cohesive — each zone can use the same colour distribution but shift the accent colour to distinguish itself.
So your lounge zone might accent in teal, your dining zone in terracotta, but both sit within the same dominant and secondary palette. This keeps the space unified while still feeling like distinct areas.
Have you tried any of these methods in your own place? I’d genuinely love to know which one made the biggest difference for you — drop a comment or share your before and after. Sometimes just moving the sofa is all it takes!