
Look, I’ve stepped in enough “surprises” during backyard barbecues to know we need to talk about this. Creating a designated dog potty area isn’t just about keeping your lawn pristine—it’s about maintaining your sanity and actually enjoying your outdoor space without playing minesweeper every time you walk outside.
After years of trial and error (and one particularly unfortunate incident involving my white sneakers), I’ve rounded up 22 practical ideas that actually work. No fancy landscaping degree required, just some common sense and a willingness to give your pup a proper bathroom spot.
Why Your Backyard Needs a Designated Dog Potty Zone

Here’s the thing: dogs are creatures of habit. Once you train them to use a specific area, they’ll keep going back to it. This means the rest of your yard stays clean, your grass grows evenly, and you’re not constantly dealing with brown patches that make your lawn look like a leopard print gone wrong.
Plus, cleanup becomes ridiculously easier when you know exactly where to look. FYI, this has saved me countless hours of yard work.
Gravel and Stone Solutions
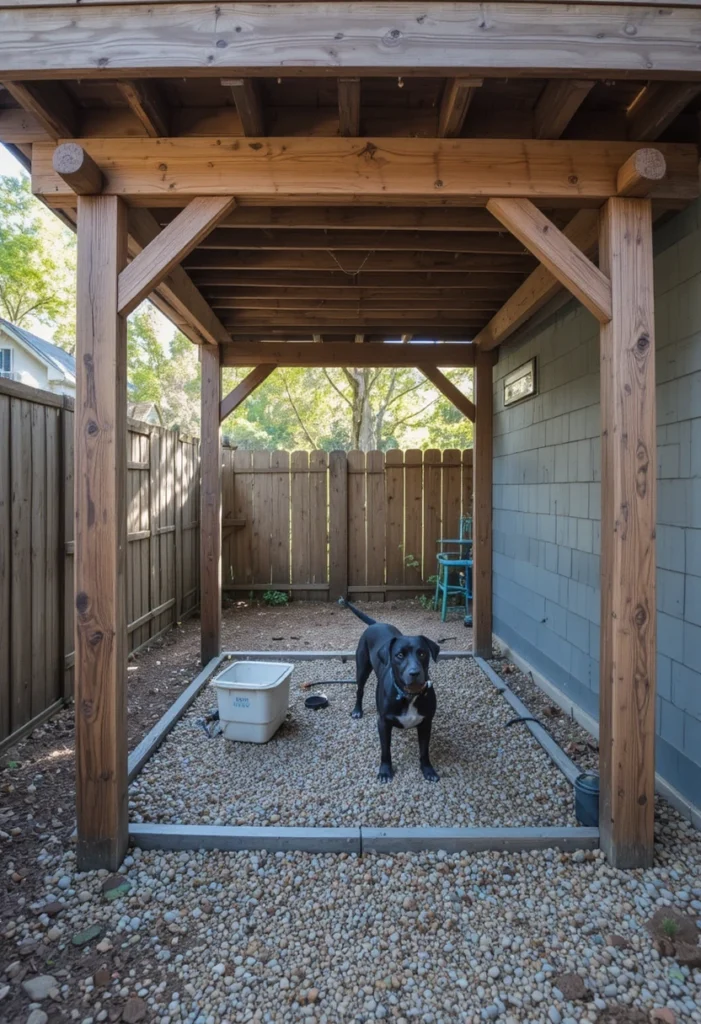
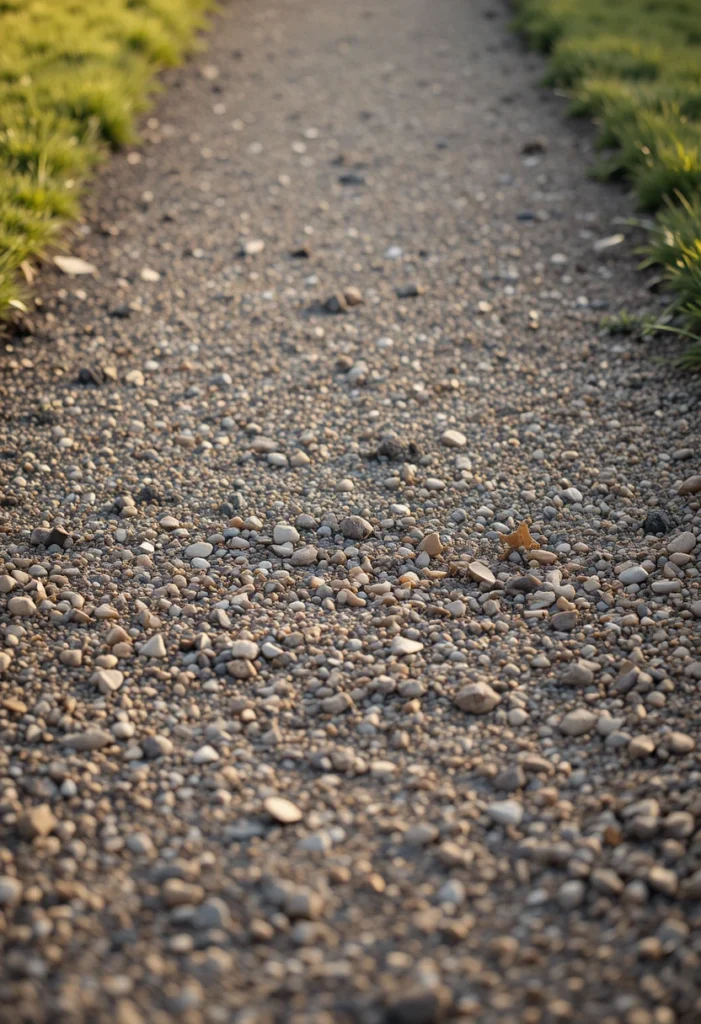
Classic Pea Gravel Area
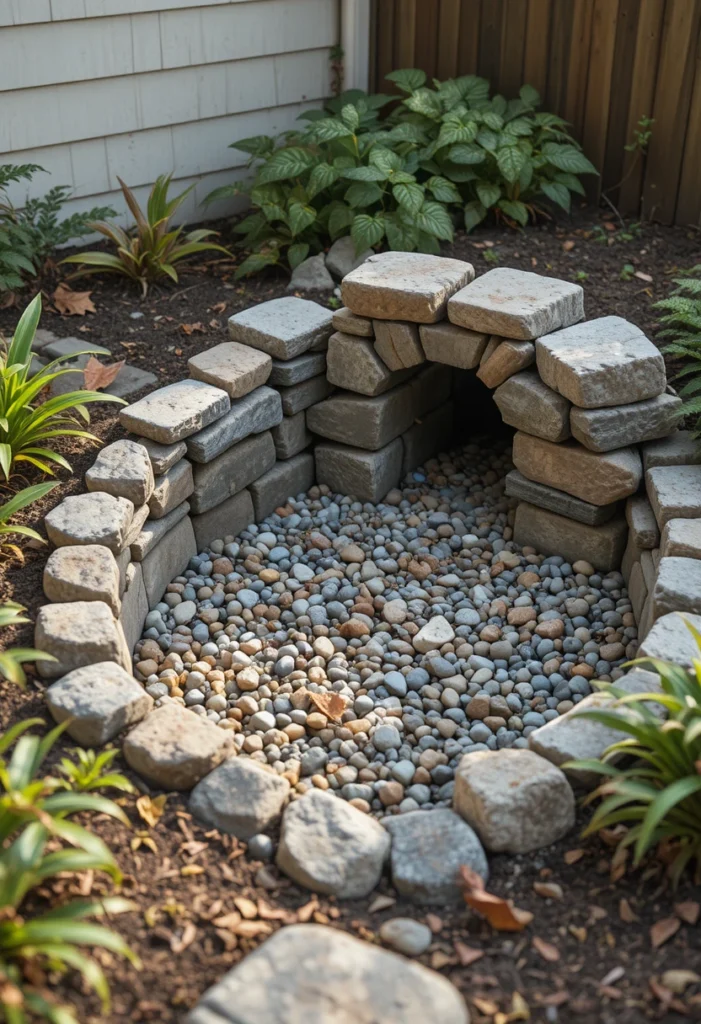
Pea gravel is my personal favorite for good reason. It drains beautifully, doesn’t hold odors, and your dog’s paws stay relatively clean. I created a 4×6 foot section bordered with landscape timber, filled it with pea gravel, and honestly? Best decision ever.
The small stones allow urine to drain through quickly, and you can easily scoop solid waste. Just make sure you get actual pea gravel—those tiny, smooth stones—not the larger decorative rocks that can hurt your pup’s paws.
River Rock Garden
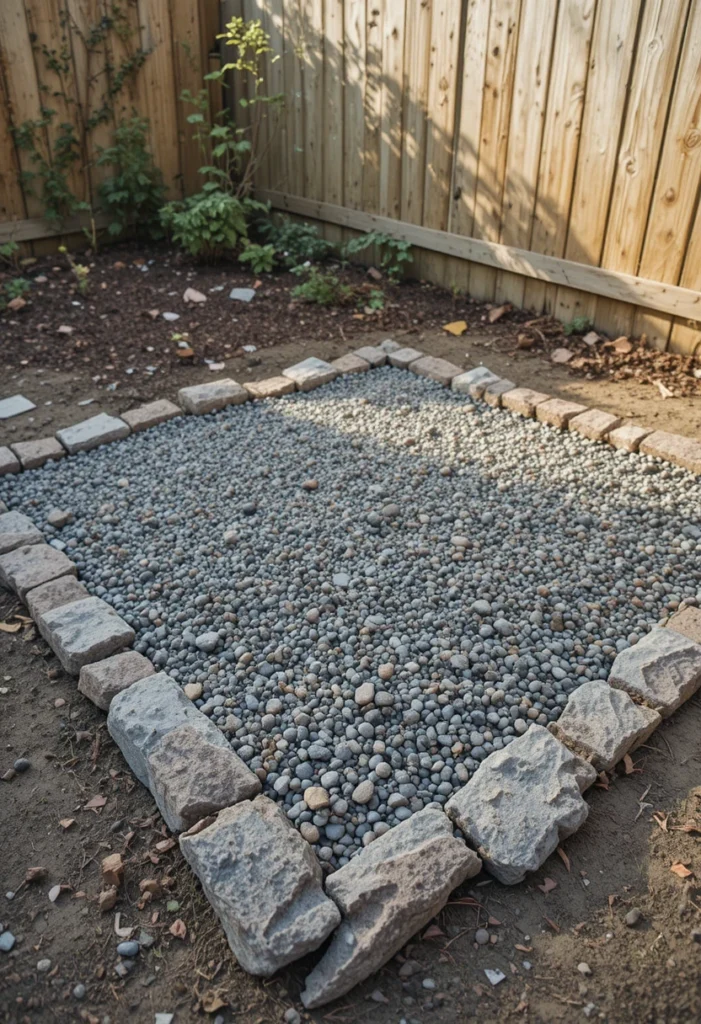
Want something that looks a bit more polished? River rocks offer a similar drainage benefit but with a more aesthetic appeal. I’ve seen neighbors create beautiful potty areas using larger river rocks mixed with smaller pebbles.
The trick here is layering. Put down landscape fabric first, then add your rocks. This prevents weeds from poking through while maintaining excellent drainage.
Decomposed Granite Base
Decomposed granite compacts nicely and creates a firm surface that’s easy on paws. It looks natural, drains well, and doesn’t track into your house as much as loose gravel might.
Mix it with some pea gravel on top for the ultimate combo. The granite provides structure while the gravel handles the drainage. Pretty smart, right?
Grass and Turf Options
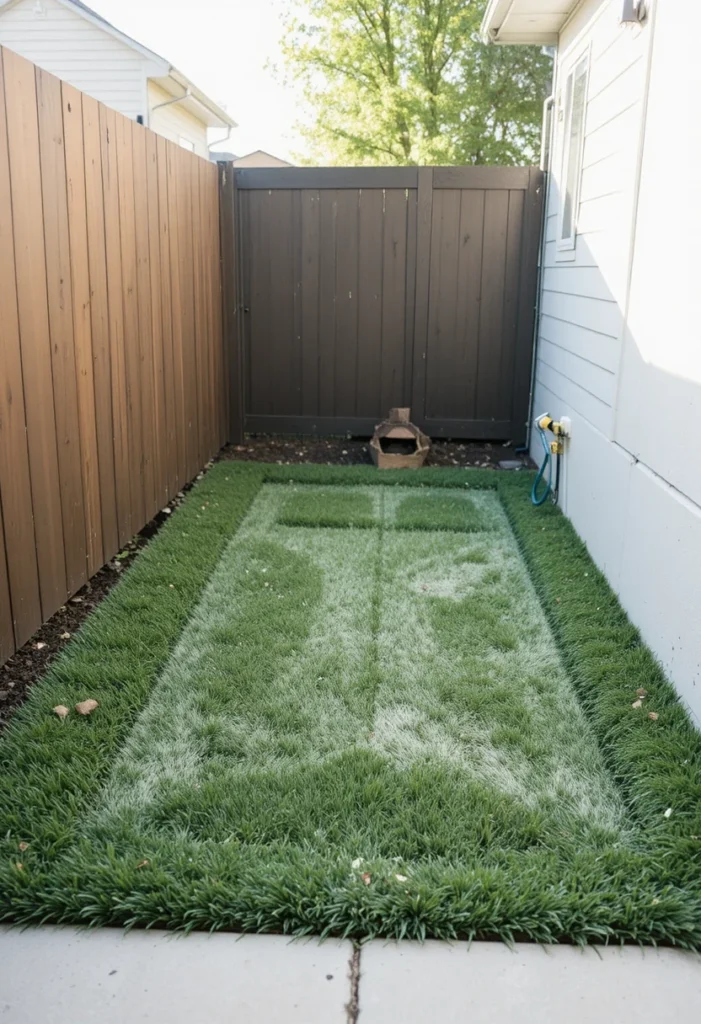
Natural Grass Section with Borders
Sometimes keeping it simple works best. Designate a specific grass area using landscape edging or border plants. Train your dog to use only that section, and you’ll protect the rest of your lawn.
The key is consistency. Take your pup to the same spot every time, especially first thing in the morning. Dogs catch on faster than you’d think.
Artificial Turf Patch
Real talk: artificial turf has come a long way. Modern pet-specific turf drains incredibly well and resists odors. I was skeptical until I saw my friend’s setup—it looked so real I almost tried to mow it 🙂
You’ll need to rinse it occasionally and use enzyme cleaners, but maintenance is minimal. Plus, no brown spots or muddy paws.
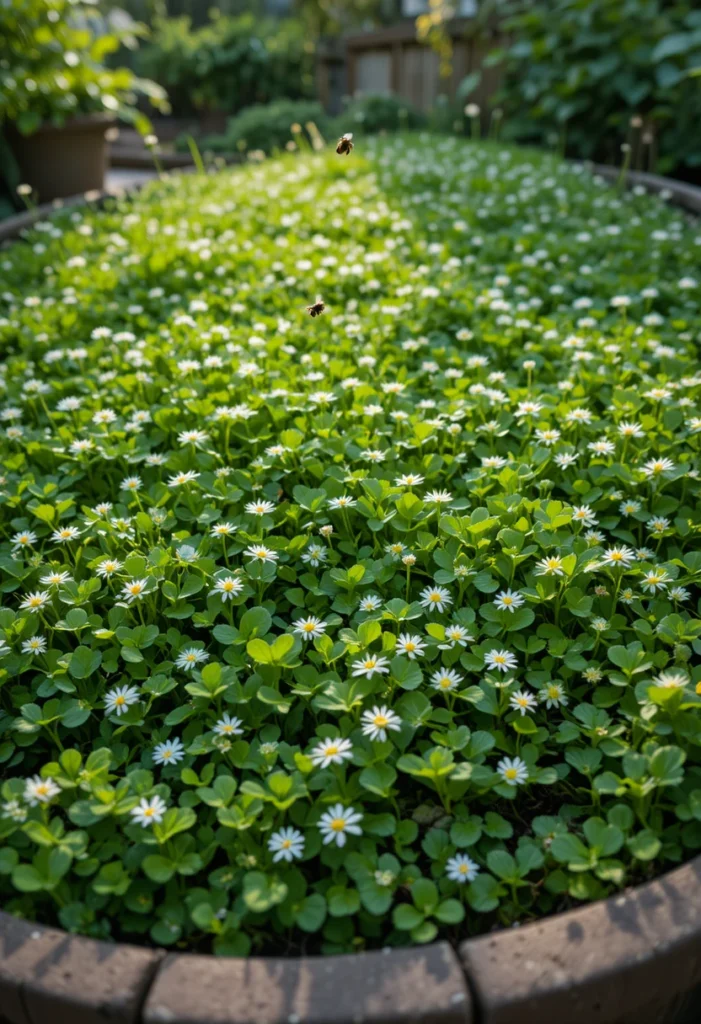
Clover Lawn Section

Clover is ridiculously resilient and actually stands up to dog urine better than regular grass. It stays green, requires less water, and feels soft underfoot.
Plant a small clover section specifically for your dog’s bathroom needs. Your water bill will thank you, and the bees absolutely love it during blooming season.
Mulch and Wood Options
Cedar Mulch Area

Cedar naturally repels insects and resists decomposition. Create a bordered area, fill it with cedar mulch, and refresh it every few months. The smell is pleasant (for humans anyway), and it’s easy to maintain.
One heads-up: some dogs try to eat mulch. If your pup has that tendency, skip this option or supervise closely.
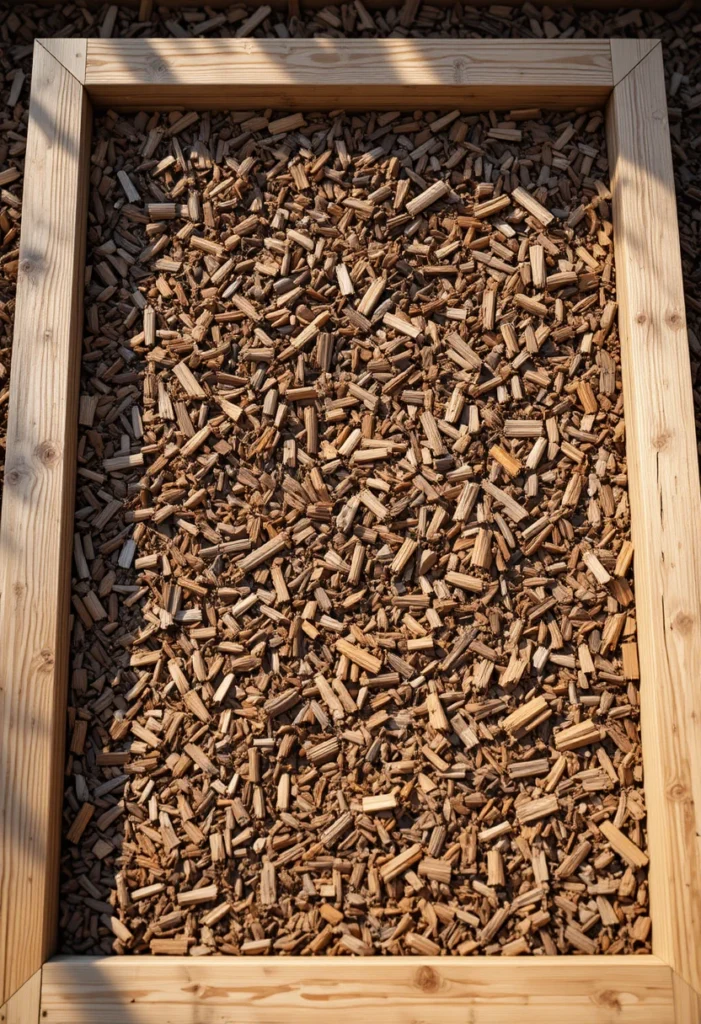
Pine Bark Nuggets

Larger pine bark pieces don’t stick to paws as much as shredded mulch. They drain well, look neat, and you can find them at any garden center for pretty cheap.
I like using the medium-sized nuggets. The tiny stuff tracks everywhere, and the huge chunks look weird IMO.
Rubber Mulch Zone
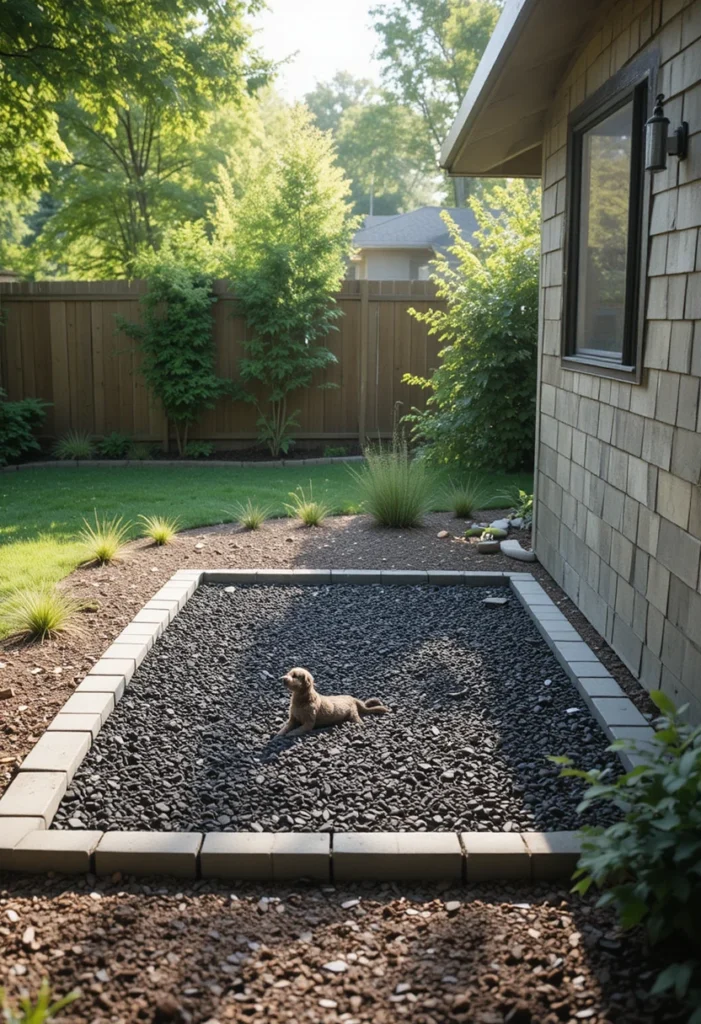
Rubber mulch doesn’t decompose, stays in place, and provides excellent cushioning. It’s made from recycled tires, so you’re being environmentally conscious while solving your potty area problem.
Fair warning: it can get hot in direct summer sun, so maybe add some shade if you go this route.
Sand and Dirt Solutions
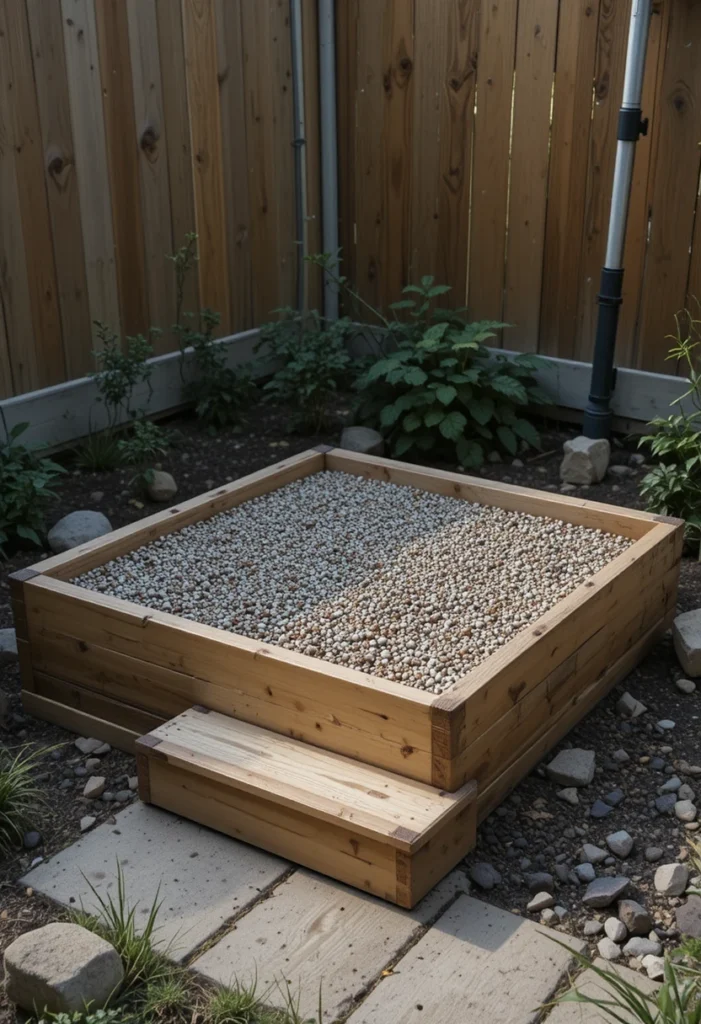
Sand Box Style Area
Yes, like a giant litter box for your dog. Sand drains perfectly and many dogs instinctively like using it. Build a simple frame with lumber, fill it with play sand, and you’re done.
Maintenance tip: rake it weekly and replace the sand every few months. Keeps things fresh and odor-free.
Dirt Patch with Border

Sometimes the simplest solution is just letting nature do its thing. Section off a dirt area, and many dogs will naturally prefer using bare ground.
The downside? Muddy paws when it rains. But if you’re not precious about a little dirt, this works surprisingly well.
Creative and Multi-Purpose Ideas
Raised Platform Potty Area
Build a simple raised platform (about 6-8 inches high) filled with your material of choice. This creates clear visual boundaries for your dog and keeps the potty zone distinct from play areas.
Great for small yards where every square foot counts. Plus, easier on your back when cleaning—no bending all the way to the ground.
Corner Garden Bed Conversion
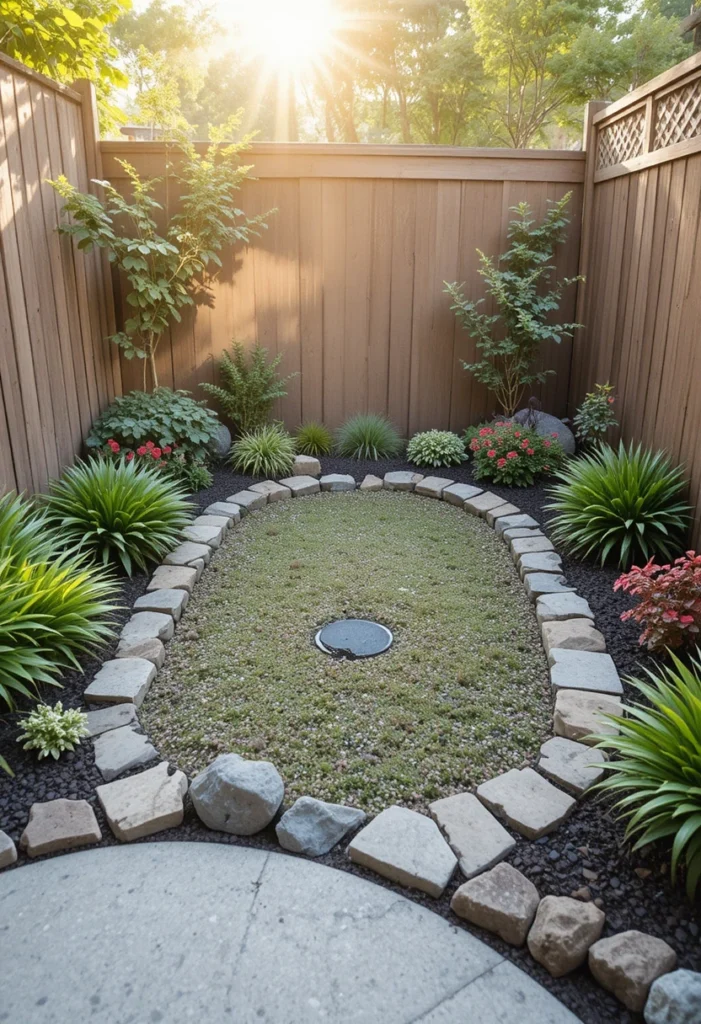
Got a corner of your yard that’s always been weird to landscape? Convert it into a dog potty area with attractive borders. Use decorative stones or plants around the edges to make it look intentional.
Nobody needs to know it’s actually your dog’s bathroom. It just looks like a thoughtfully designed landscape feature.
Under Deck Utilization
That awkward space under your deck? Perfect potty real estate. It’s already partially hidden, provides shade, and you can easily contain it with minimal materials.
Just ensure good drainage since it won’t get much sun to help dry things out naturally.
Privacy Screen Potty Zone

Install a simple privacy screen or plant tall grasses around a designated area. Your dog gets a private bathroom (they appreciate this more than you’d think), and you don’t have to stare at it during dinner parties.
Bamboo screens work great, or plant some ornamental grasses for a natural divider.
Training-Friendly Setups
Marked Territory with Signs

I know this sounds silly, but visual markers actually help. Use small garden stakes or flags to clearly define the potty area while training.
Dogs are visual learners too. That bright flag becomes a signal that says “this is your spot.”
Scented Border Training
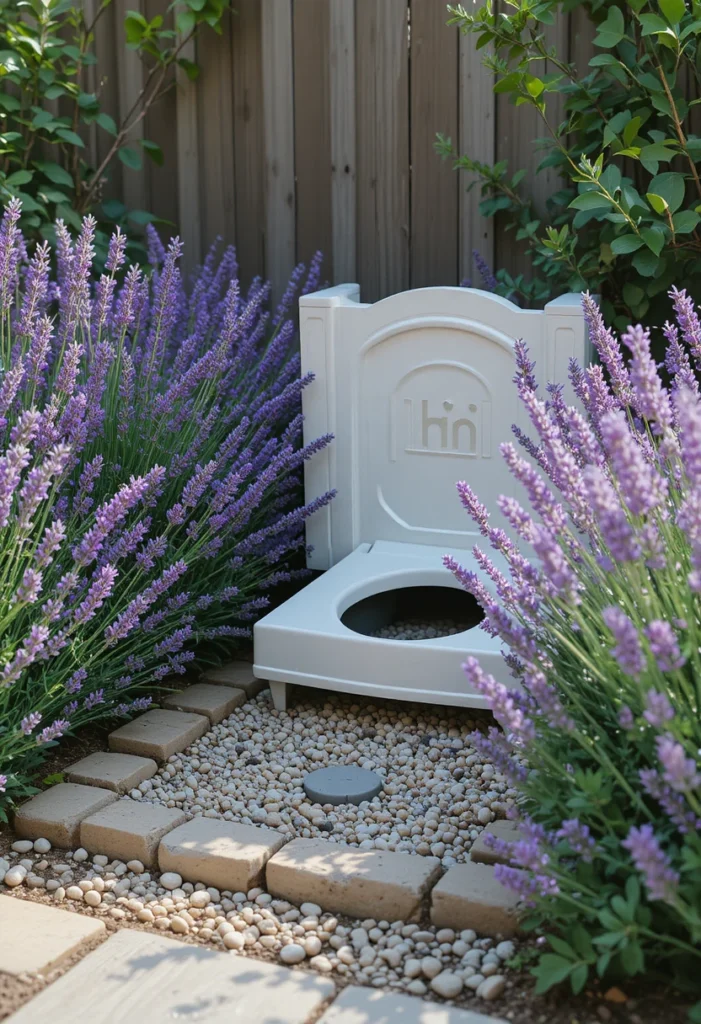
Plant herbs like lavender or rosemary around the border. The strong scent creates a natural boundary that helps define the space for your pup.
Plus, your yard smells amazing. Win-win situation right there.
Combination Material Zones
Create different textures in one contained area—half gravel, half mulch. This gives your dog options while keeping everything in one designated spot.
Some dogs prefer different surfaces depending on the weather or their mood. Weird, but true.
Pathway Connected Design

Build a small pathway leading from your door to the potty area. This physically guides your dog to the right spot and makes those middle-of-the-night bathroom breaks easier.
Trust me, stumbling through the dark yard at 3 AM gets old fast. A simple gravel path solves this problem.
Low-Maintenance Solutions
Xeriscaped Potty Garden
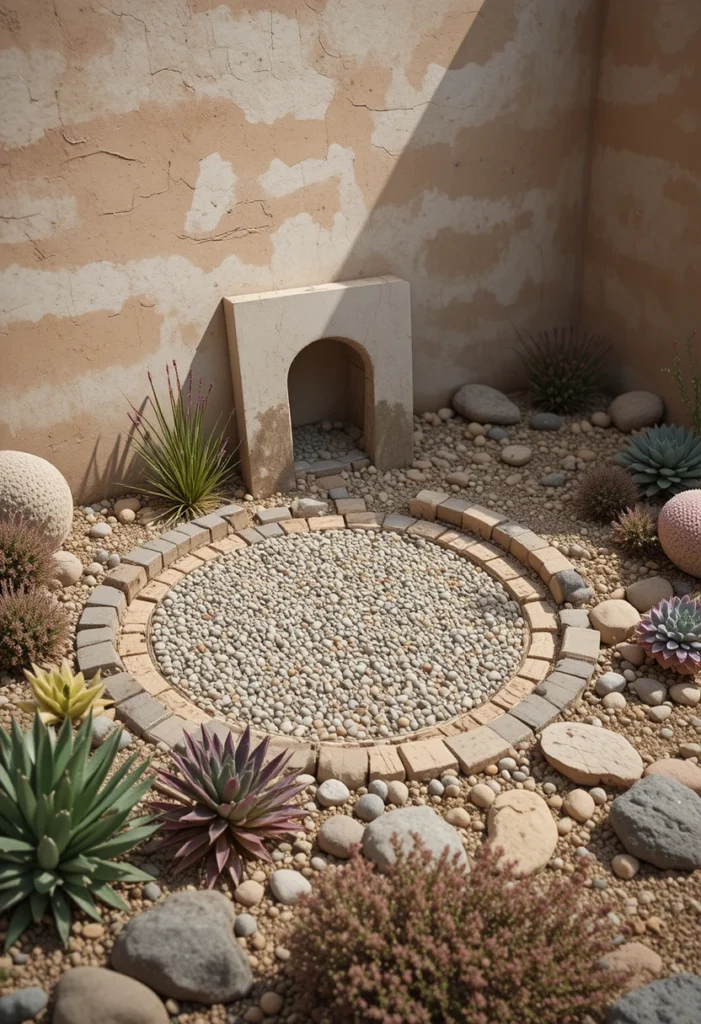
Use drought-resistant materials and plants to create a zero-maintenance zone. Rocks, succulents around the border, and well-draining gravel in the center.
Perfect for busy people or anyone who doesn’t want another yard chore on their list.
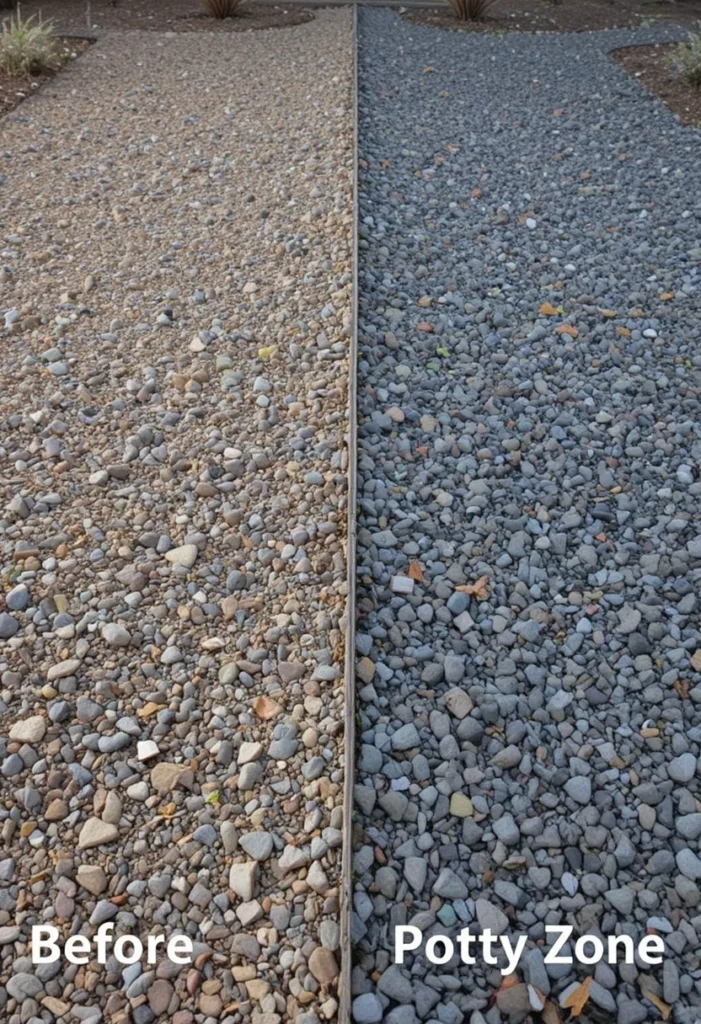
Self-Cleaning Gravel System

Install a slight slope in your gravel area leading to a drain. Heavy rains naturally rinse everything away. Genius, right?
You’ll still need to scoop, but the urine issue basically handles itself.
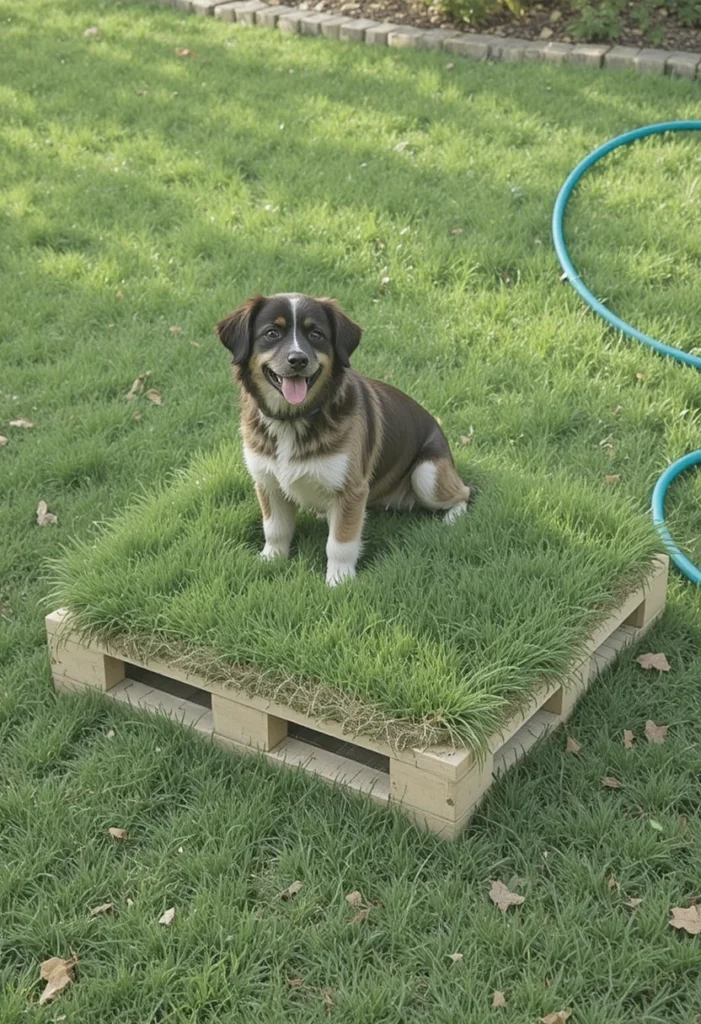
Portable Grass Pad Station
Not technically permanent, but hear me out. Those commercial grass pads on pallets can be moved around your yard to prevent wear and tear.
When one section gets worn, just move the pad. The grass underneath recovers while your dog uses a fresh spot.
Quick Setup Comparison
| Material | Setup Time | Drainage | Maintenance |
|---|---|---|---|
| Pea Gravel | 2-3 hours | Excellent | Low |
| Artificial Turf | 4-5 hours | Good | Medium |
| Cedar Mulch | 1-2 hours | Good | Medium-High |
| Sand | 2-3 hours | Excellent | Medium |
Making It Work for Your Space
Whatever option you choose, remember that consistency is everything. Your dog won’t magically know where to go—you need to actively train them to use the designated area.
Take them to the spot immediately after meals, after naps, and first thing in the morning. Reward them every single time they use it correctly. Yeah, it feels repetitive, but it works.
Also, consider your climate. Gravel works great in rainy areas because of drainage. Mulch might not be ideal in super windy locations. Artificial turf can get scorching hot in desert climates. Match your solution to your environment.
The Bottom Line
Creating a designated dog potty area doesn’t require a massive budget or professional landscaping skills. Start with basic borders and your chosen material, stay consistent with training, and give it a few weeks.
Your yard will look better, smell better, and actually be usable again. Plus, those surprise backyard landmines? Gone. And honestly, that alone makes the effort worthwhile.
Pick an idea that matches your style and space, commit to the training process, and enjoy having a functional outdoor area again. Your grass, your guests, and your white sneakers will thank you 🙂
1 thought on “22 Simple Designated Dog Potty Area Backyard Ideas”