
My first attempt at growing basil indoors ended with a shriveled, yellow mess on my windowsill. Classic. I’d jammed it into a pot that was way too small, watered it like I was trying to drown it, and stuck it in a corner with zero sunlight. The plant didn’t stand a chance.
But here’s the thing: once I figured out what I was actually doing wrong, growing herbs indoors turned out to be one of the most satisfying things I’ve added to my kitchen routine.
Fresh mint in my tea, snipped chives on scrambled eggs, basil pulled straight off the stem and dropped onto pasta. Hard to beat that.
So if you’re starting from scratch, or you’ve tried before and had the same disaster I did, this is the guide I wish I’d had. Twenty real ideas, actual steps, honest opinions about what works and what doesn’t.
Why growing herbs indoors is worth the effort
Let me be direct: a small pot of homegrown thyme will not save you money compared to buying a $1.50 bunch at the grocery store. I want to set that expectation right now.
What it does do is give you herbs that taste noticeably fresher, because you’re harvesting seconds before you cook instead of days after shipping.
And if you’re on Pinterest saving herb garden photos, you already know there’s something genuinely pleasing about a tidy row of labeled pots on a sunny shelf.
It’s satisfying in a way that’s hard to explain to someone who’s never done it.
The best beginner herbs to start with:
- Basil (fast-growing, loves warmth, dies dramatically if you neglect it, teaches you discipline)
- Mint (almost impossible to kill, spreads aggressively, needs its own pot)
- Chives (patient, forgiving, grows back quickly after cutting)
- Parsley (slow to start, but once established, gives you greens for months)
- Thyme (drought-tolerant, perfect if you forget to water)
- Oregano (similar to thyme, incredibly low maintenance)
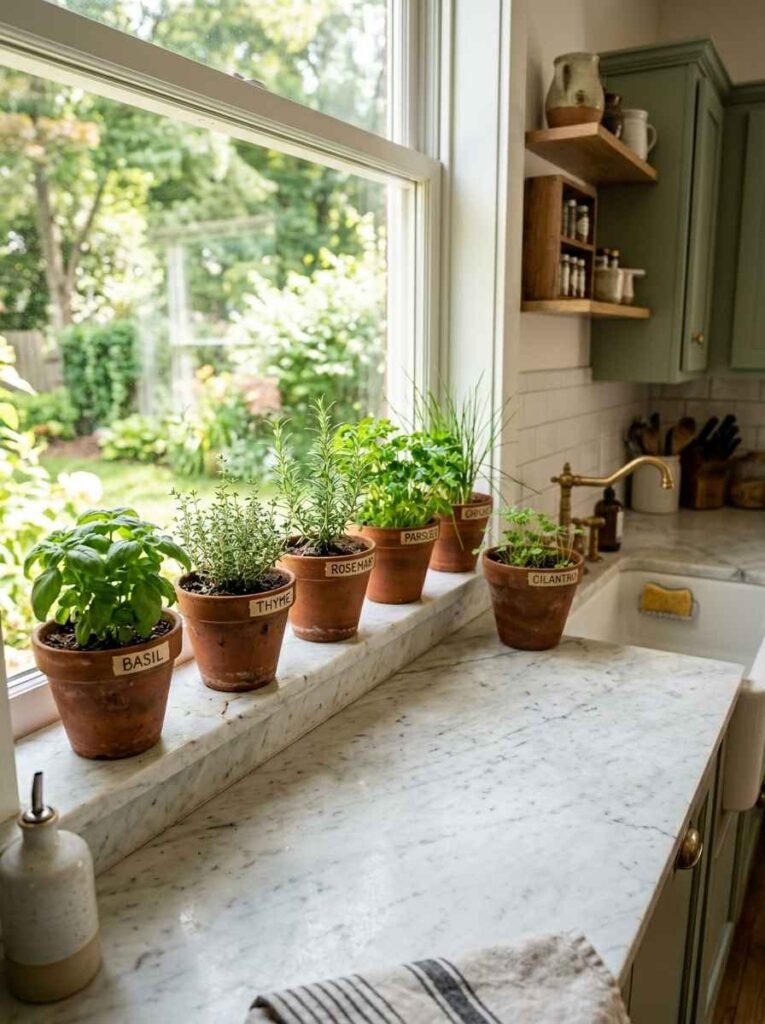
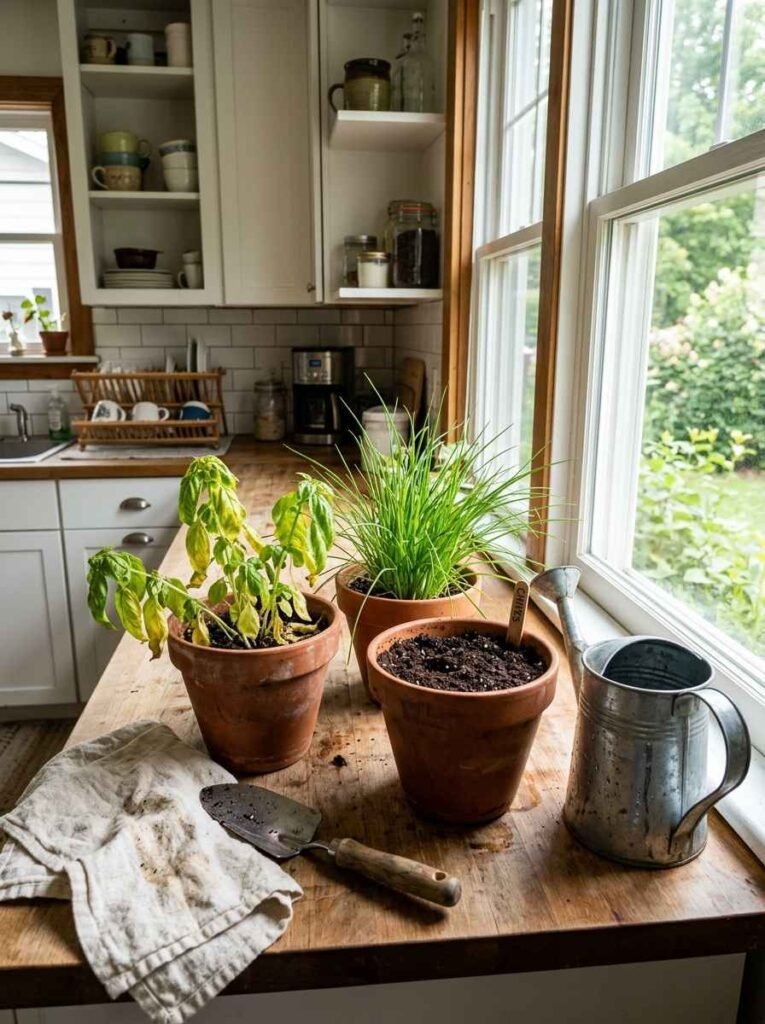
Idea 1: The windowsill row
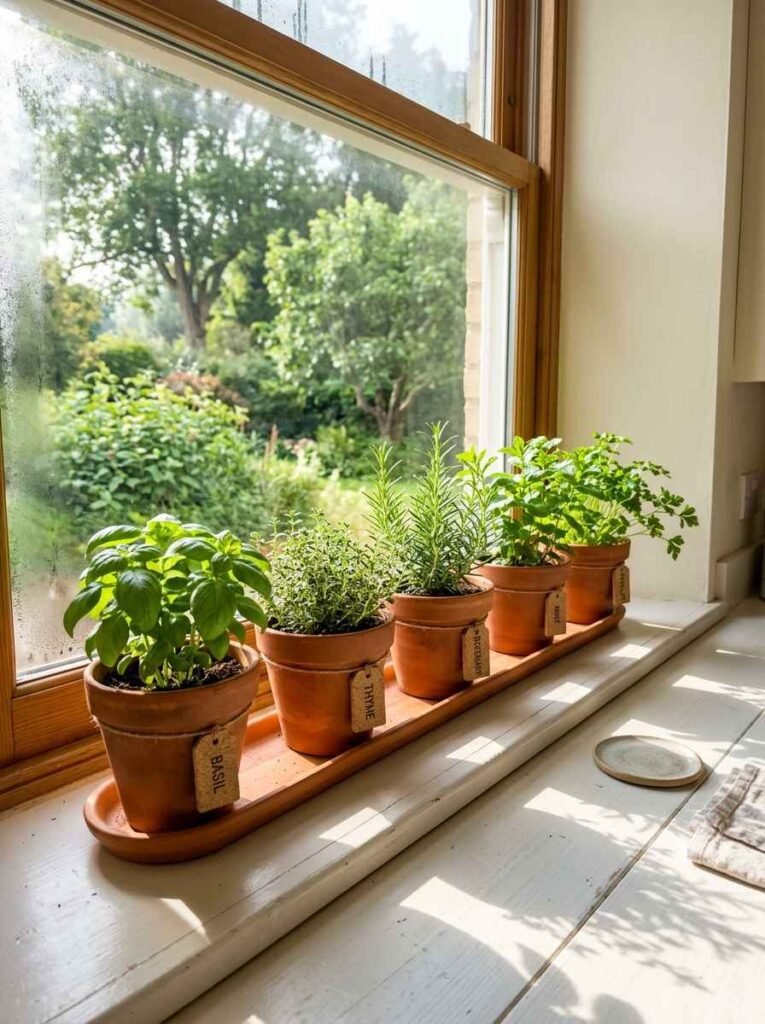
The most practical setup for most kitchens. Line up 4 to 6 small pots along a south-facing or east-facing windowsill, and you’ll have a functioning herb garden that also looks like something from a design magazine.
What you actually need
- Pots with drainage holes (4-inch terra cotta pots work well, roughly 120 Rs each)
- A tray underneath to catch water
- Quality potting mix, not garden soil
- Labels, either small chalkboard tags or even just masking tape and a marker
South-facing windows get the most direct sun in the Northern Hemisphere, around 6 hours a day in summer. East-facing gets gentler morning light, which suits herbs like mint and parsley that don’t want to bake.
Idea 2: Mason jar herb garden
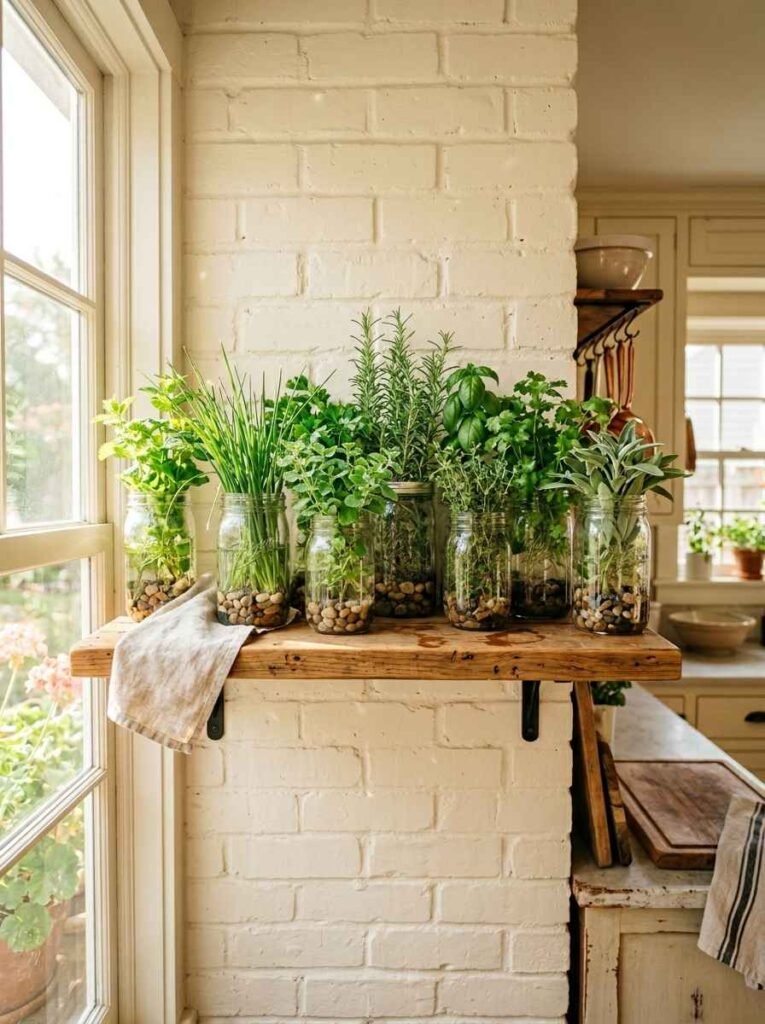
Pinterest’s favorite. And honestly, for good reason — mason jars look great, they’re cheap, and you probably already have a few sitting in a cabinet.
The catch: mason jars have no drainage. This is solvable. Add a 1-inch layer of small pebbles or gravel at the bottom before adding soil.
This creates a gap so roots don’t sit permanently in standing water. Still, you’ll need to be more careful about how much you water compared to a proper pot.
Best herbs for mason jars: mint, chives, and parsley. They’re more forgiving of imperfect drainage conditions.
Idea 3: Hanging wall planter
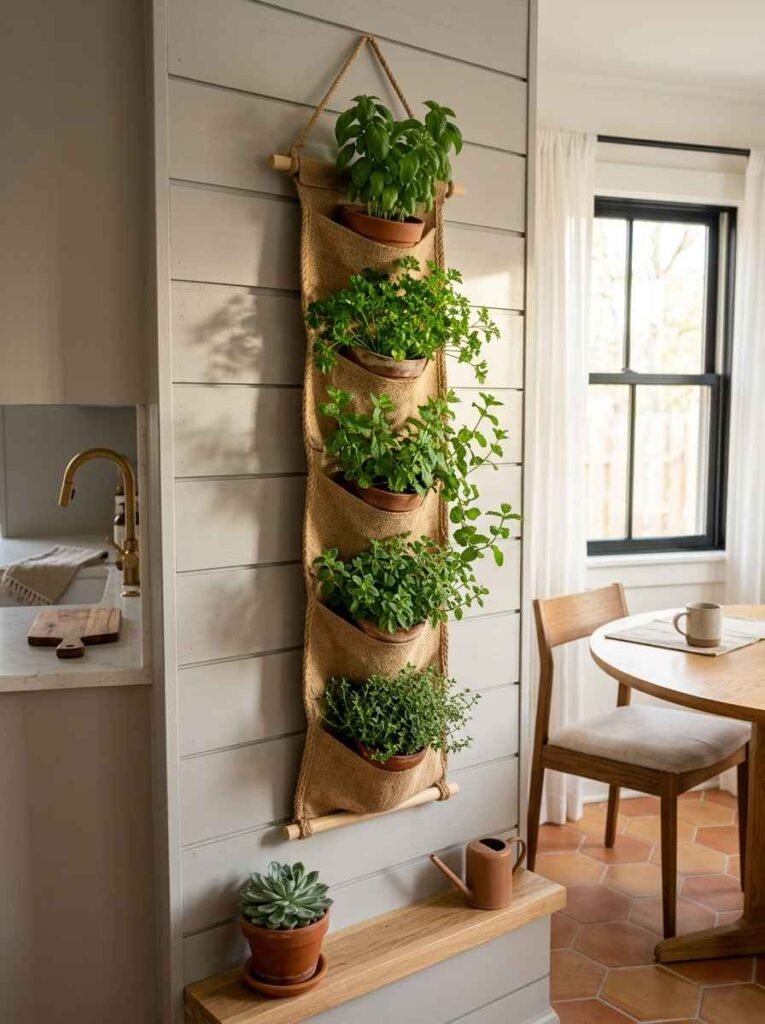
If counter space is the problem, go vertical. Wall-mounted planters, whether fabric pockets, wooden boards with small pots, or tiered metal frames, free up your entire countertop while putting herbs at eye level.
I’ve used a 3-pocket fabric planter from Amazon (around 400-500 Rs) and it held basil, thyme, and mint for almost a full growing season before the fabric started to degrade.
For something more permanent, wooden pallet-style wall planters from local craft stores hold up better.
Idea 4: Tiered plant stand
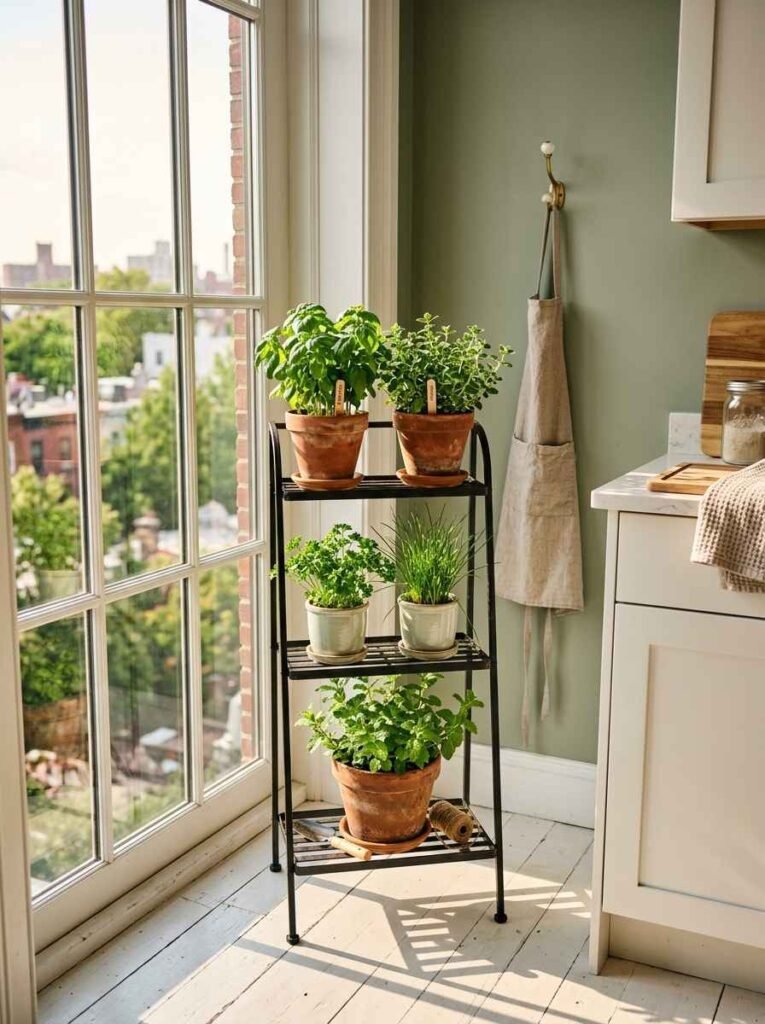
A 3-tier plant stand by a window is genuinely one of the better-looking indoor garden setups, and it fits into a corner you probably aren’t using anyway.
Top tier: herbs that need the most light (basil, oregano). Middle tier: moderate-light herbs (chives, parsley). Bottom tier: shade-tolerant plants (mint does okay here).
Step-by-step setup
- Pick a spot within 2 feet of your brightest window
- Set up the stand and check that it’s stable
- Add your pots, heaviest at the bottom
- Water each pot until water drains from the bottom (do this the first time to settle the soil)
- Check daily for the first week to understand each herb’s water needs before you settle into a routine
Idea 5: Repurposed tin cans
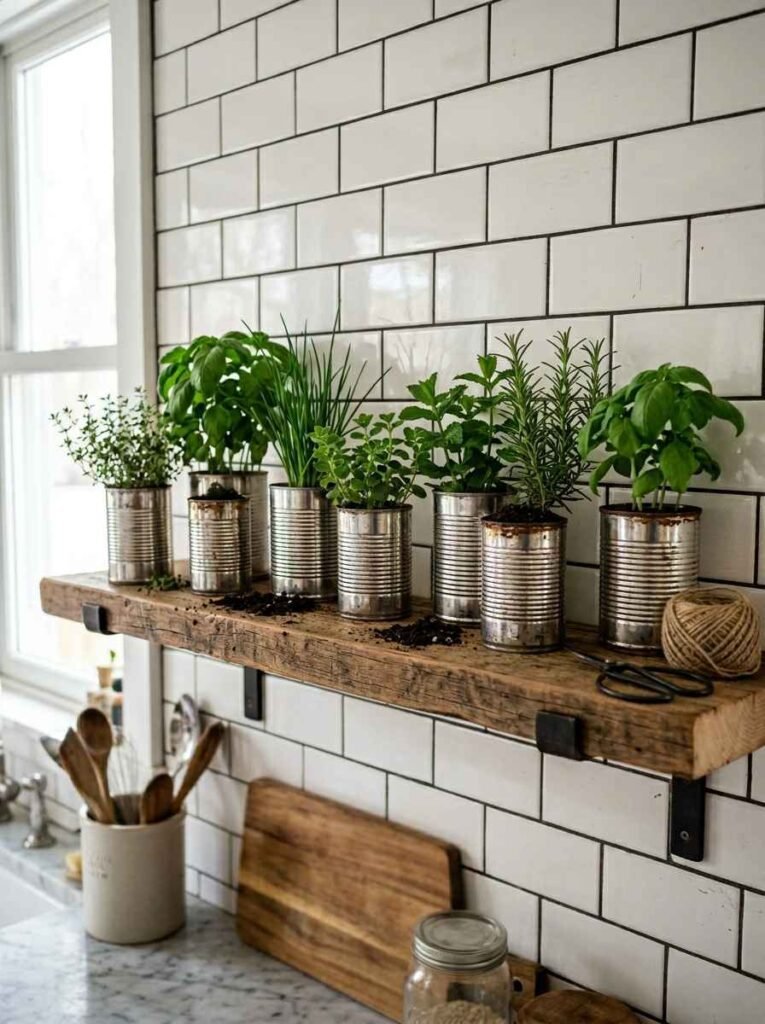
Old tin cans (soup cans, tomato cans) make decent herb pots if you punch drainage holes in the bottom with a nail.
They also look charming labeled and lined up on a shelf. I think this is genuinely one of the most budget-friendly options if you’re testing the hobby before committing to proper pots.
The metal conducts heat and cold more readily than ceramic or plastic, so position them away from cold drafts in winter.
Idea 6: Self-watering planter
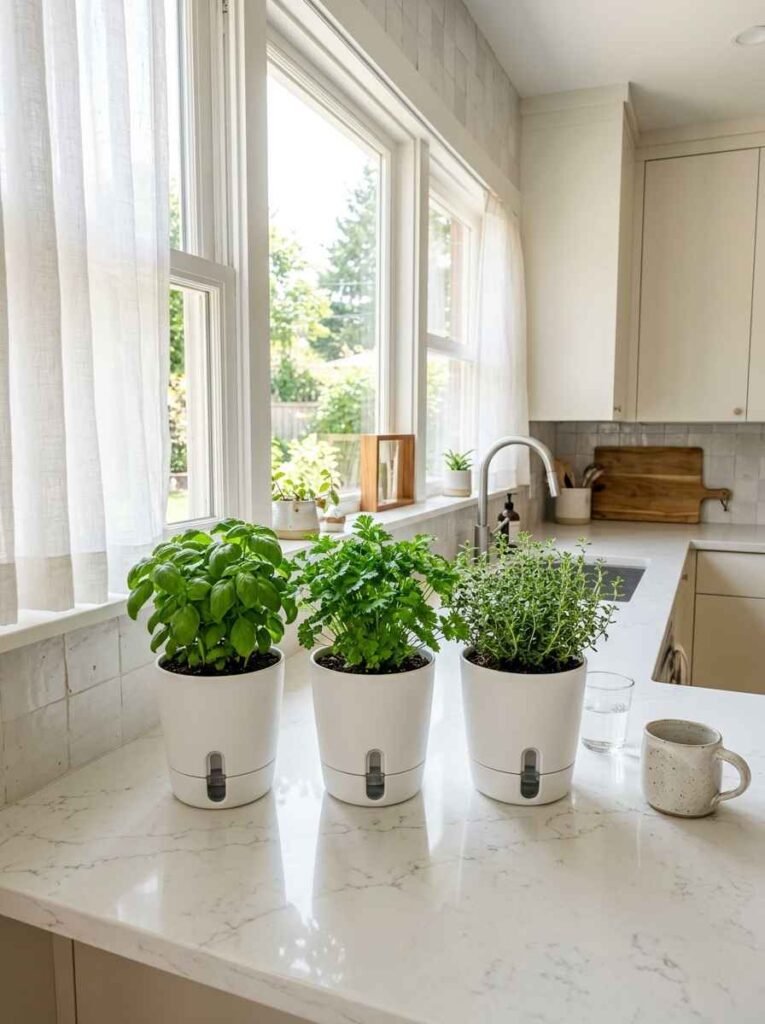
If you travel, work long hours, or just know yourself well enough to admit you’ll forget to water, a self-watering planter is probably the right call.
These have a water reservoir at the bottom that wicks moisture up to the roots as needed.
Brands like Lechuza and AeroGarden make solid options. For herbs specifically, basil and parsley thrive in these. Mint? Mint will try to take over the entire reservoir. That’s mint’s personality.
Idea 7: Herb garden in a wooden crate
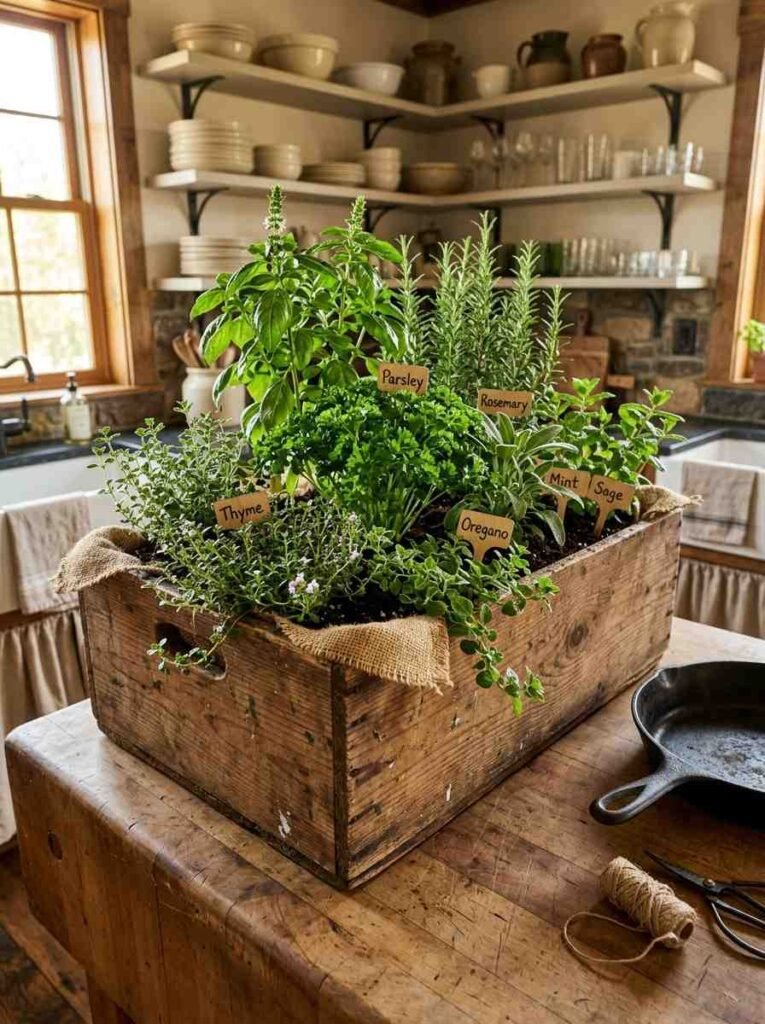
Vintage wooden crates lined with landscape fabric make a big, statement herb garden that looks genuinely nice on a kitchen island or shelf.
You can grow 6 to 8 herbs in a single medium-sized crate (roughly 40cm x 30cm).
Line the inside with burlap or a cut-up garbage bag (poke holes in it for drainage), fill with potting mix, and plant your herbs with at least 8 to 10cm of space between each one.
Idea 8: Grow lights setup
This one’s for apartments with genuinely terrible natural light. A basic full-spectrum LED grow light costs around 800 to 1,500 Rs and will keep herbs alive and producing through an entire winter.
Quick grow light guide:
| Herb | Hours of light needed | Grow light distance |
|---|---|---|
| Basil | 14-16 hours/day | 15-20 cm above plant |
| Mint | 12-14 hours/day | 20-25 cm above plant |
| Parsley | 12-14 hours/day | 20-25 cm above plant |
| Thyme | 14-16 hours/day | 15-20 cm above plant |
Set a timer so you’re not manually switching the light on and off. Even a cheap mechanical outlet timer works fine.
Idea 9: Herb garden in a colander
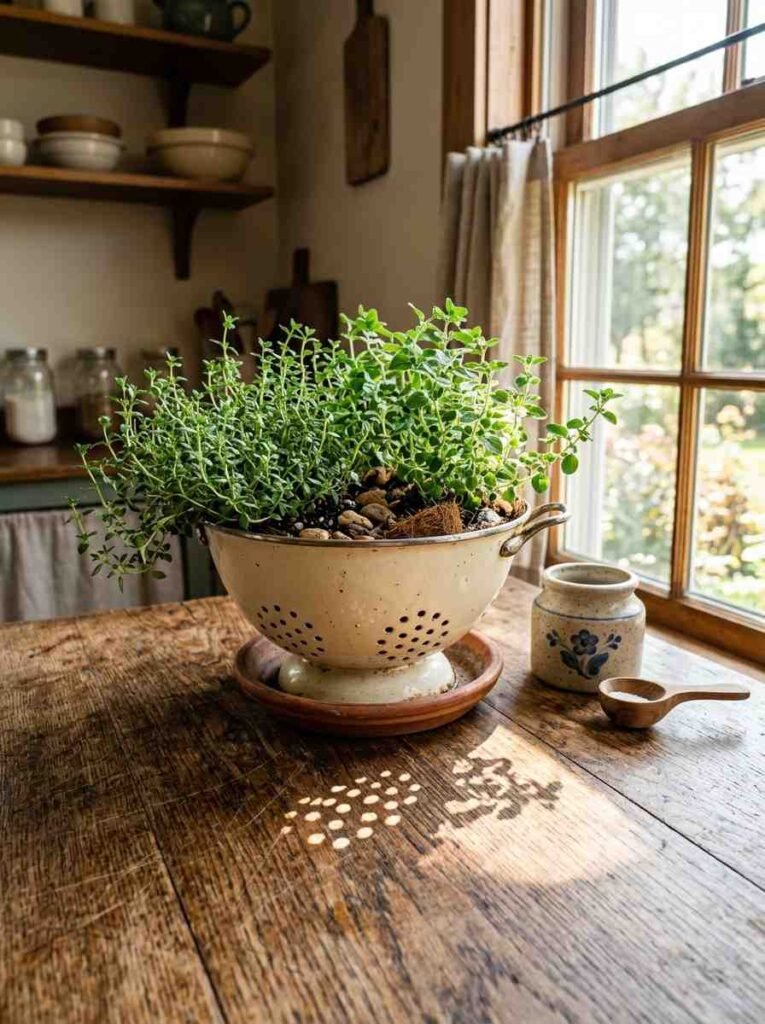
Okay, this one I saw on Pinterest and was skeptical about, but it actually works better than expected.
A metal or enamel colander has built-in drainage (the holes are already there) and holds enough soil for 3 to 4 herbs comfortably.
Line it with coconut coir liner or sphagnum moss to hold the soil in, then plant. It drains exceptionally well, which herbs like thyme and oregano specifically appreciate.
Idea 10: Kitchen window box
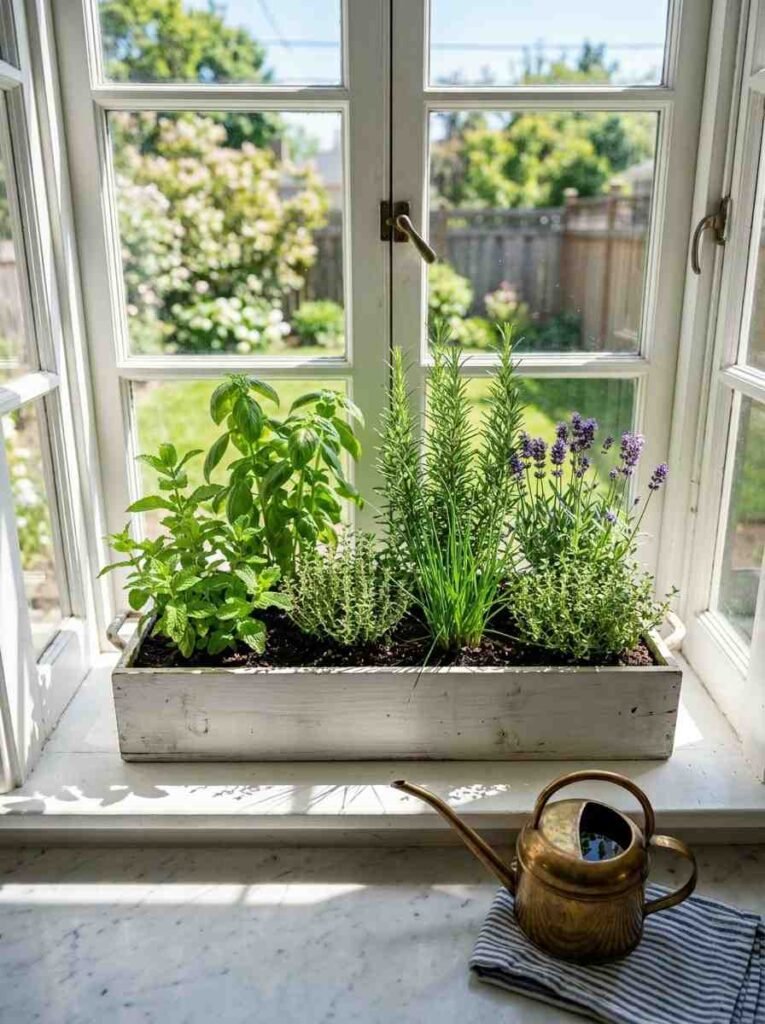
A long window box, the kind typically used for outdoor window ledges, fits beautifully on a deep interior windowsill and holds 5 to 6 herbs in a single planting.
Plant taller herbs (basil, parsley) toward the back, shorter ones (thyme, chives) toward the front. Water from the front to avoid disturbing back plants, and rotate the whole box 180 degrees every 2 weeks so all herbs get even light.
Idea 11: Teacup herb garden
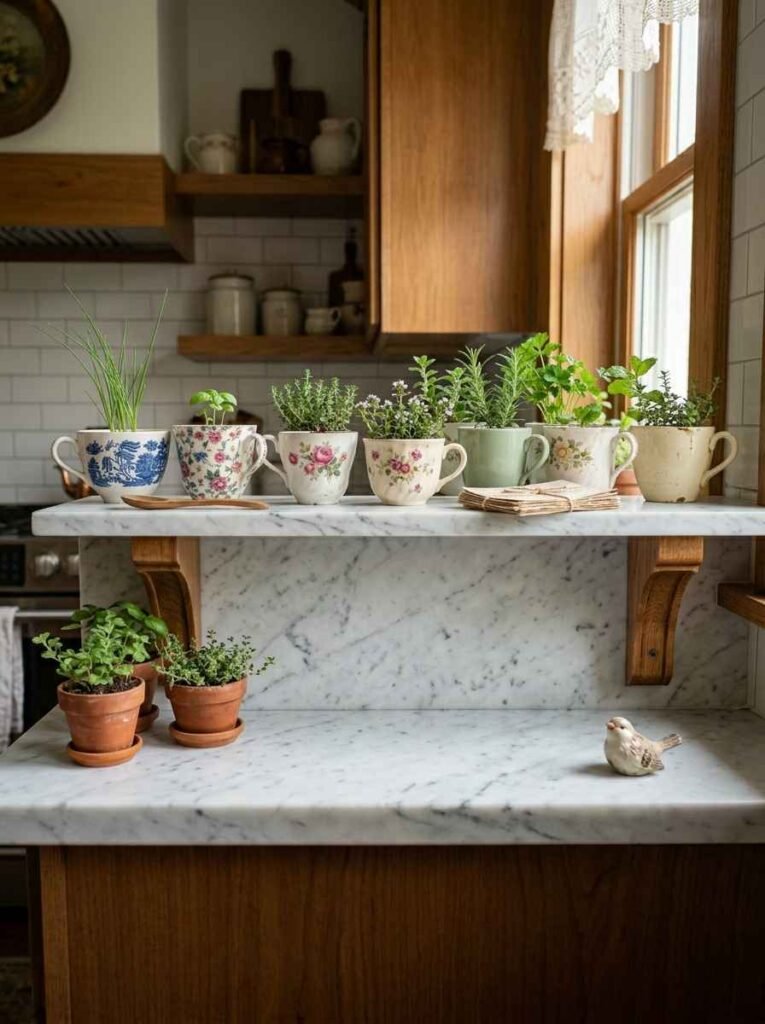
This is 100% an aesthetic choice. Small teacups or mugs, planted with single herbs, look adorable grouped together.
The practical reality: the volume of soil is very small, so these dry out fast and don’t sustain large plants.
Best herbs for this format: chives (slow-growing and compact), or using the cups as seed-starting pots rather than permanent homes. A nice gift idea too, if you’re growing herbs for someone else.
Idea 12: Hydroponic countertop garden
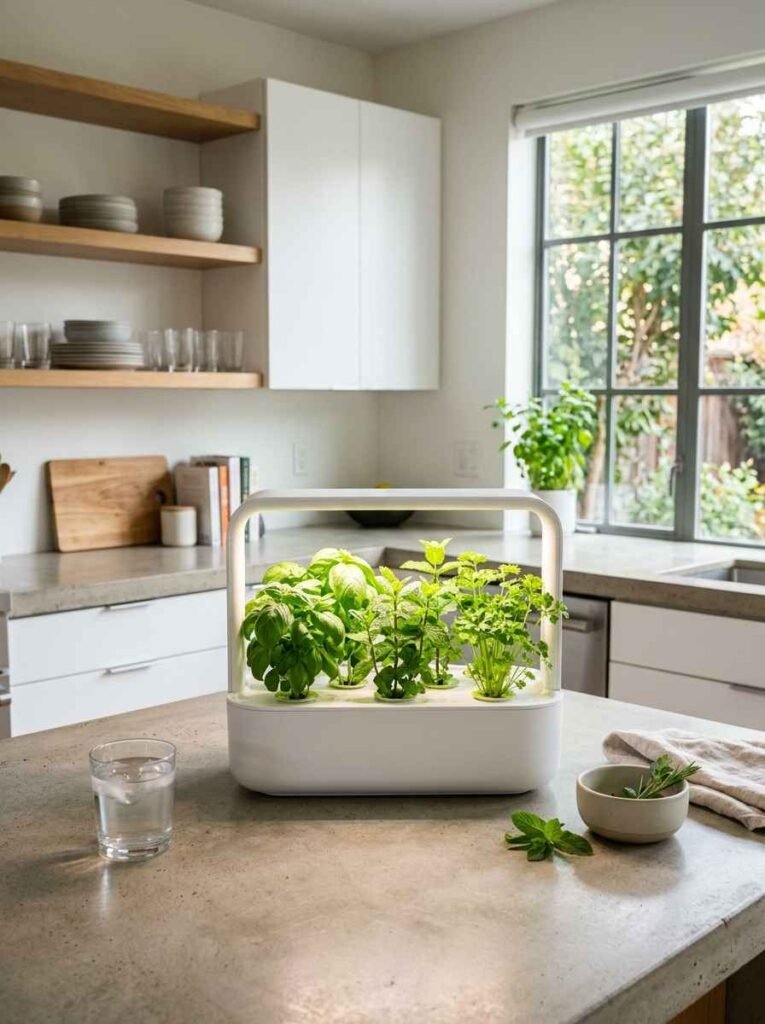
The AeroGarden (and similar brands like iDOO) is a hydroponic system where herbs grow in water with liquid nutrients rather than soil.
Plug it in, add the pods, add water and nutrient solution, and herbs grow about twice as fast as soil-grown plants.
Wow, the speed difference really is noticeable. I grew basil in an AeroGarden alongside a pot-grown basil plant started the same week, and the hydroponic one was harvestable 12 days earlier.
The downside: these cost anywhere from 3,000 to 8,000 Rs for a quality unit. And buying replacement pods adds up. For someone who cooks with herbs daily, it pays for itself. For casual growers, a few pots near a window is probably enough.
Idea 13: Stepped ladder shelf
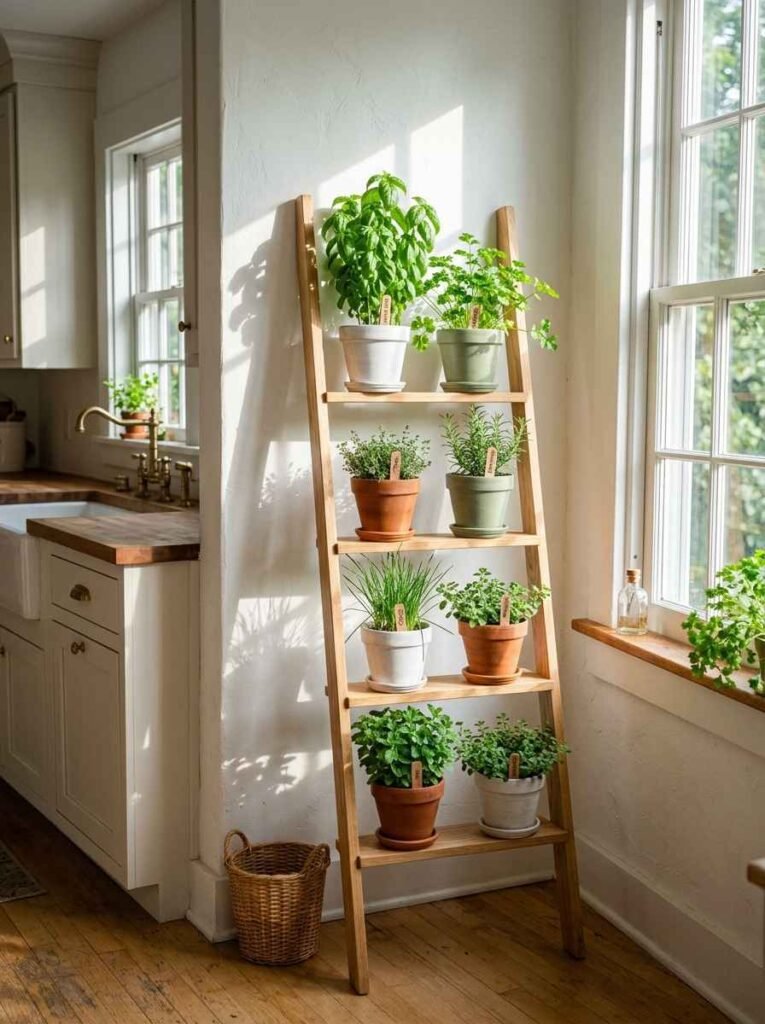
A small wooden ladder shelf (leaned against a wall, not attached) holds multiple pots at different heights and takes up almost no floor space.
Very popular on Pinterest for good reason: it looks like a purposefully designed installation.
Keep the bottom rungs for decorative pots or less-used herbs, and put your most-used herbs (basil, chives) at the top where they get the most light and you reach them most easily.
Idea 14: Repurposed rain boots or rubber duck planters
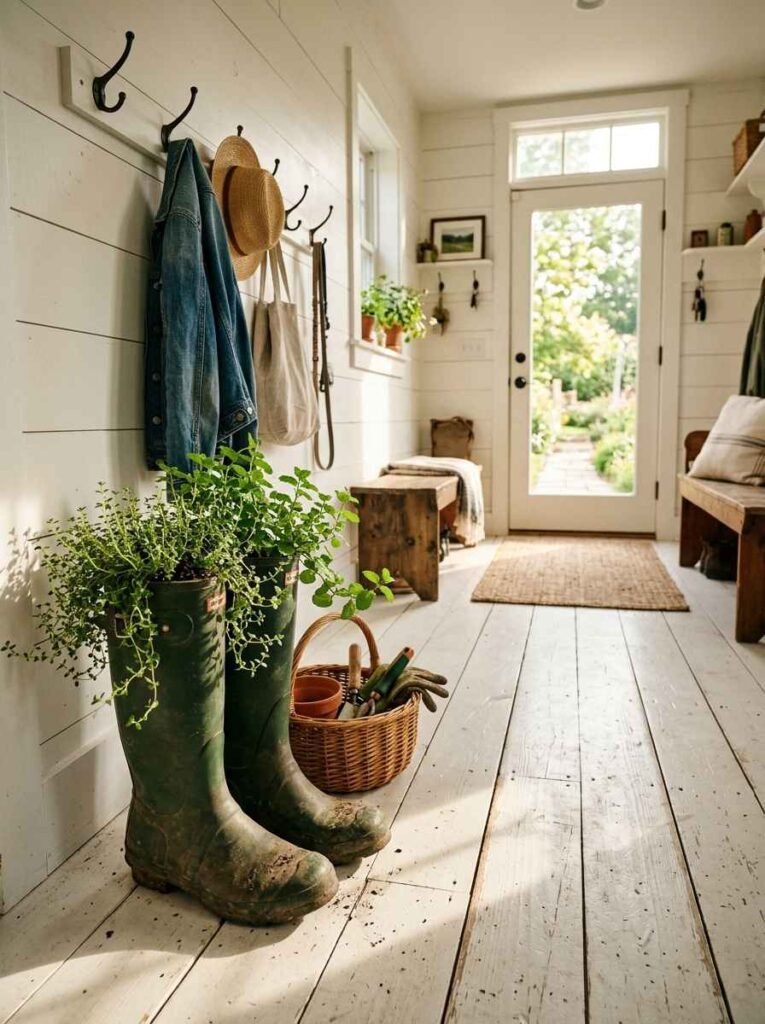
I mention this purely because it comes up constantly in Pinterest herb garden boards, and people genuinely do it.
Old rubber boots filled with potting mix, drainage holes punched in the soles, planted with trailing herbs like thyme or mint.
Does it work? Yes, actually. Rubber holds moisture reasonably well. Does it look good? Depends entirely on your kitchen aesthetic.
I think it’s charming. My partner thinks I’ve lost the plot. IMO, that’s the hallmark of great Pinterest content.
Idea 15: Herb garden in a bathroom window
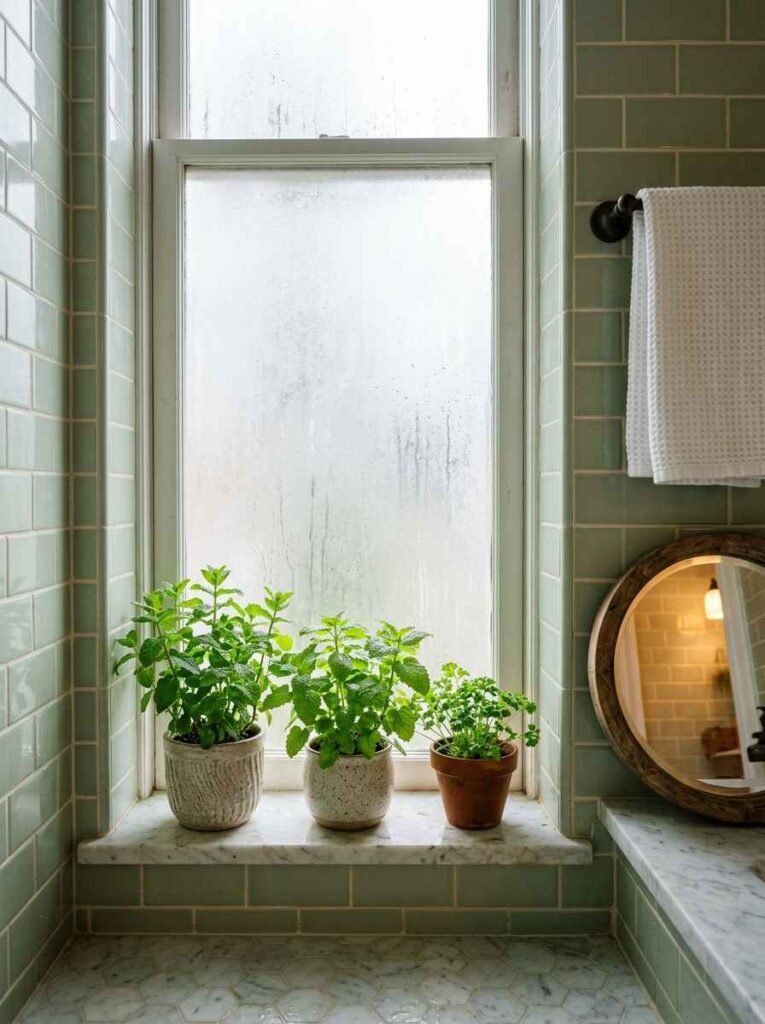
If your bathroom gets decent natural light (a frosted glass window that still lets light through, or a clear window in a private space), humidity-loving herbs do well in there. Mint, in particular, loves the higher ambient moisture.
Just check that the window gets actual light and not just a dim northern exposure. Herbs in a dark bathroom will struggle and get leggy.
Idea 16: Propagating from grocery store herbs
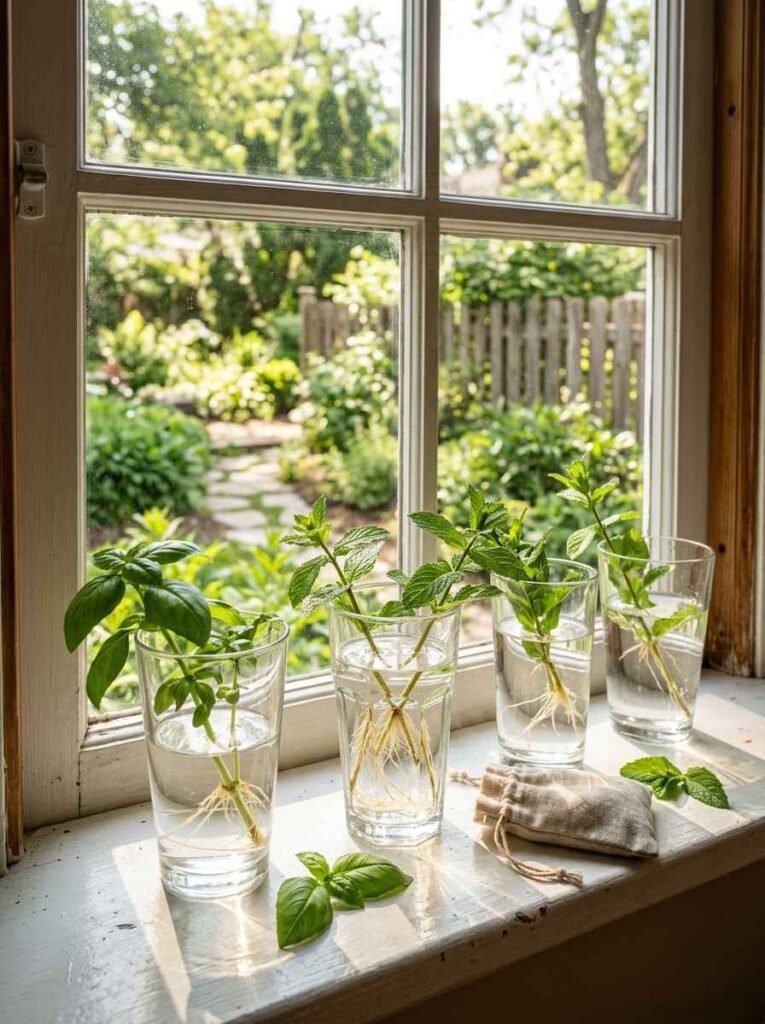
You can skip buying seedlings entirely by propagating from supermarket herb bunches. This works particularly well with basil and mint.
Step-by-step
- Buy a fresh bunch of basil or mint
- Cut the stems at a 45-degree angle, just below a leaf node
- Strip the lower leaves, leaving 2 to 3 leaves at the top
- Place stems in a glass of water on a windowsill
- Change the water every 2 days
- Wait 7 to 14 days for roots to develop (basil roots faster than mint)
- Once roots are 2 to 3 cm long, pot into soil
The success rate is high enough that this is genuinely the cheapest way to start an herb garden. Grocery store basil bunches are often around 20 to 40 Rs. A rooted cutting costs you nothing beyond soil and a pot.
Idea 17: Labelled apothecary jar display

This is more display than growing medium, but I’ve seen it work as a kitchen aesthetic: amber or clear glass apothecary jars filled with dried herbs from your own garden, labeled with handwritten tags. You grow the herbs in regular pots, dry them, and store them in jars.
It looks beautiful, keeps dried herbs fresh for months, and uses up the overflow when your plants produce more than you can use fresh.
Idea 18: Hanging glass globe planters
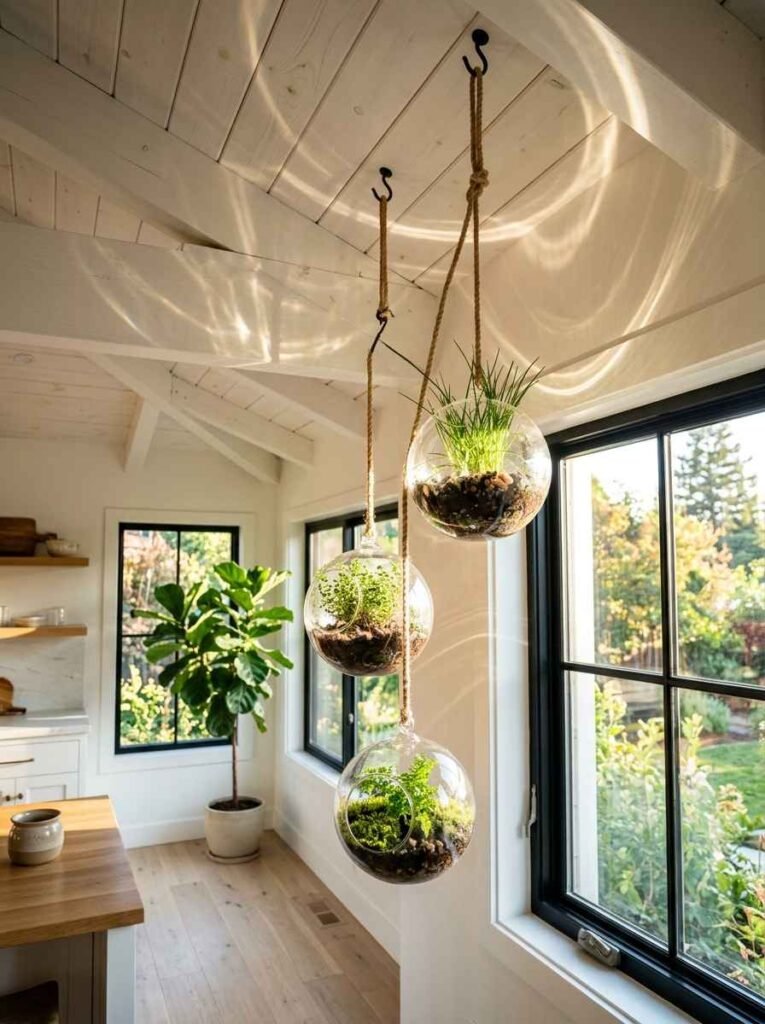
Glass globe terrariums hung at different heights near a window look stunning. They’re better suited to small, slow-growing herbs (thyme, chives) because the glass traps heat and limits air circulation for larger plants.
Add a small layer of activated charcoal before soil to prevent bacterial buildup. Water sparingly because these don’t drain.
Idea 19: Recycled wine bottle watering system
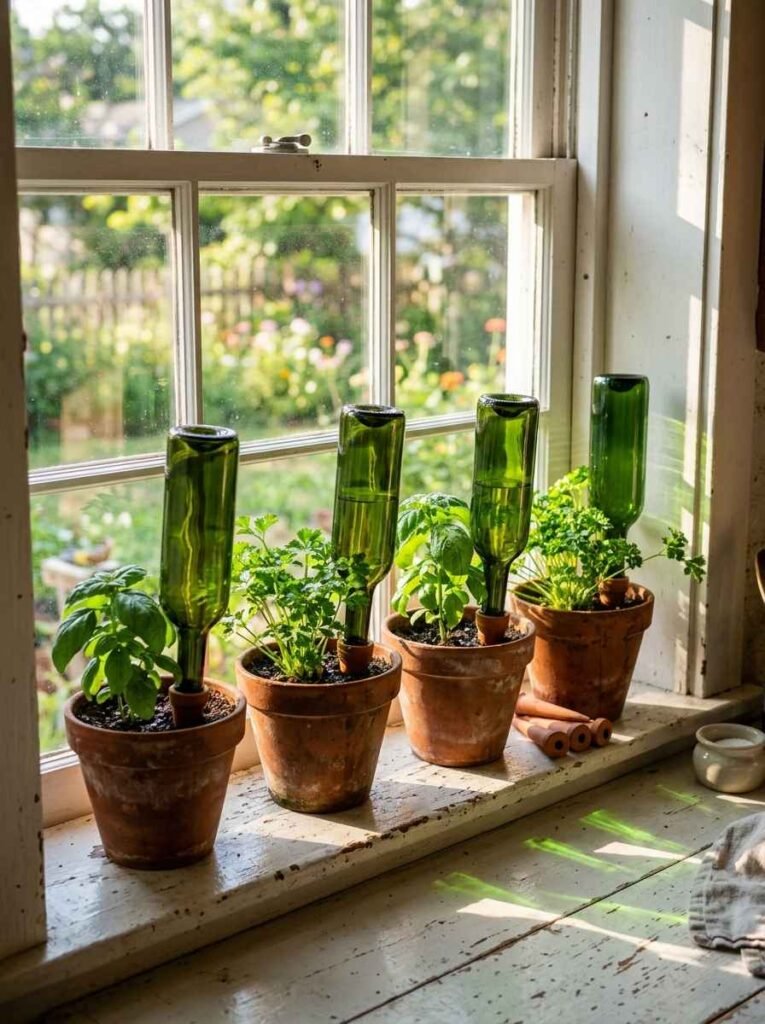
Okay, this is a technique more than a garden idea. Fill an empty wine bottle with water, cap it with a terracotta watering spike (sold for around 100 Rs each), insert it into your pot upside down, and it slowly releases water over 5 to 7 days.
I used these during a 10-day trip and came back to completely healthy basil and parsley. They work. Pick them up from any garden center or online.
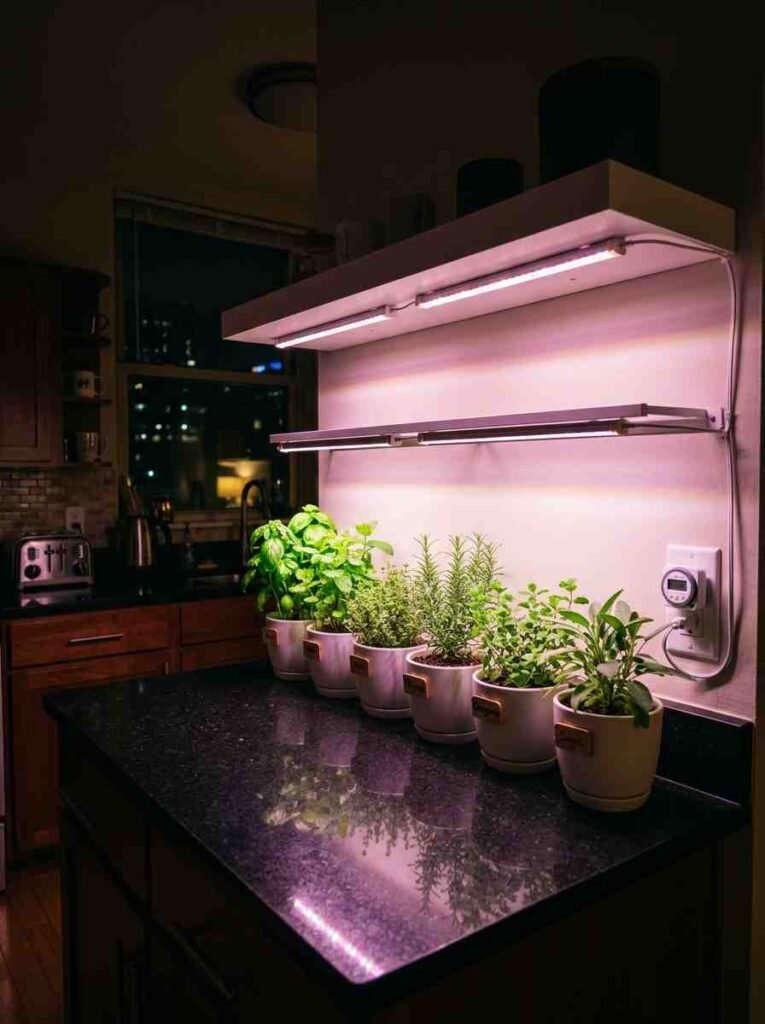
Idea 20: The dedicated herb shelf
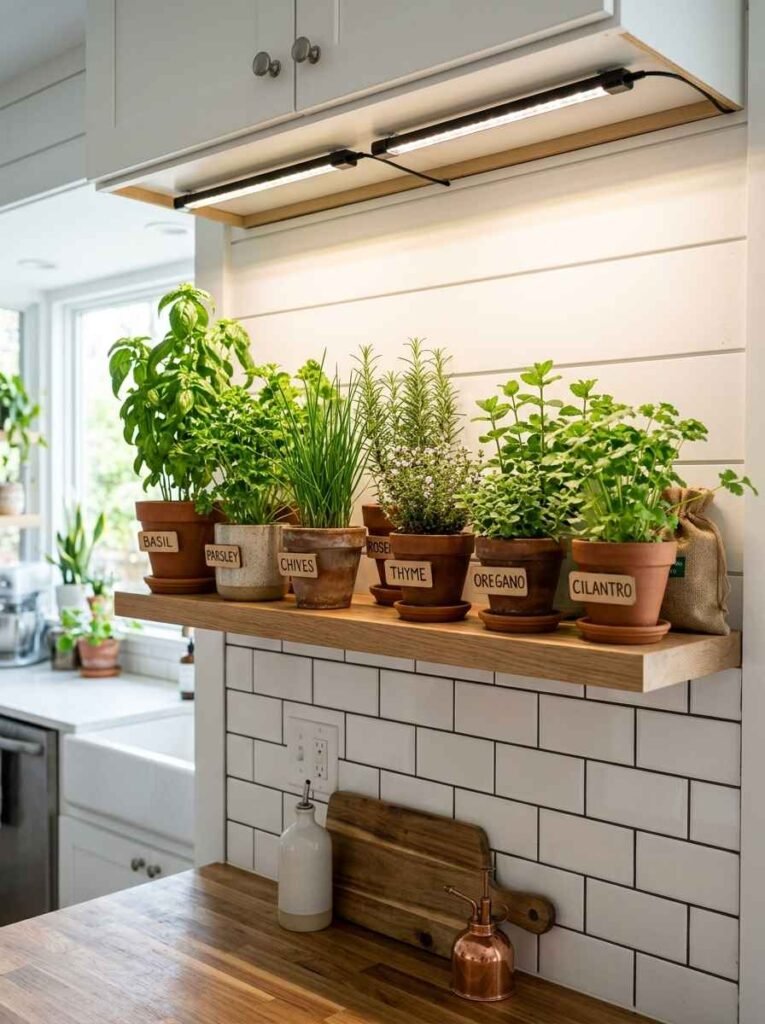
The final idea is also the most committed one: dedicate an entire floating shelf or small bookshelf entirely to herbs, with a grow light mounted underneath the shelf above (to light the shelf below it),
and labeled pots arranged by cooking use: baking herbs on one end, cooking herbs in the middle, teas and drinks on the other end.
This is the setup I have now. 8 pots, 2 grow light strips, one shelf. It takes up about 90 cm of wall space and gives me fresh herbs year-round, regardless of the season or whether I remember to open the blinds.
Common beginner mistakes (and quick fixes)
Overwatering. The number one killer of indoor herbs. Before watering, push your finger 2 cm into the soil. Water only when it feels dry at that depth.
Pots without drainage. Roots sitting in standing water develop rot within days. Either use pots with holes or add a gravel layer to pots without them.
Not harvesting enough. Herbs grow back when you cut them. Harvesting regularly actually encourages bushier growth. If you only snip a tiny bit occasionally, the plant puts its energy into flowering and seeds instead.
Using garden soil indoors. Garden soil compacts in pots and doesn’t drain properly. Use a potting mix or a soilless medium specifically sold for container planting.
Ignoring light. Most herbs need at least 6 hours of direct light. A few feet back from a window drops light levels dramatically. Measure with a light meter app on your phone (free, reasonably accurate) if you’re unsure.
Frequently asked questions
Q: Can I grow herbs indoors without any natural light? Yes, but you’ll need a grow light. Full-spectrum LED grow lights (check options at sites like Amazon India or local nurseries) work well for most kitchen herbs.
Set the light timer to run 14 hours per day for sun-loving herbs like basil. The University of Maryland Extension has a helpful guide on indoor plant lighting if you want to get more specific.
Q: How often should I water indoor herbs? Once every 2 to 3 days for most herbs in summer, once every 4 to 5 days in winter when growth slows.
The finger test (2 cm into soil) is more reliable than a schedule. Soil type, pot size, temperature, and humidity all affect drying speed. The Royal Horticultural Society has a solid herb care reference that breaks this down by variety.
Q: Why do my indoor herbs keep dying? Usually one of 4 reasons: overwatering, too little light, a pot too small for the root system, or buying supermarket herbs that were grown in greenhouse conditions and never adapted to home environments.
Starting from seed or from a plant nursery (rather than a supermarket bunch) often gives you a more resilient plant.
Final thought
Growing herbs indoors isn’t complicated, but it does reward attention. The people who succeed at it long-term are the ones who check on their plants regularly,
actually cook with what they grow, and don’t get too attached to any single pot (because some will die, and that’s fine).
The 20 ideas above range from a mason jar on your windowsill to a full dedicated shelf with grow lights. Pick one that matches how much effort you want to put in right now, and upgrade from there.
So, which herb are you starting with? Drop a comment or save this for your next trip to the nursery.