
Your entryway is the first thing people see when they walk in. And let’s be real, most mud rooms look like a pile of coats had a fight with some shoes and nobody won.
Board and batten fixes that fast, and it does it with style.
I’ve spent way too many Saturday afternoons obsessing over entryway makeovers on Pinterest, and board and batten keeps showing up for a reason.
It’s one of those upgrades that looks expensive but genuinely isn’t, and once you see it done right, you can’t unsee it everywhere.
So here’s 23 ideas to steal, adapt, and make your own
Why Board and Batten Works So Well in a Mud Room
Before we get into the ideas, let me tell you why this specific wall treatment belongs in an entryway more than anywhere else in the house.
It adds visual weight to a space that usually gets zero design attention. Most mud rooms are just a hallway with hooks, maybe a bench if you’re lucky.
Board and batten turns that forgotten corridor into something that actually looks intentional.
It also hides a ton of sins. Scuffs, dents, random marks from kids and bags and everything else that hits your walls daily?
Way less noticeable when you’ve got structured panels running vertically. Trust me, I learned this the hard way.
Classic Board and Batten Styles
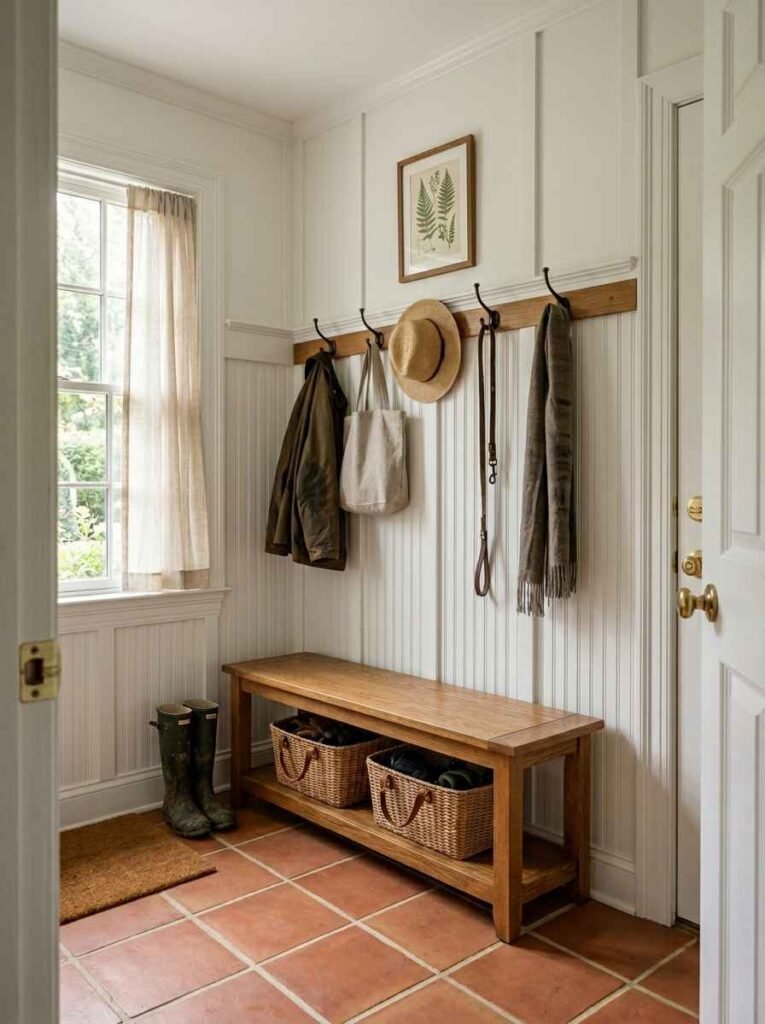
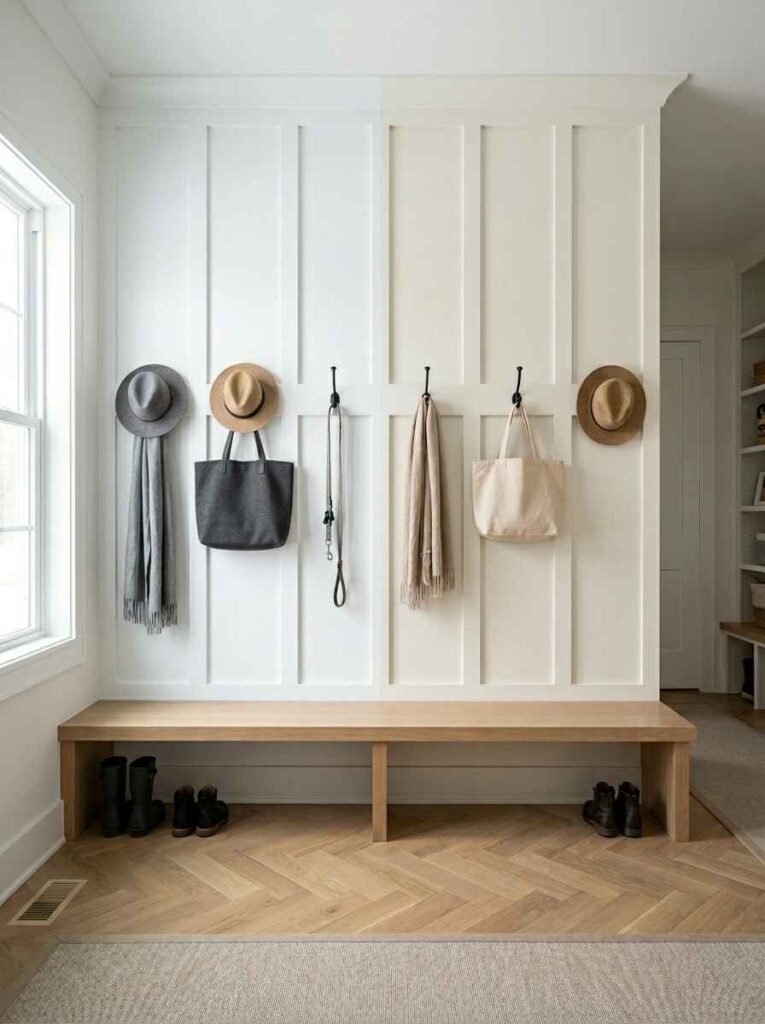
The All-White Traditional Look
White board and batten is the most pinned version of this idea, and honestly, it earns that spot.
Clean, timeless, pairs with literally any flooring. You install the battens at even intervals, paint everything the same crisp white (Benjamin Moore Chantilly Lace is the crowd favourite, FYI), and suddenly your mud room looks like it belongs in an interior design magazine.
The trick is going floor to ceiling. Half-wall installs look okay. Full-height installs look wow.
Painted a Bold Colour
Here’s where it gets fun. Take the same classic board and batten structure and swap the white for something with nerve. Navy. Forest green. Charcoal. Deep terracotta.
I painted mine a moody sage green once and genuinely stood there staring at it for a solid five minutes when it dried.
It completely changed the energy of the space. Bold colour on board and batten reads as sophisticated rather than overwhelming because the structure breaks it up.
Two-Tone: Batten One Colour, Wall Another

This is the designer trick people don’t talk about enough. Paint the board and batten a lighter shade, and the wall above a slightly darker tone of the same colour family.
Or flip it. The contrast draws the eye and makes the architectural detail pop even more.
Small info table to help you pick your combo:
| Wall Colour | Batten Colour | Vibe |
|---|---|---|
| Warm white | Soft grey | Clean, quiet |
| Deep navy | Crisp white | Bold, classic |
| Sage green | Cream | Earthy, cosy |
| Charcoal | Light warm grey | Dramatic, modern |
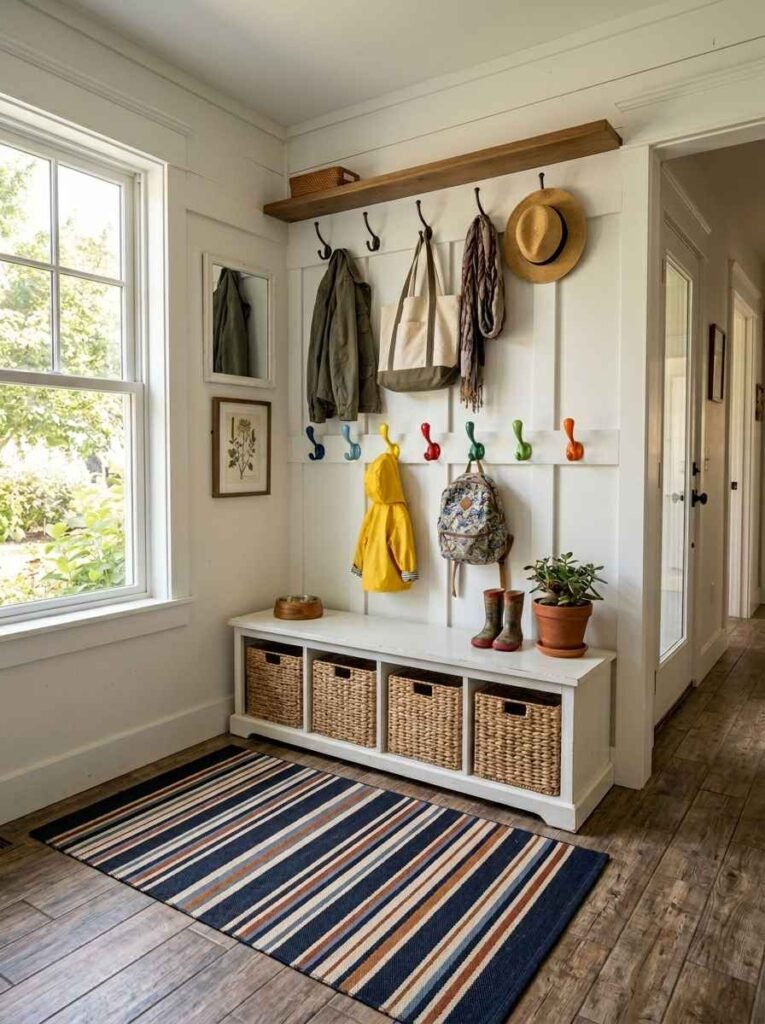
Board and Batten with Built-In Storage
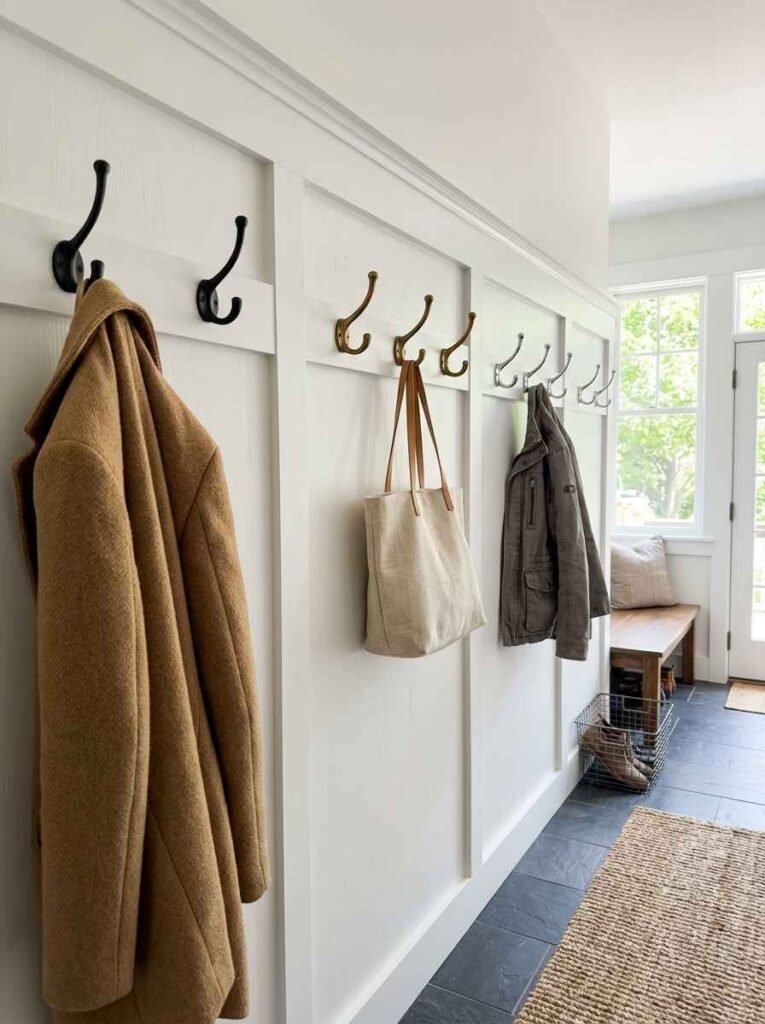
Hooks Mounted Directly Into the Battens
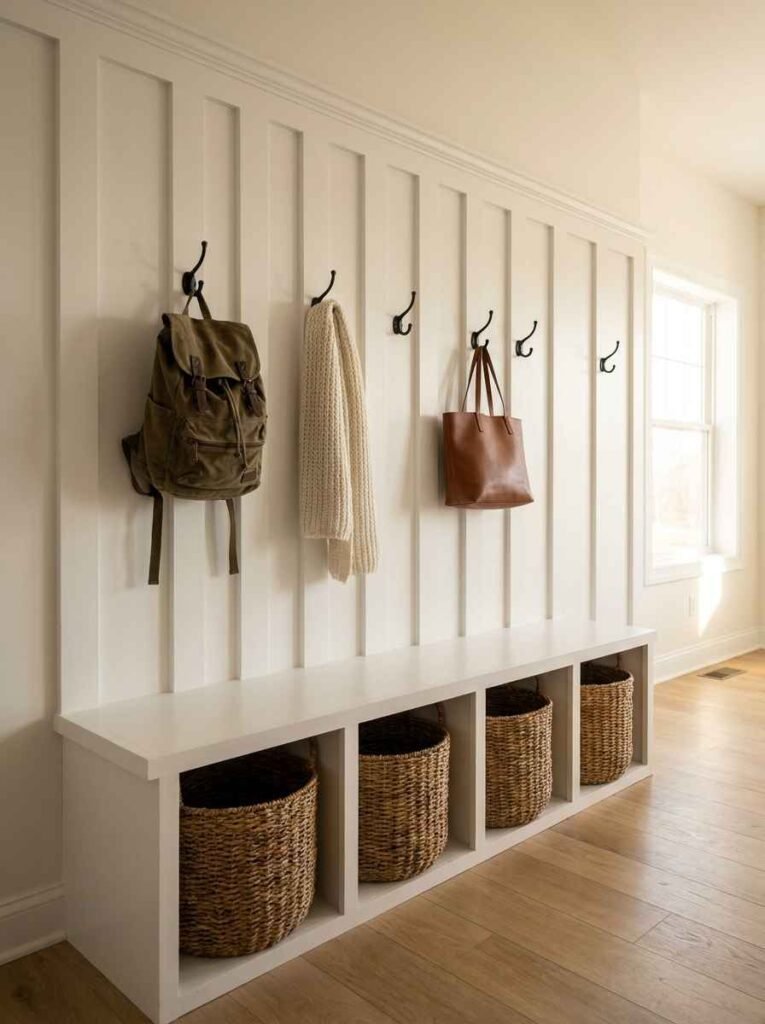
This is one of the most practical setups you can do. Space your battens strategically so you can mount hooks directly into the vertical boards.
The battens give you solid backing, which means no hunting for studs and no wobbling hooks six months later.
I used black matte coat hooks for this in my own place. Looked clean, held everything, and the install was genuinely easy.
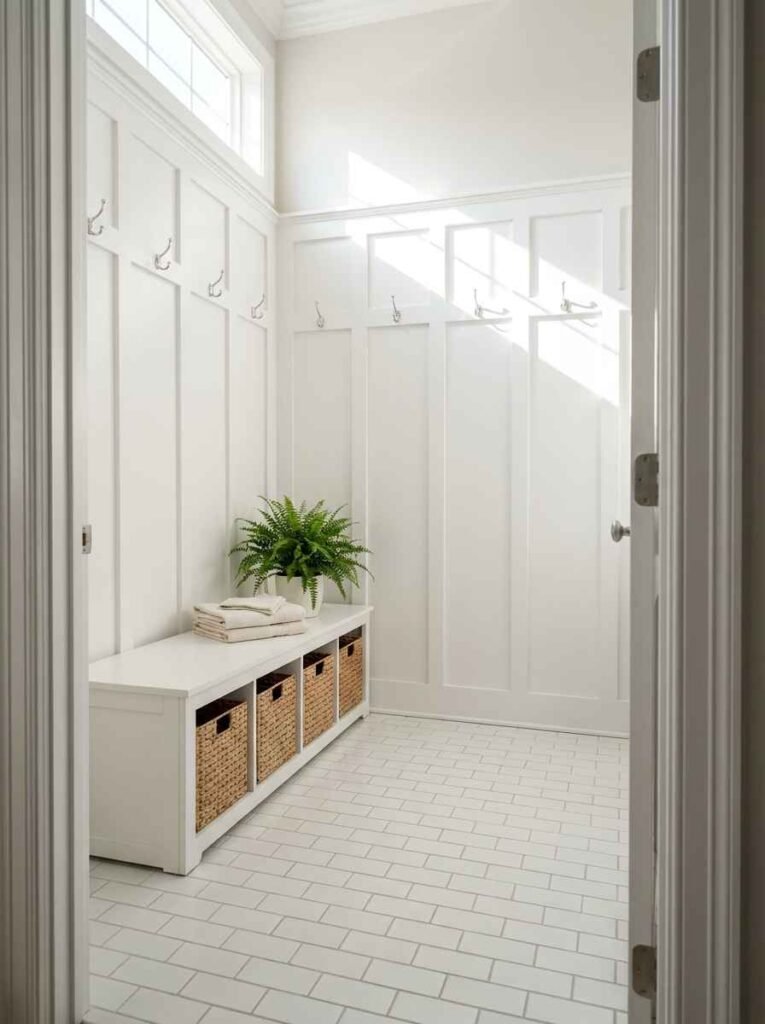
The Full Built-In Bench Situation
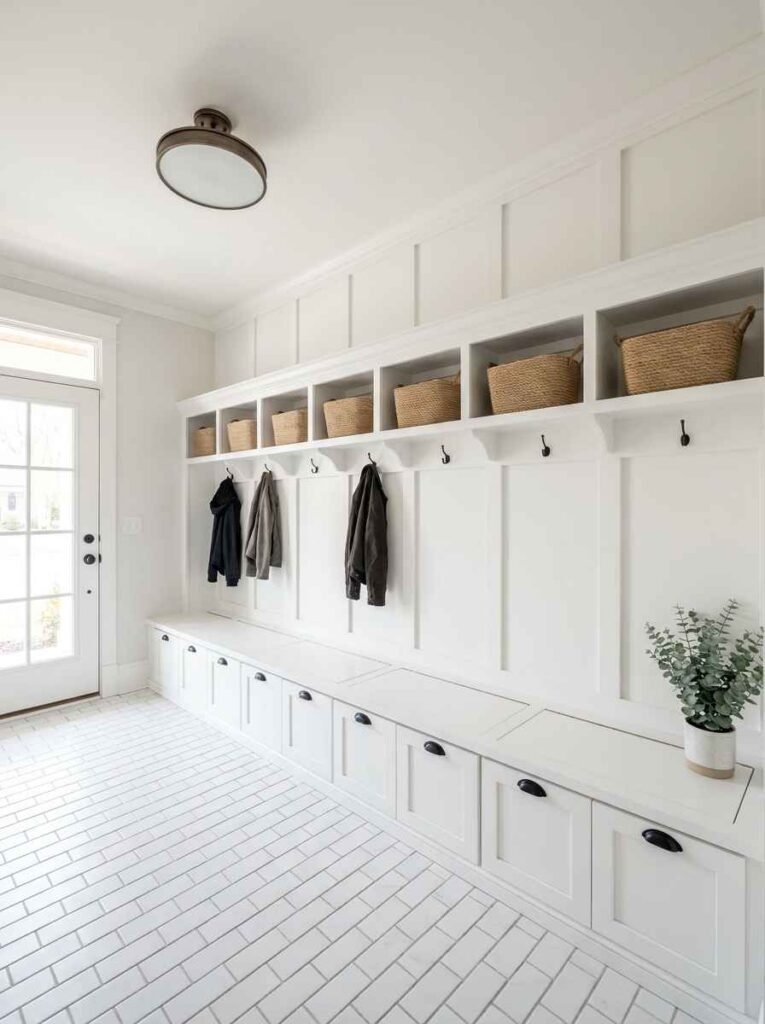
This is the Pinterest holy grail right here. Board and batten runs up the wall, a bench with lift-up storage sits against the base of it, and everything looks like it was always meant to be there. It’s more of a project than just wall panels, but the result is worth every hour.
Use the same paint for the bench and the wall panels to make it look built-in even if it technically isn’t.
Cubbies Between the Battens
Space your battens far enough apart to create functional cubbies between them. Add a small shelf at the midpoint of each cubby for shoes, and you’ve got a system that works as hard as it looks good.
Honestly, this approach works best if you’re starting from scratch. Retrofitting it into an existing layout is possible but gets complicated fast.
Mud Room Board and Batten with Different Heights
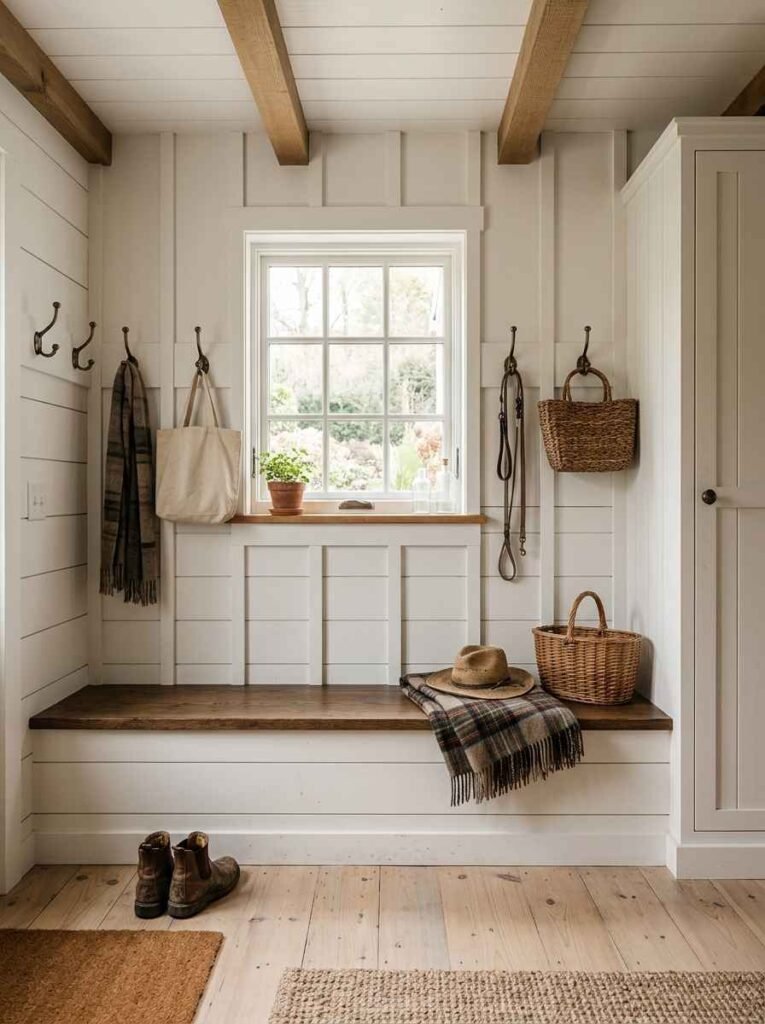
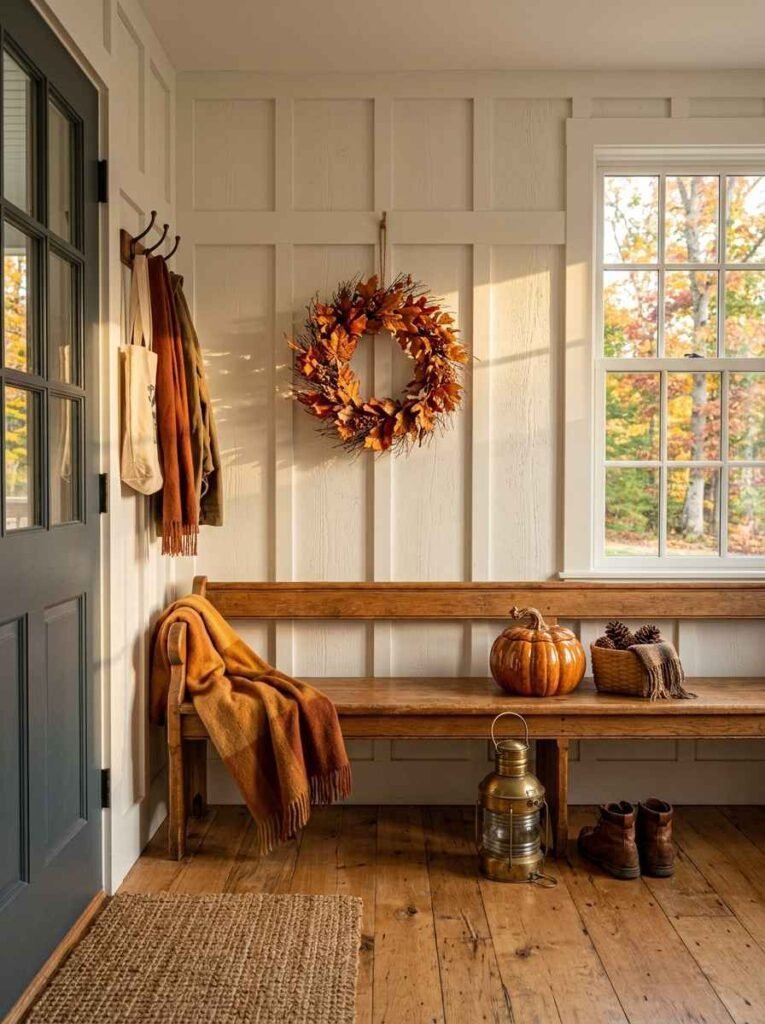
Wainscoting Height (Lower Third of Wall)

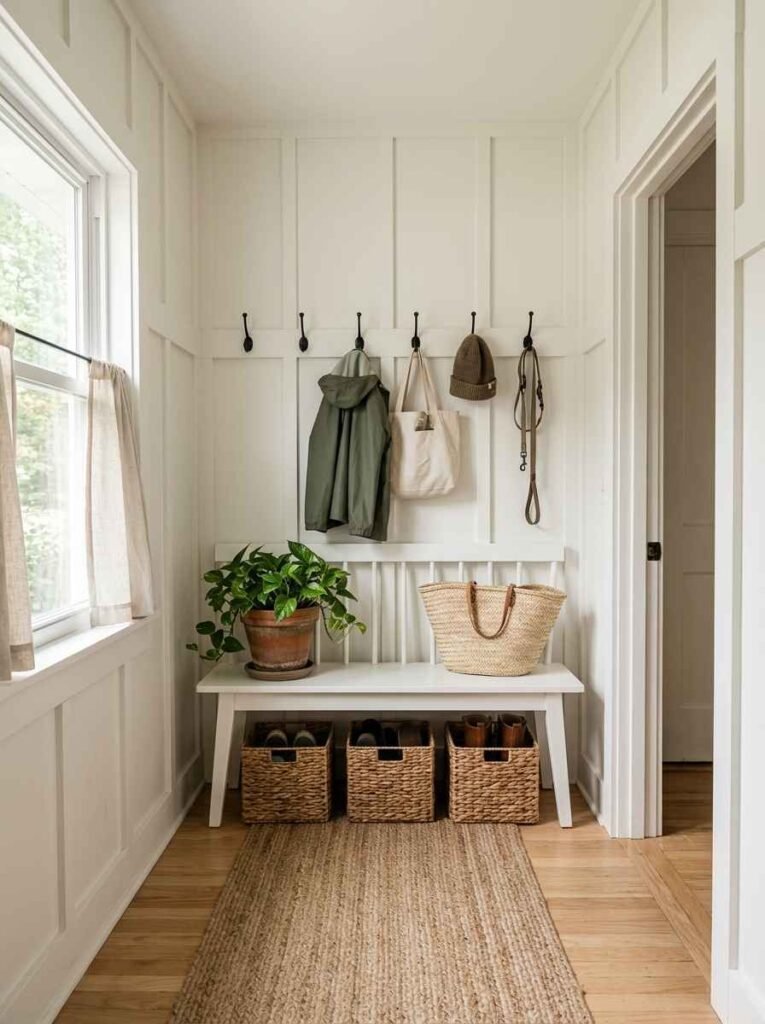
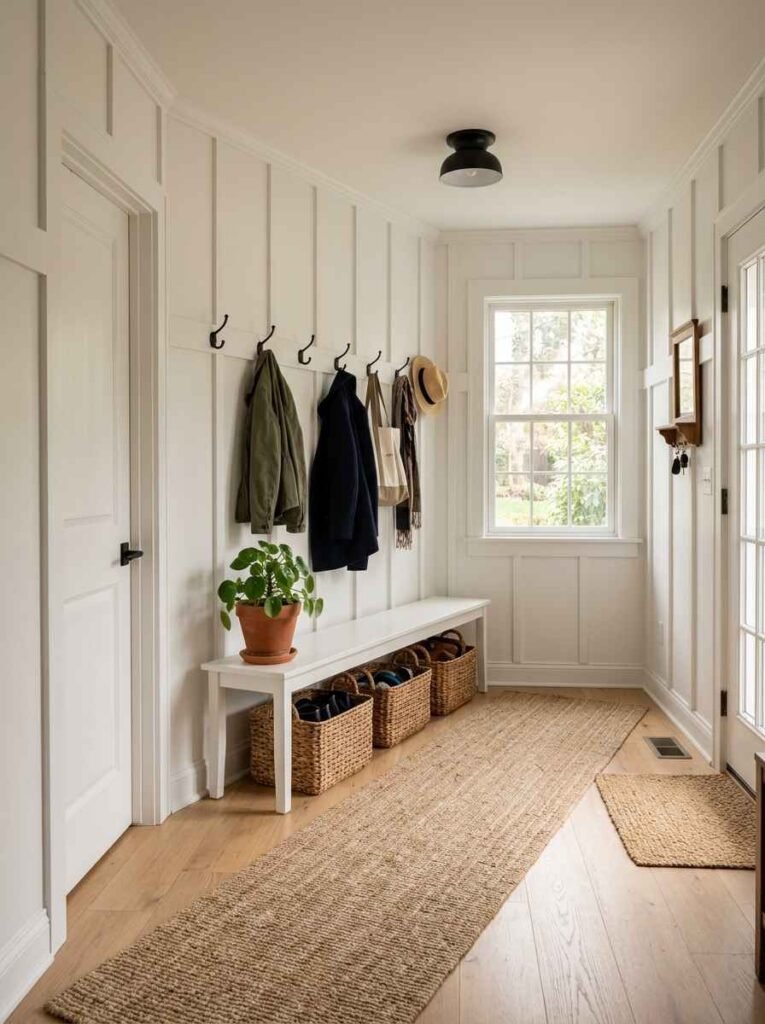
If you don’t want to commit to full-height panels, stop at wainscoting height, around 36 to 42 inches.
Cap it with a flat rail and use that rail as a small shelf for keys, sunglasses, the stuff you need on your way out.
This is the easier install and still makes a massive difference. Good entry point if you’re a first-timer.
Chair Rail Height with Wallpaper Above
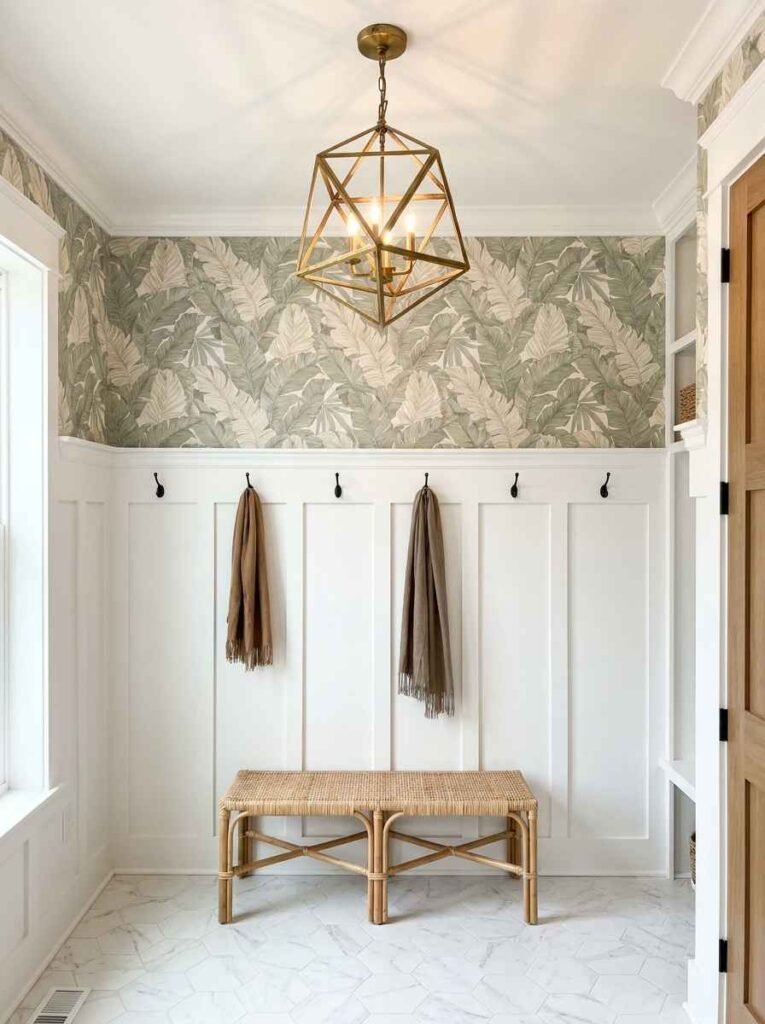
Run your board and batten to chair rail height, cap it, and put a fun wallpaper or even a bold paint colour on the upper wall.
The board and batten anchors the look while the wallpaper adds personality. This combo is huge on Pinterest right now, and rightly so.
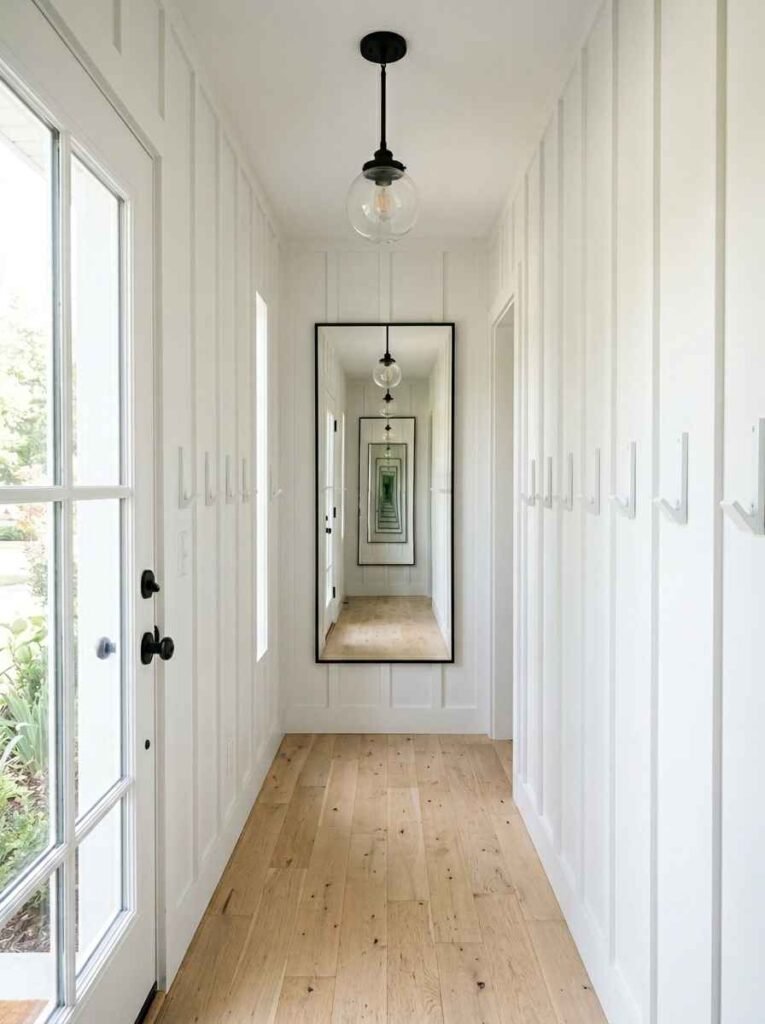
Full Floor-to-Ceiling Drama

Already mentioned this but it deserves its own section because the impact is just different. Going all the way to the ceiling makes the room feel taller, more architectural, more finished. If your mud room ceiling is low, this trick is your best friend.
Texture and Material Variations
Shiplap Hybrid
Mix horizontal shiplap on the lower half with vertical battens above, or run shiplap behind the battens to create depth.
It’s a little more work but adds serious texture that photographs incredibly well. Good for those Pinterest-worthy shots if that matters to you.
Beadboard Panels as the Base
Instead of a plain flat wall between your battens, install beadboard. The subtle texture of the beadboard between smooth battens adds dimension without going overboard.
Classic American farmhouse look. Timeless. Still relevant. Won’t look dated in five years.
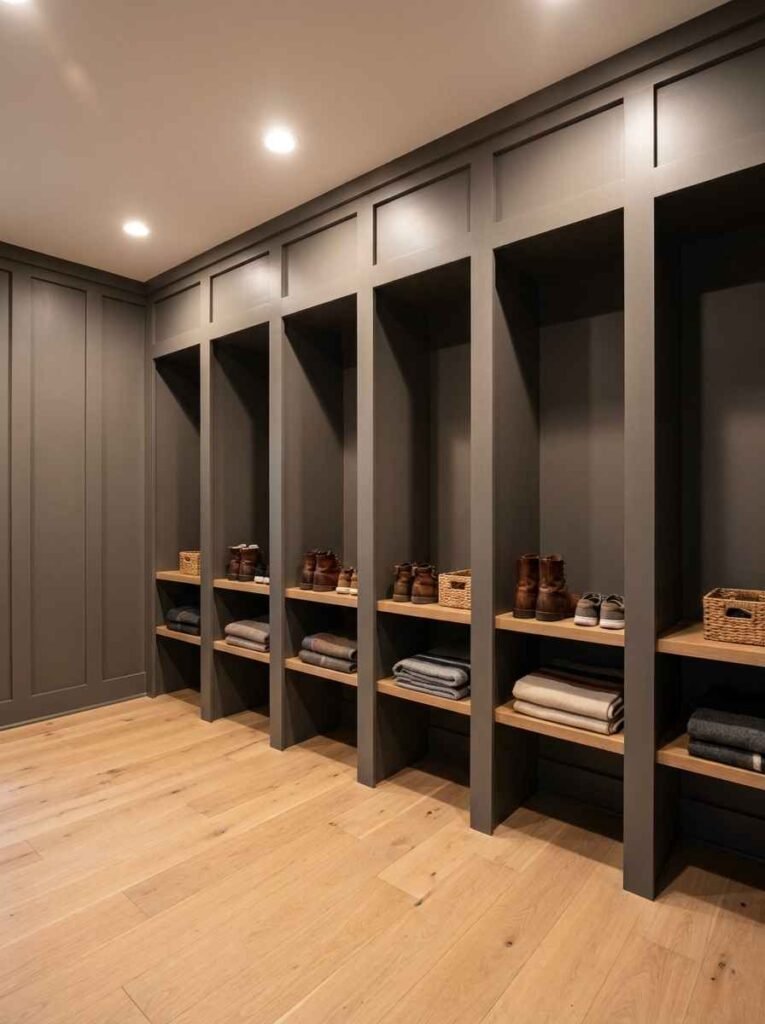
Dark Stained Wood Battens on White Wall
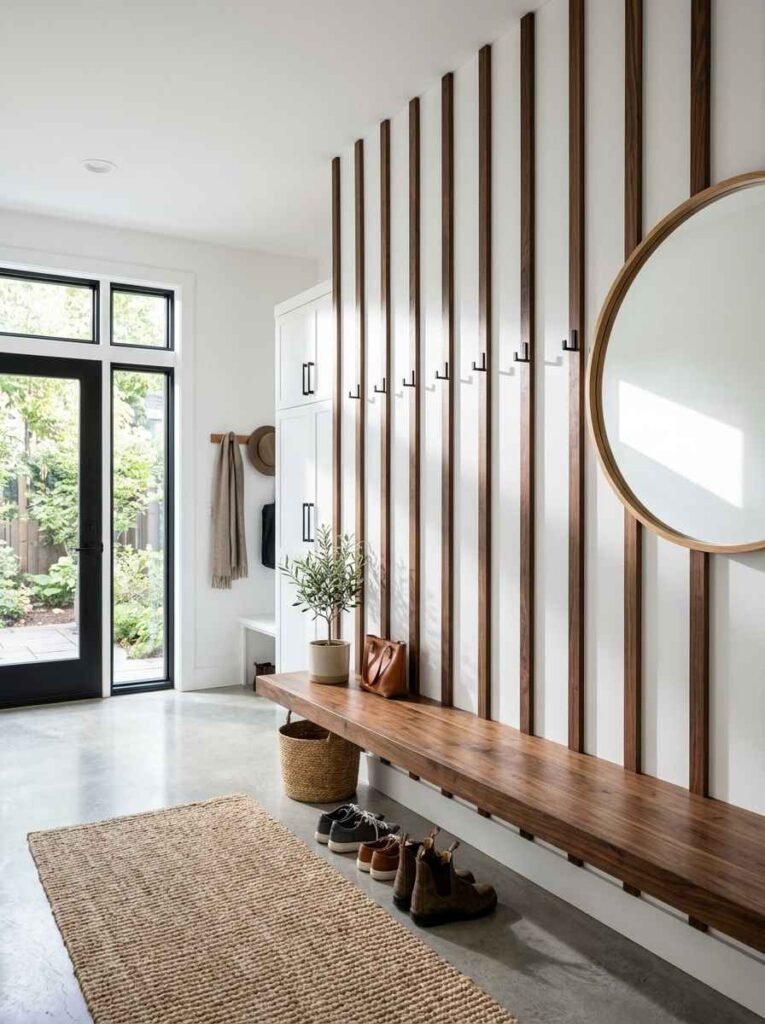
Here’s one that feels fresh: white painted wall, but the battens themselves are stained wood. Dark walnut.
Warm oak. The natural grain against a clean white background looks modern and warm at the same time.
I’ll be honest, I thought this might look awkward. It absolutely does not. It’s one of the cooler variations I’ve seen executed well.
Styling Around the Board and Batten
Mirrors Between the Panels
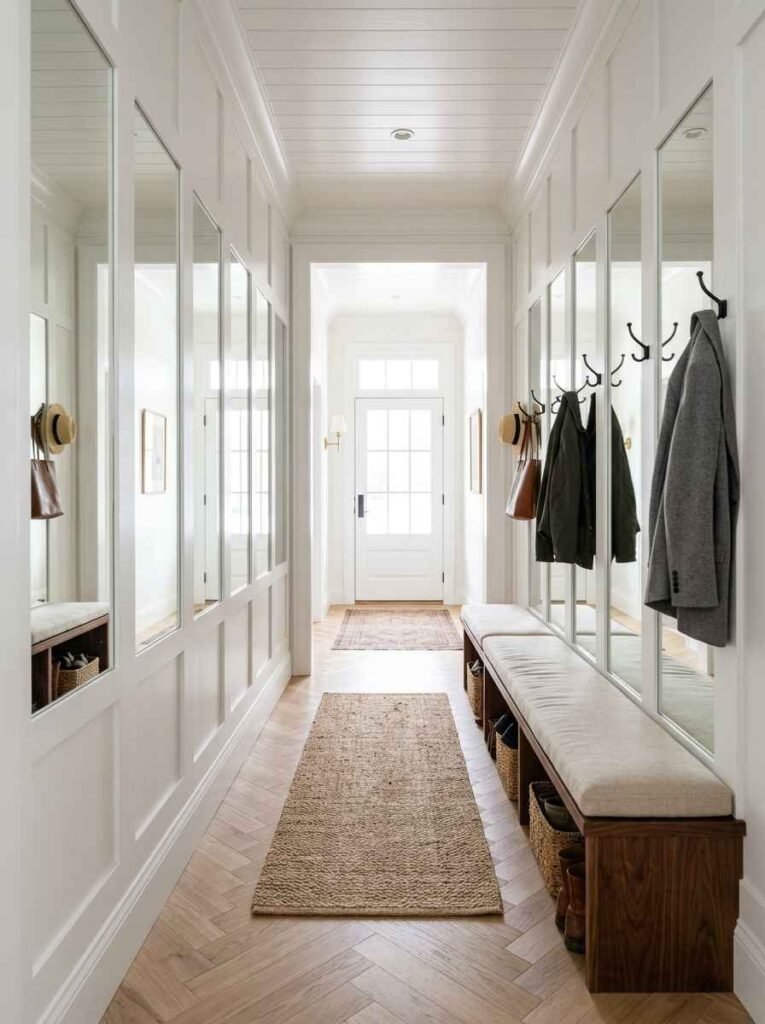
A slim vertical mirror mounted between two battens does two things: it bounces light into what’s usually a dark entryway,
and it gives you somewhere to check yourself before heading out. Practical and killer-looking.
Art Gallery Wall Above the Rail
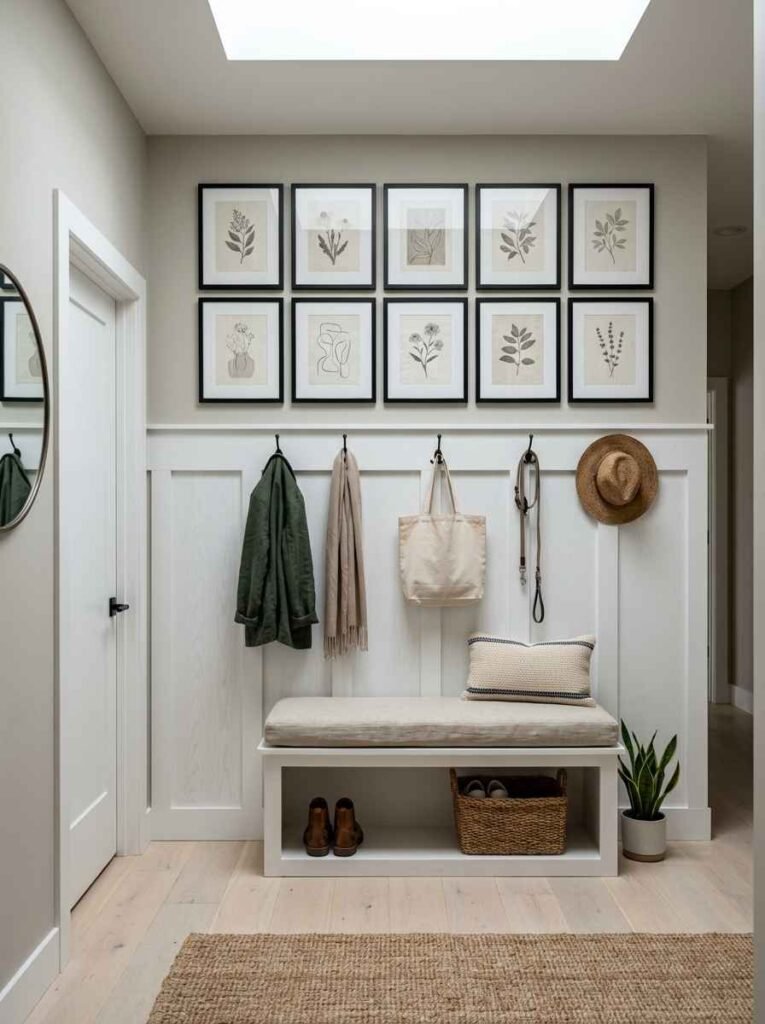
If you stopped your battens at mid-wall height, use the upper portion for a tight gallery wall of framed prints.
Keep the frames uniform for a polished look, or mix them if you want something more casual. The board and batten below gives the gallery wall a grounded, structured base.
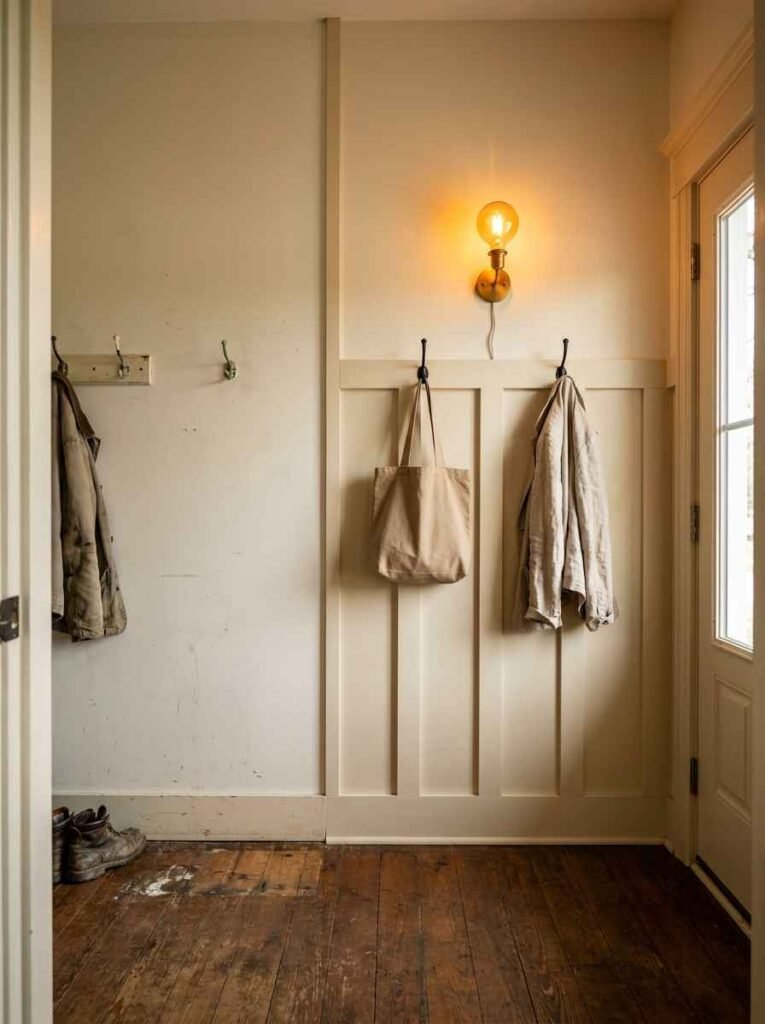
Lantern-Style Sconces on the Battens
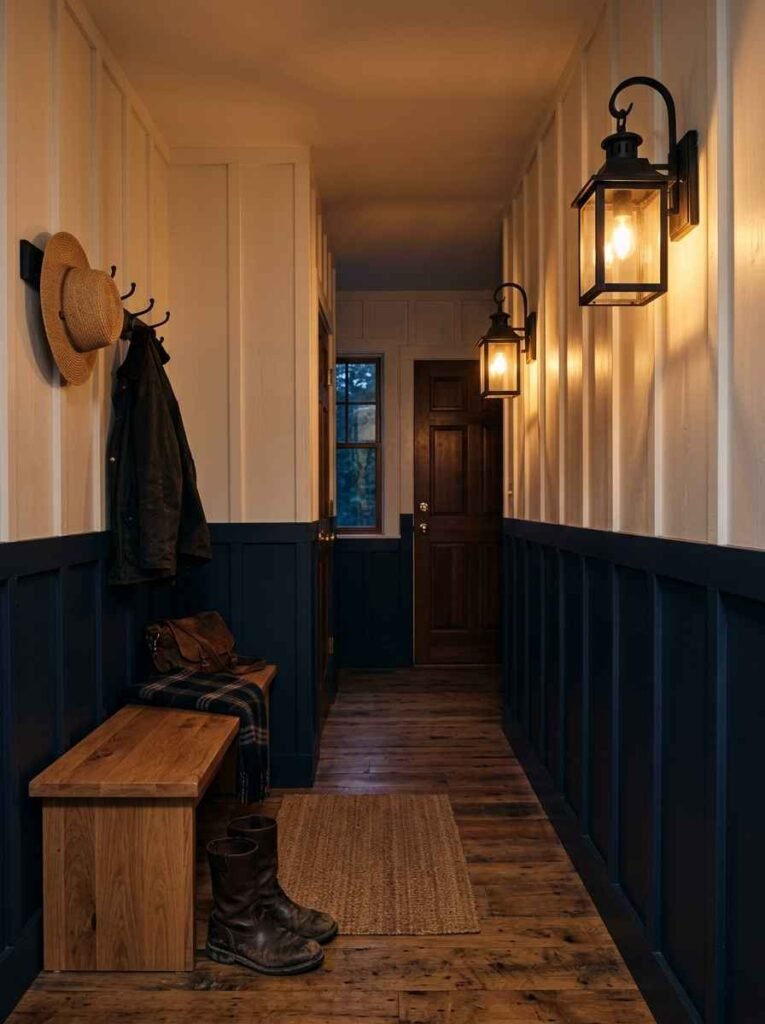
Mounting wall sconces directly onto your board and batten wall elevates the space from “nice DIY project” to “did you hire someone?” territory. Plug-in sconces exist if hardwiring isn’t an option.
The warm light in a mud room is also just genuinely more welcoming than an overhead can light blasting everything from above.
Colour Deep-Dives for Board and Batten Mud Rooms
All the Whites Worth Knowing
Not all whites are the same. Bright whites look crisp and modern but can read cold. Warm whites feel cosier.
Off-whites like linen or cream add softness. For mud rooms specifically, warm whites tend to hold up better visually because the space takes a lot of wear and a warmer tone is more forgiving.
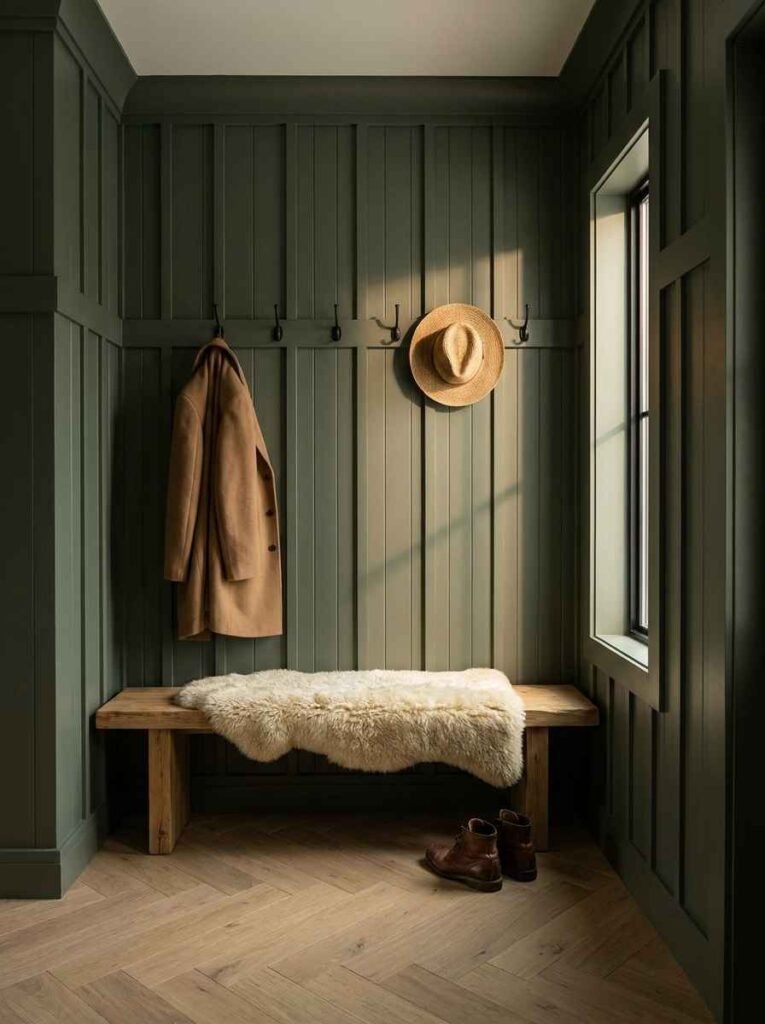
Greens Are Having a Moment
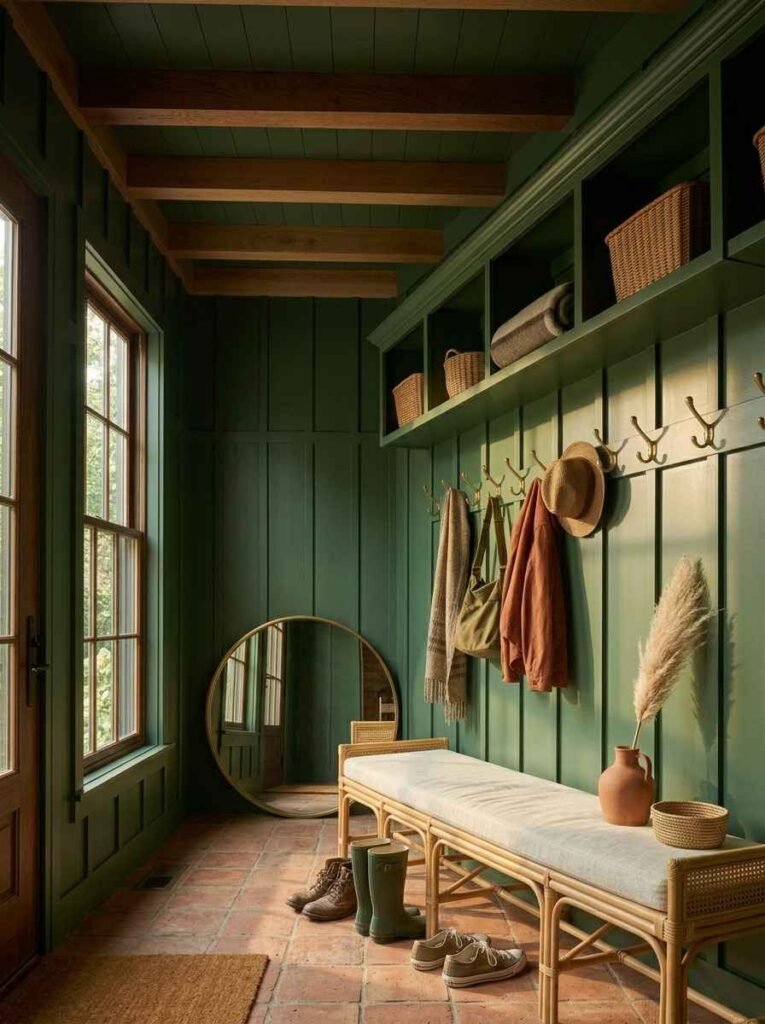
From deep hunter green to soft eucalyptus, every shade of green is showing up in board and batten mud rooms right now. It reads natural, calming, and cool at the same time.
If you’ve been scared of colour on walls, sage green is the lowest-risk entry point. Goes with wood tones, black hardware, white tile, pretty much everything.
Black Is Bold and Correct
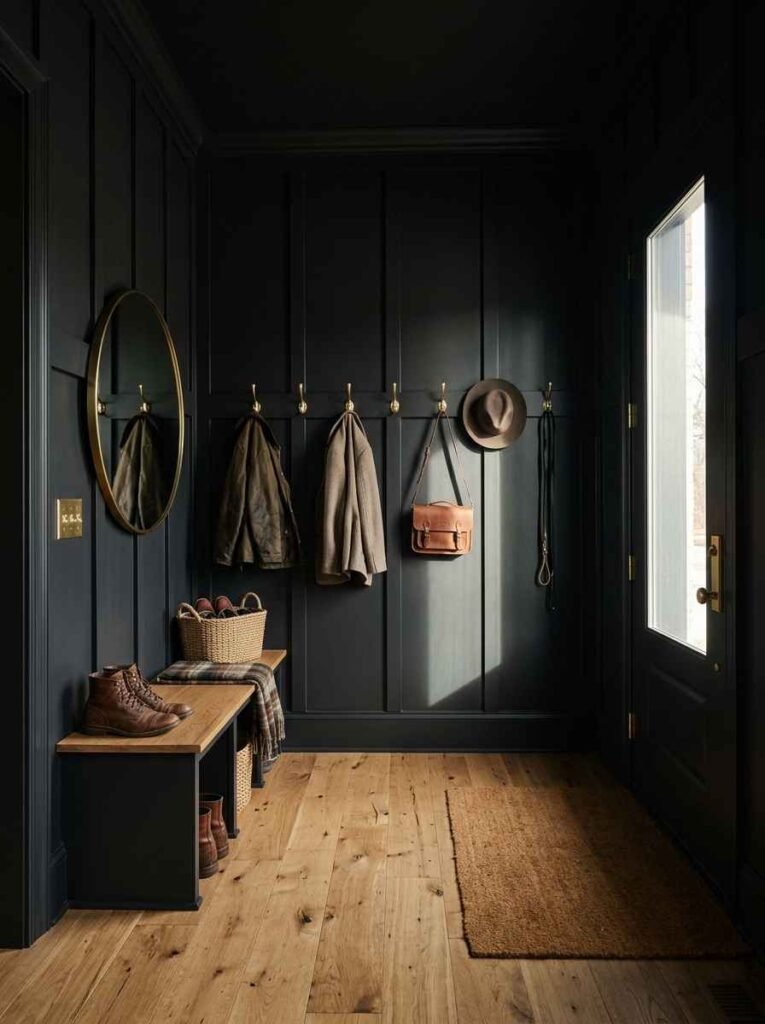
Black board and batten with brass or gold hardware is one of those combinations that sounds like too much and looks like exactly the right amount. It’s dramatic but it’s also grounded.
The structure of the panels keeps it from feeling heavy. If you want a mud room that genuinely stops people in their tracks, this combo does it.
DIY Tips for Installing Board and Batten
What You Actually Need
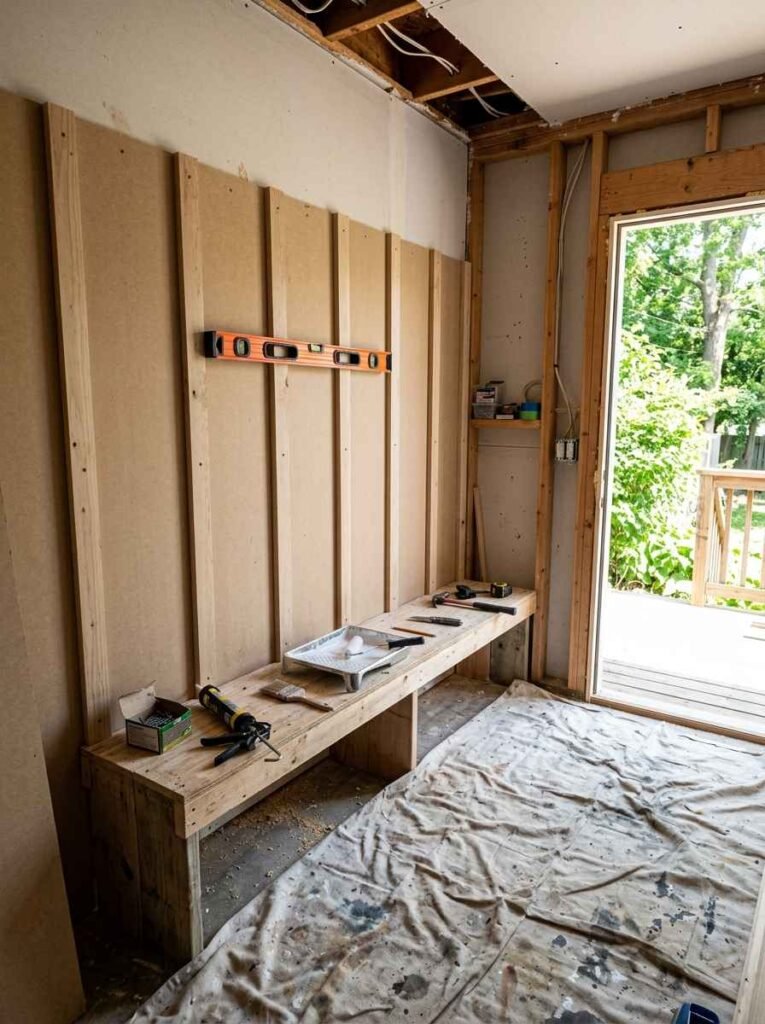
- MDF boards or solid pine (1×4 is the most common batten width)
- A nail gun (or finish nails and a hammer if you’re going old school)
- Construction adhesive for extra hold
- A level (non-negotiable, trust me)
- Sandpaper, caulk, primer, paint
The Spacing Question
No universal rule here, but 8 to 12 inches between battens is the most common range. Wider spacing looks more modern.
Tighter spacing looks more traditional. Walk around your space, hold up a board, see what feels right.
Caulk Everything
Every seam where the batten meets the wall needs caulk before paint. This is the difference between a professional-looking finish and one that looks like a beginner project. Take the extra 30 minutes. You’ll thank yourself.
Mud Room Board and Batten for Small Spaces
Small mud rooms are actually great candidates for board and batten because the structure makes the space feel intentional rather than cramped. A few specific moves that help:
- Use lighter colours to keep it feeling open
- Go vertical with your battens to draw the eye up
- Skip the heavy bench and use wall-mounted hooks instead to keep the floor clear
- A mirror is your best friend in a tight space
Honestly, some of the most awesome board and batten mud rooms I’ve seen are tiny. Constraints force creativity.
Ideas for Families with Kids
Durable Paint Finishes
Kids are going to touch the walls. They’re going to drag backpacks along them. Get a satin or semi-gloss finish. Flat paint in a mud room is a choice, and not a good one. Washable paint is even better.
Lower Hook Rail for Small Hands
Mount a second row of hooks at kid height, around 36 inches from the floor. They can actually hang their own stuff up. You’re welcome. (This one actually worked for me. The getting-them-to-use-it part is a separate challenge that board and batten cannot solve.)
Label the Cubbies
If you built cubbies into your board and batten layout, add a small label or name plaque to each one. Each kid gets a cubby, each cubby has their name on it, and suddenly there’s a system. Or at least the appearance of one.
Seasonal Styling Ideas
Board and batten is a permanent fixture, but what you put on or around it can change with the seasons. In autumn, swap out the hook accents for copper or bronze tones. In winter, a simple wreath on the wall between panels or a lantern on the bench shelf. Keep the bones consistent, let the accessories do the seasonal work.
Getting the Hardware Right
Hardware is the punctuation of a board and batten mud room. Get it wrong and the whole sentence reads weird.
- Black matte hardware looks good with almost every paint colour
- Brass and gold hardware pairs best with warm whites, greens, and deeper tones
- Chrome reads more modern and clean, good with grey or cool whites
- Mix metal finishes with caution, it can work but needs intention
The hooks specifically: get ones rated for actual weight. Cheap decorative hooks look fine until someone hangs a wet winter coat on them and the whole thing pulls out of the wall.
Real Talk: What Doesn’t Work
Some board and batten combinations look great in photos and genuinely don’t translate to real life. Here are a few I’d steer you away from:
- Battens that are too thin look flimsy. Go at least 1.5 inches wide, preferably 2 to 3 inches
- Spacing that’s too tight makes the wall look busy rather than structured
- Skipping primer. Just don’t. Paint adhesion on MDF without primer is rough
- Mismatched gloss levels between the battens and wall. If one is satin and one is flat, you’ll see the difference in certain light and it’s distracting
Budget Breakdown
You don’t need to spend a fortune. Quick rough estimate for a standard 8×10 foot mud room:
- MDF boards: $60-120 depending on quantity
- Paint and primer: $40-80
- Hardware and hooks: $30-150 (huge range here based on quality)
- Caulk, nails, adhesive: $20-40
Total DIY cost: somewhere in the $150-400 range for most mud rooms. A contractor install can run $800-2,000 depending on complexity and your location. If you have a weekend and a nail gun, DIY is very doable.
For more board and batten inspiration and tutorials, the folks at Young House Love have documented multiple installs in detail. The DIY Playbook is also worth bookmarking for the practical, step-by-step stuff.
FAQ
How long does a board and batten mud room install take? For a DIYer doing a standard 8-foot wall, budget a full day for the install and another day after for caulking, priming, and painting. Two weekends if you’re taking it slow or doing a larger space.
Do I need to find studs for every batten? Not necessarily. For battens, construction adhesive plus finish nails is usually enough. For hooks that will carry real weight, yes, find a stud or use solid wall anchors rated for the load.
Can I install board and batten over existing painted walls? Yes. Lightly sand the wall where the battens will go, clean the surface, and use construction adhesive. It holds well. Just make sure the wall isn’t textured heavily, because gaps between the batten and wall will show.
Wrapping Up
Board and batten in a mud room isn’t a trend. It’s a genuine upgrade that makes the space work harder and look better, and it holds up over time in a way that wallpaper or decal treatments simply don’t.
Whether you go classic white, bold navy, or something with stained wood battens that nobody in your neighbourhood has seen yet, the structure of it gives you a base to build on. Add the right hooks, the right lighting, a bench or cubbies if space allows, and you’ve got a mud room that actually earns its name.
Have you tried board and batten in your own entryway? What colour did you go with? Drop it in the comments. I’m genuinely curious what’s working for people right now.