
You killed the basil again, didn’t you? I’ve been there. Brown, droopy, sitting in 3 inches of standing water on a windowsill I thought was “probably fine.” The good news: growing herbs indoors is genuinely easy once you stop guessing and start with a real setup.
I’ve tried most of these ideas myself, some brilliant, some embarrassing. This guide pulls the best 26 together, plus a setup walkthrough so you’re not just pinning pretty photos and doing nothing with them (we’ve all been guilty of that :/).
Why indoor herb gardens are worth the effort

Fresh herbs change how food tastes. That’s it. A pinch of fresh thyme on roasted chicken versus dried thyme from a jar that’s been sitting in the cabinet since 2021 — there’s no comparison.
And honestly, a little pot of rosemary on the counter just looks good. Functional decor, FYI.
26 indoor herb garden ideas that actually work
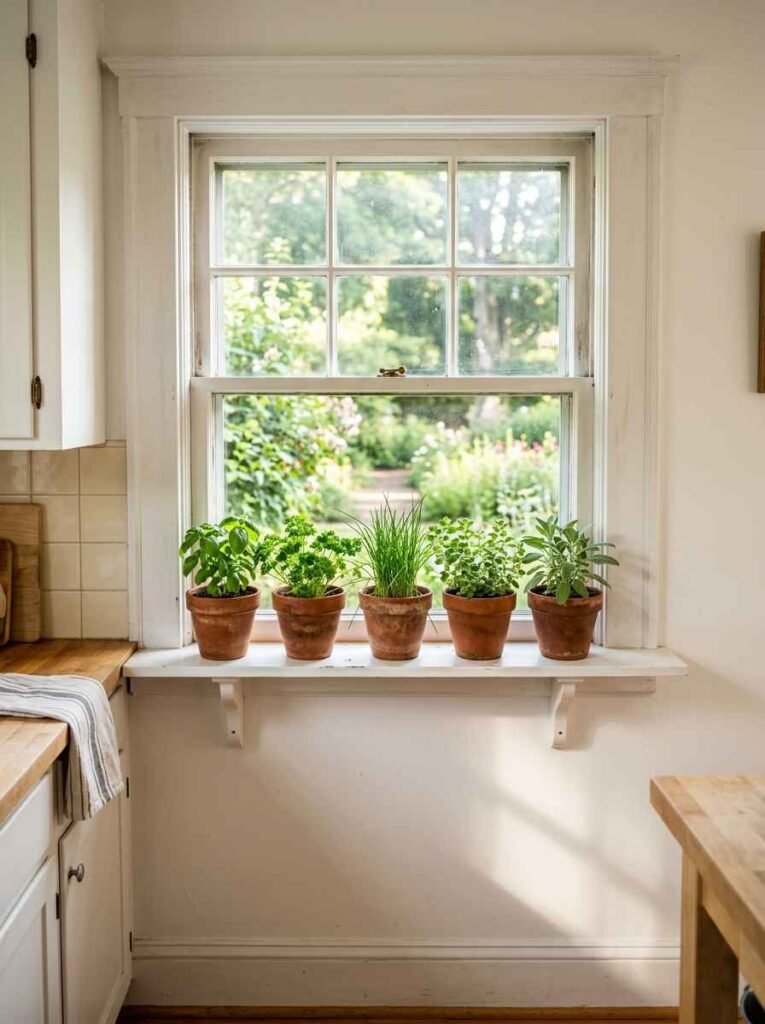
1. The classic windowsill row
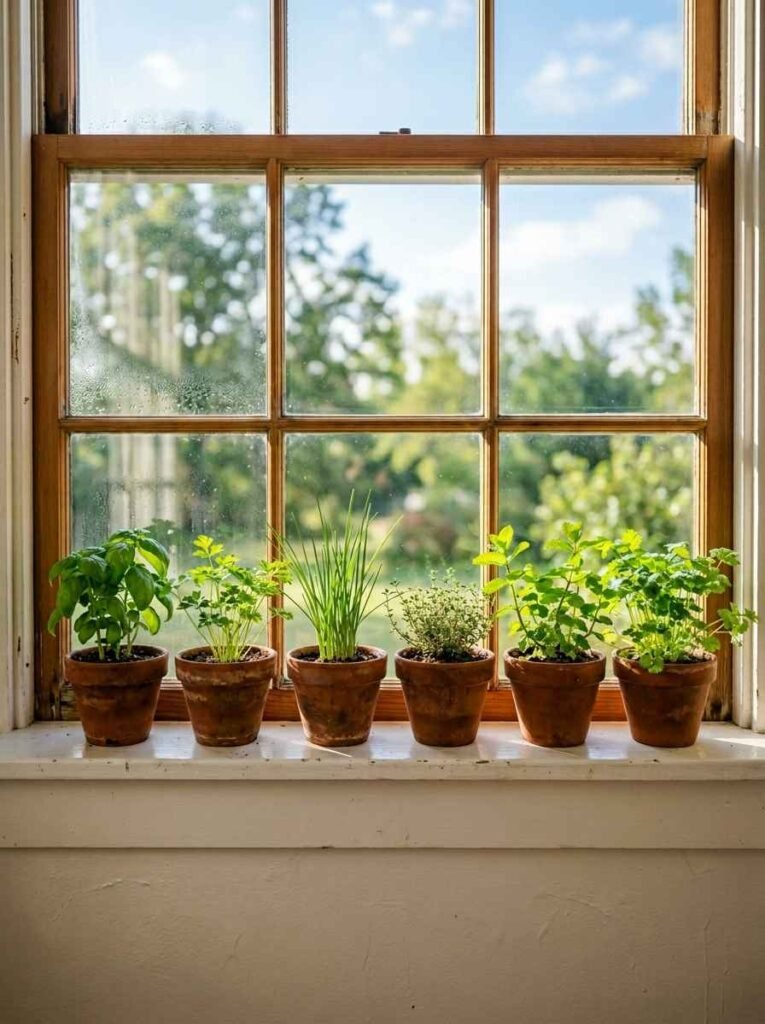
Line up 4 to 6 small terracotta pots along a south-facing window. Basil, parsley, chives, thyme, mint (in its own pot, always its own pot), and cilantro. Simple. Costs maybe $20 to start.
The catch: south-facing matters. East or west works for some herbs but not all. North-facing windows are a herb graveyard.
2. A single hanging macrame planter
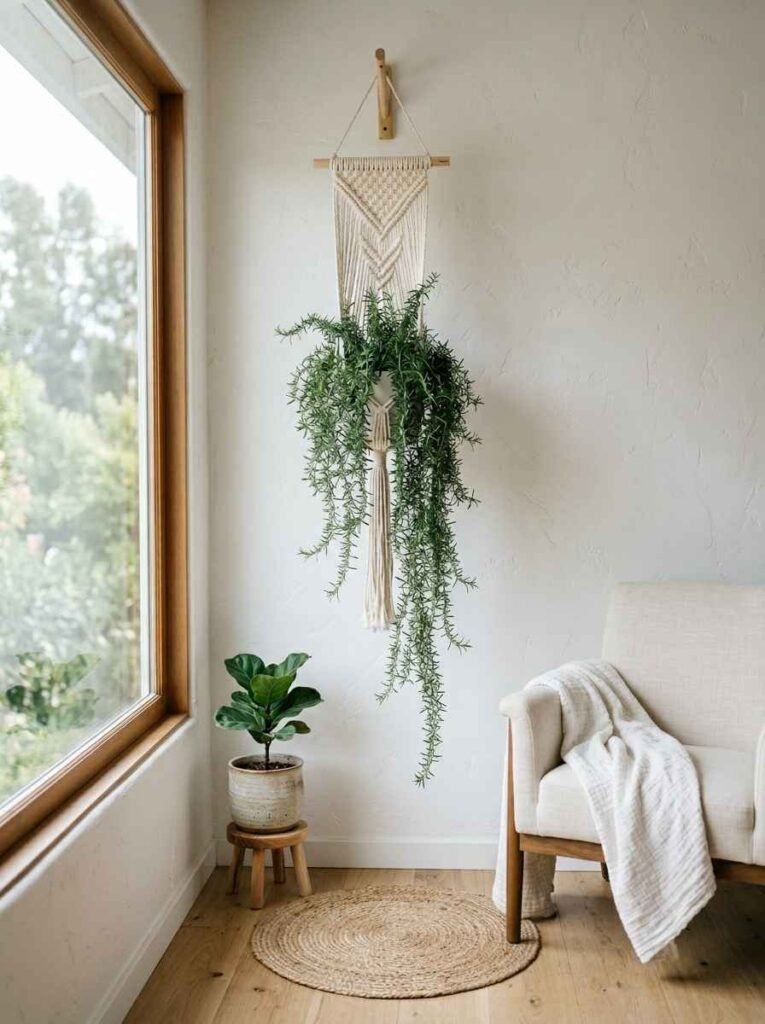
One plant. One macrame hanger. Looks deliberate, not cluttered. Trailing rosemary does well here and the trailing stems are genuinely beautiful over time.
You can find good macrame planters on Etsy for under $15, usually handmade.
3. Floating wall shelves with grow lights
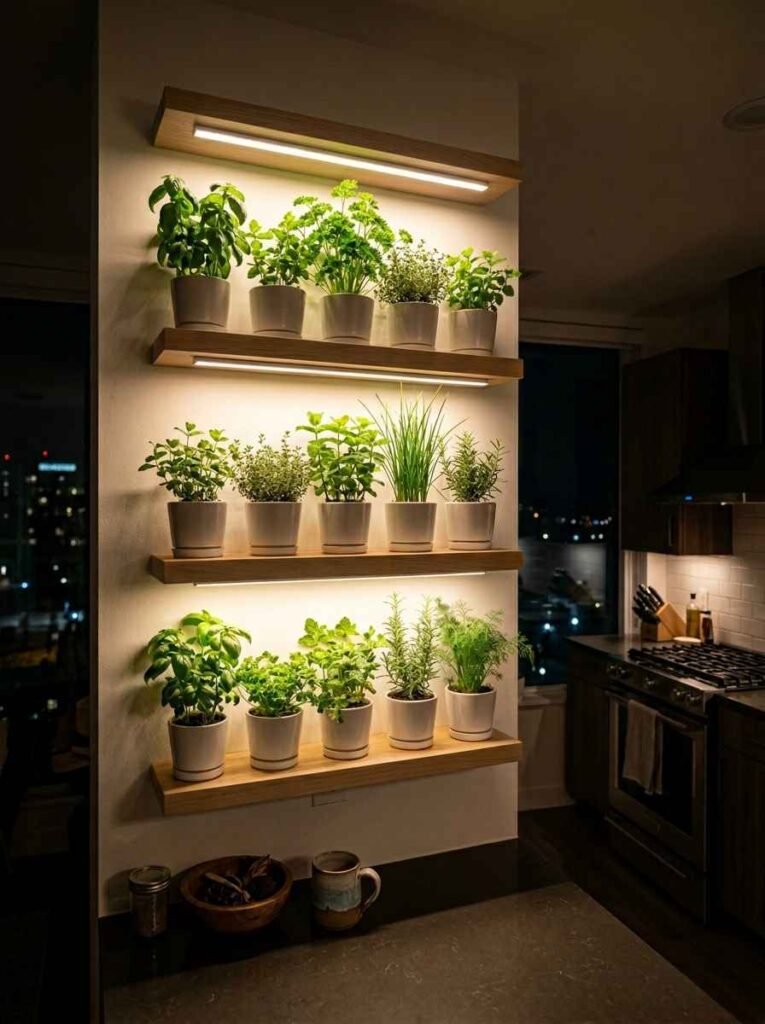
Mount 2 to 3 white floating shelves on a kitchen wall. Add a small LED strip light underneath each shelf. You get a full-spectrum mini garden without needing a single south-facing window.
This is probably the setup I’d do if I were starting fresh today. Total cost is maybe $80 to $120, but it works in any apartment.
4. A tiered plant stand

A 3-tier bamboo stand in a sunny corner holds 9 to 12 pots easily. You can rotate plants around depending on which ones need more light that week. Cheap, portable, no drilling required.
5. Repurposed mason jars
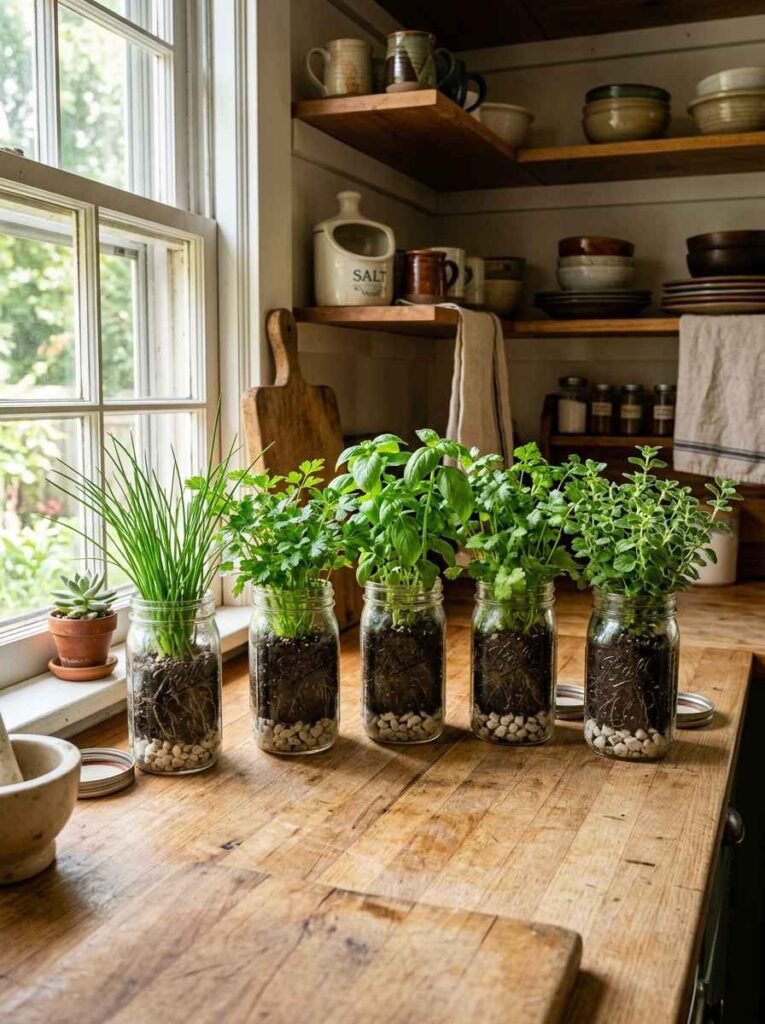
Fill mason jars with a layer of pebbles at the bottom, then potting mix. Grow chives or parsley in them. They look great on a butcher block counter and cost almost nothing if you already have jars.
Just poke drainage holes in the lids if you’re using those, or leave the jars open. Don’t drown the roots.
6. A magnetic herb planter on the fridge
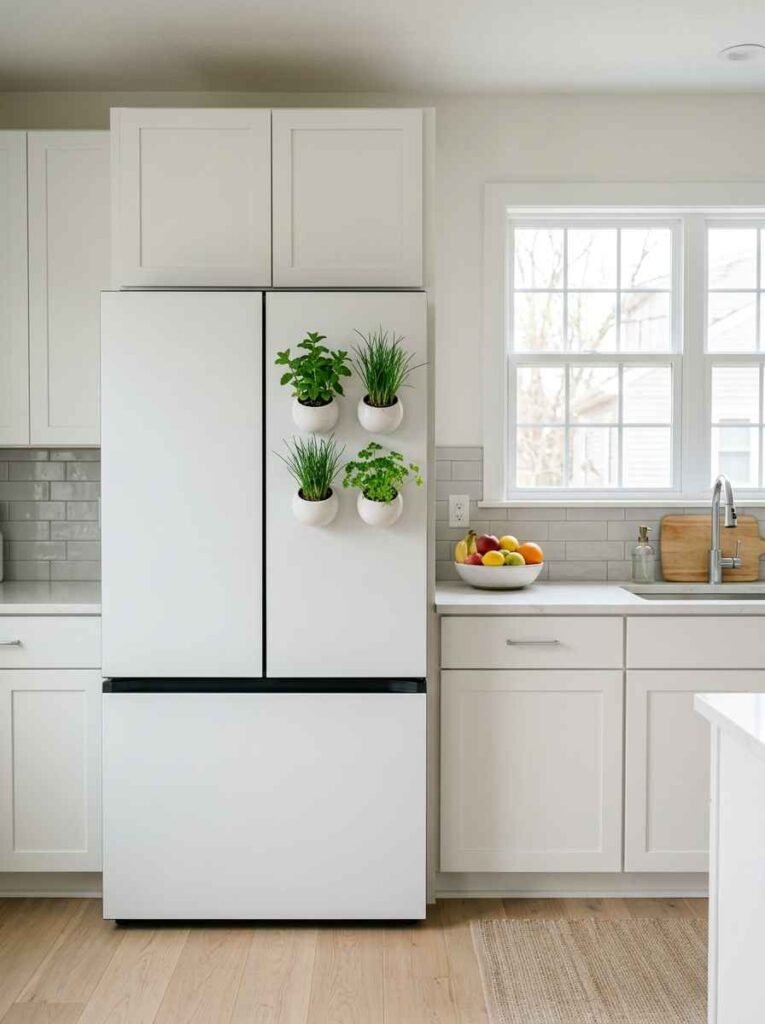
Small magnetic pods stick directly to the fridge door. These work best for herbs that don’t need a ton of light, like mint or chives. They’re sold on Amazon and at most garden centers.
Honestly, the novelty of grabbing mint straight off your fridge is something I still haven’t gotten over.
7. A kitchen pegboard with planters
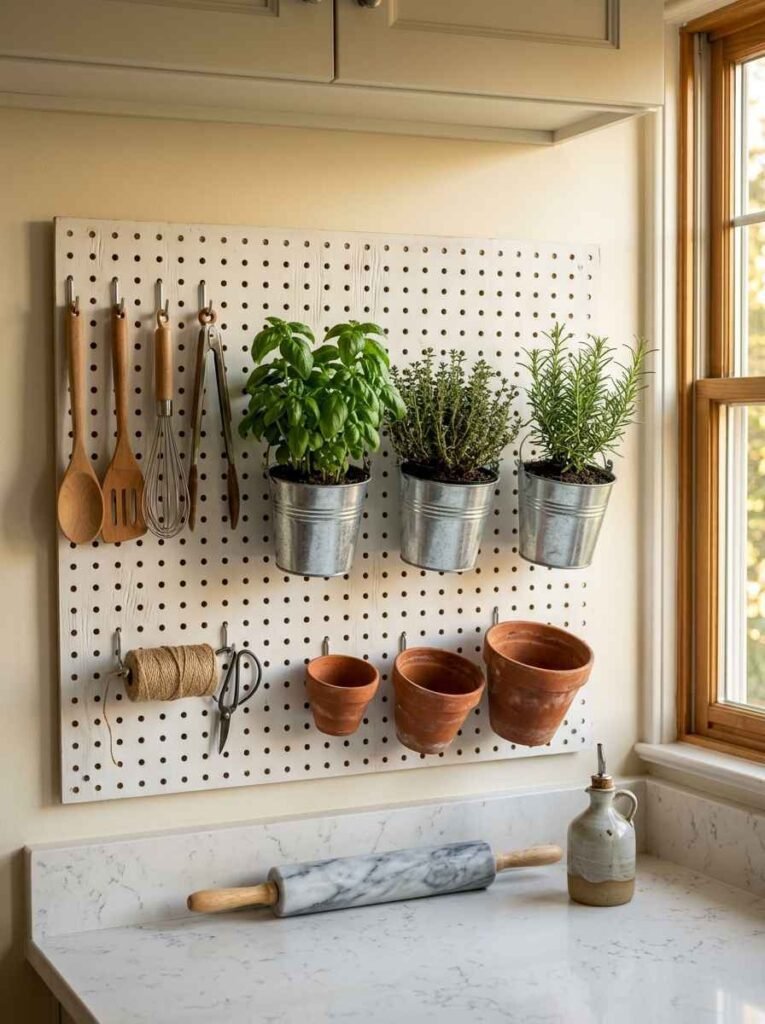
Mount a pegboard and hang small baskets or metal buckets from it. You can mix herb pots with kitchen tools, twine, scissors, whatever. Functional wall art.
8. Upcycled wooden crates
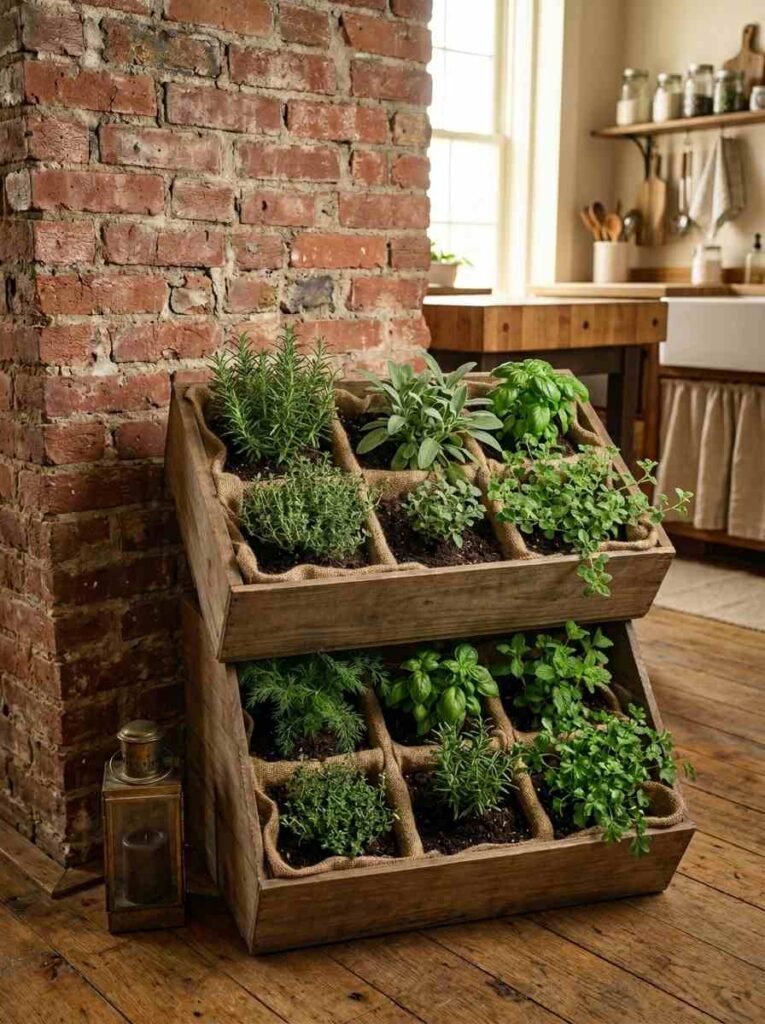
Stack 2 old wooden wine crates or build dividers inside one. Line them with burlap, add potting soil, and plant directly. Aged wood looks incredible in a kitchen with exposed brick or white tile.
9. A self-watering planter box
These are worth every penny if you travel or forget to water (me). The reservoir at the bottom wicks moisture up to the roots as needed. Lechuza makes good ones. Pricier, but a basil plant that survives a long weekend feels like a miracle.
10. Hydroponic countertop garden
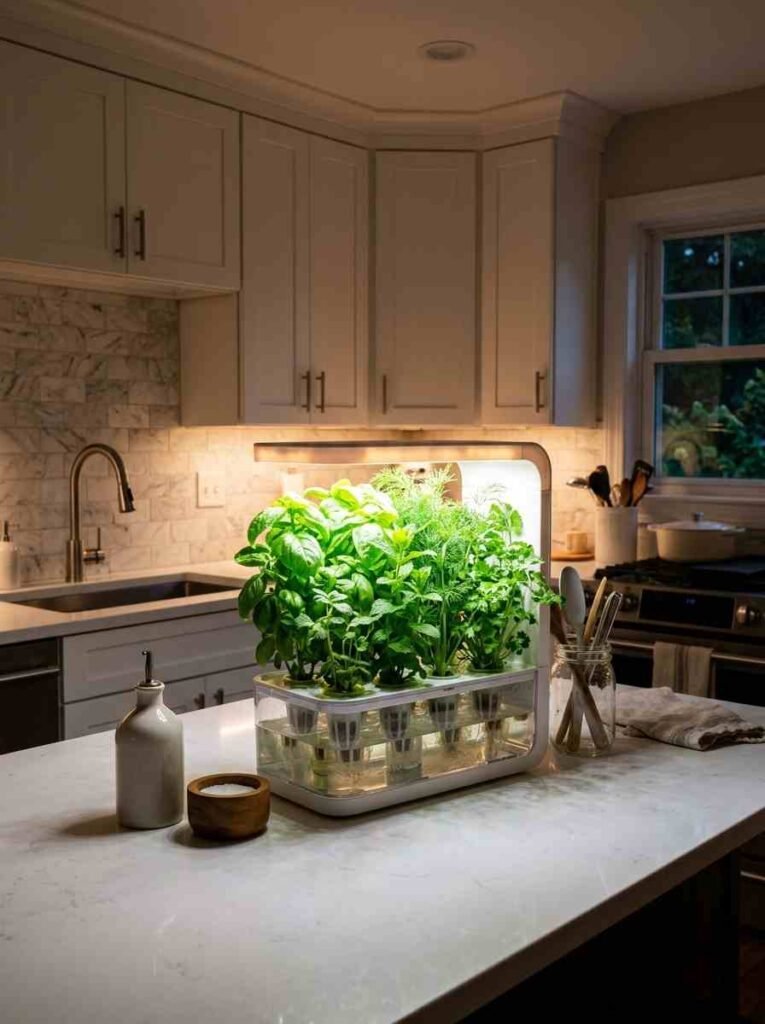
The AeroGarden and similar units grow herbs in water with built-in lights. Zero soil, zero mess, zero guesswork on watering. Wow, the basil that comes out of these things grows fast, like embarrassingly fast compared to soil.
Good for: basil, mint, dill, parsley, cilantro. Not great for: rosemary, thyme, or anything woody.
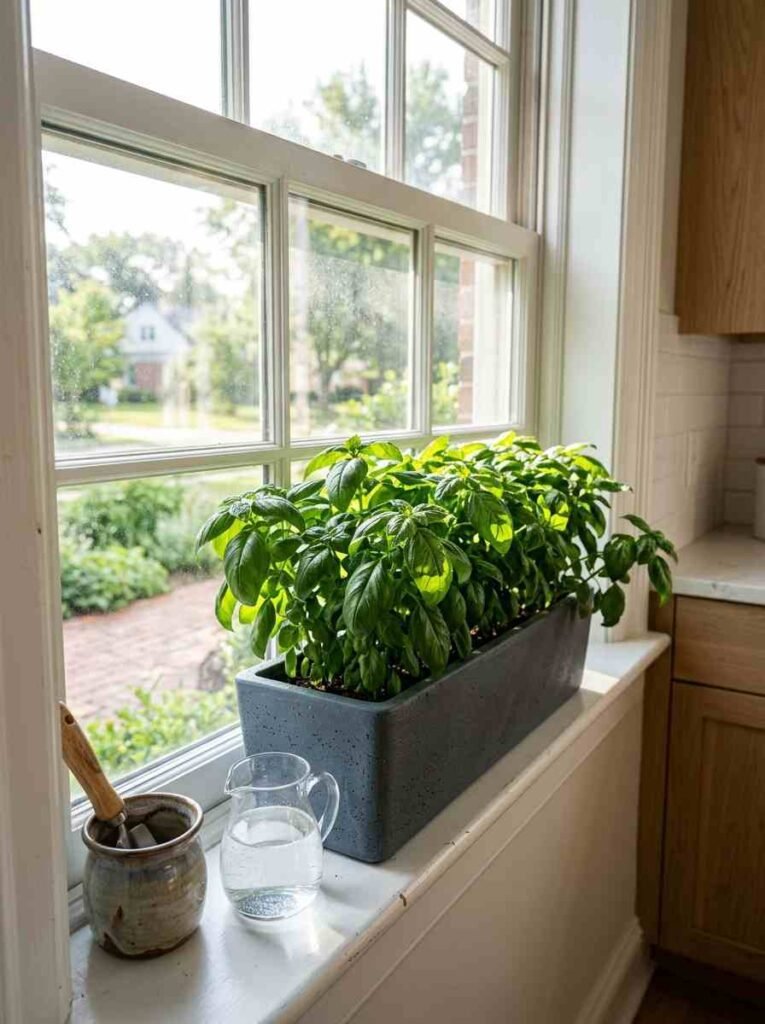
11. A shallow window box, indoors
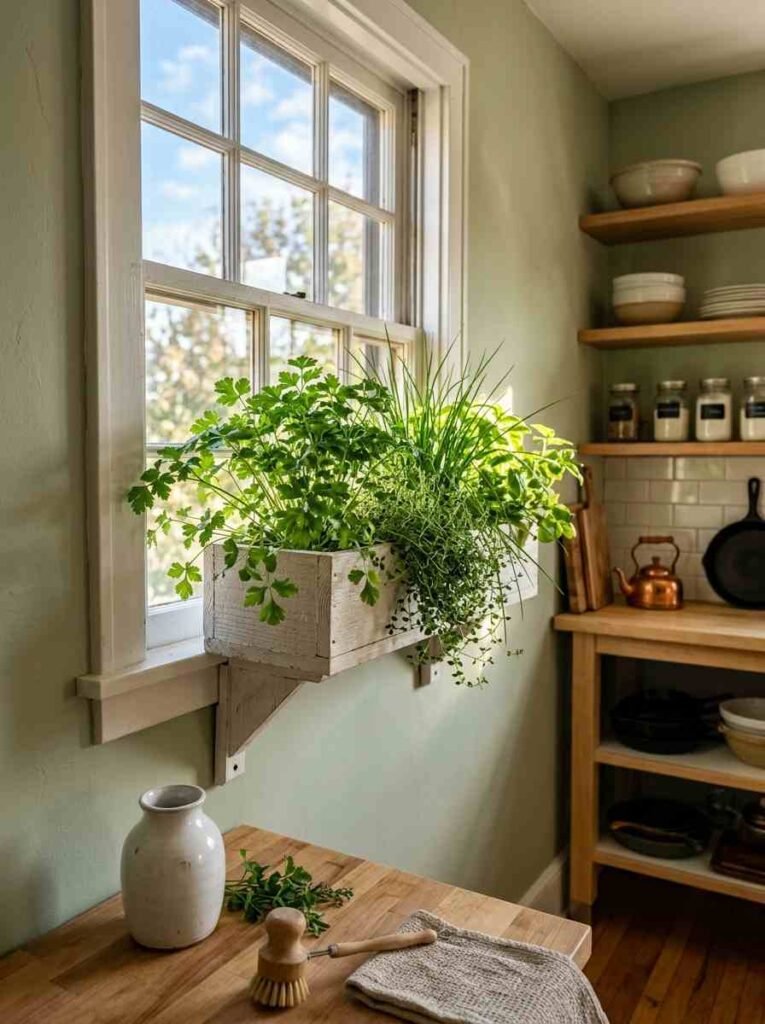
Mount a rectangular window box bracket on the inside of a window frame. Fill it and plant densely. Looks like a European apartment and also feeds you. Win.
12. A repurposed colander
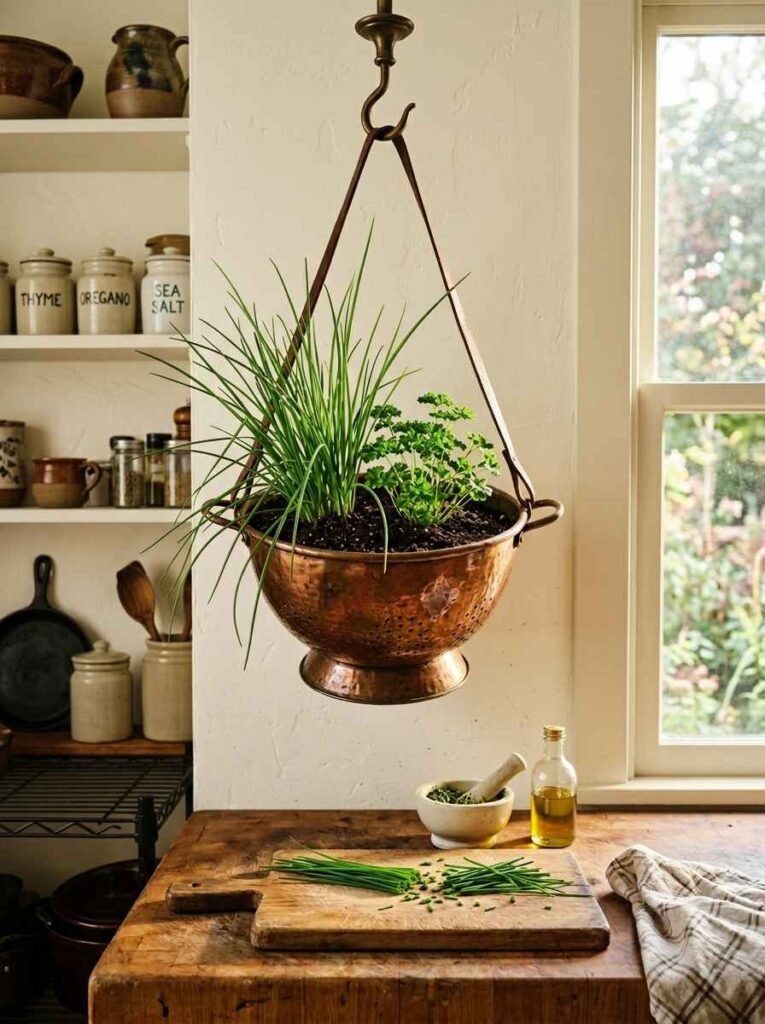
Hang a metal colander from a hook. It drains perfectly, looks quirky, and holds 3 or 4 small herb starts. I’ve seen this done with copper colanders and it looks genuinely cool.
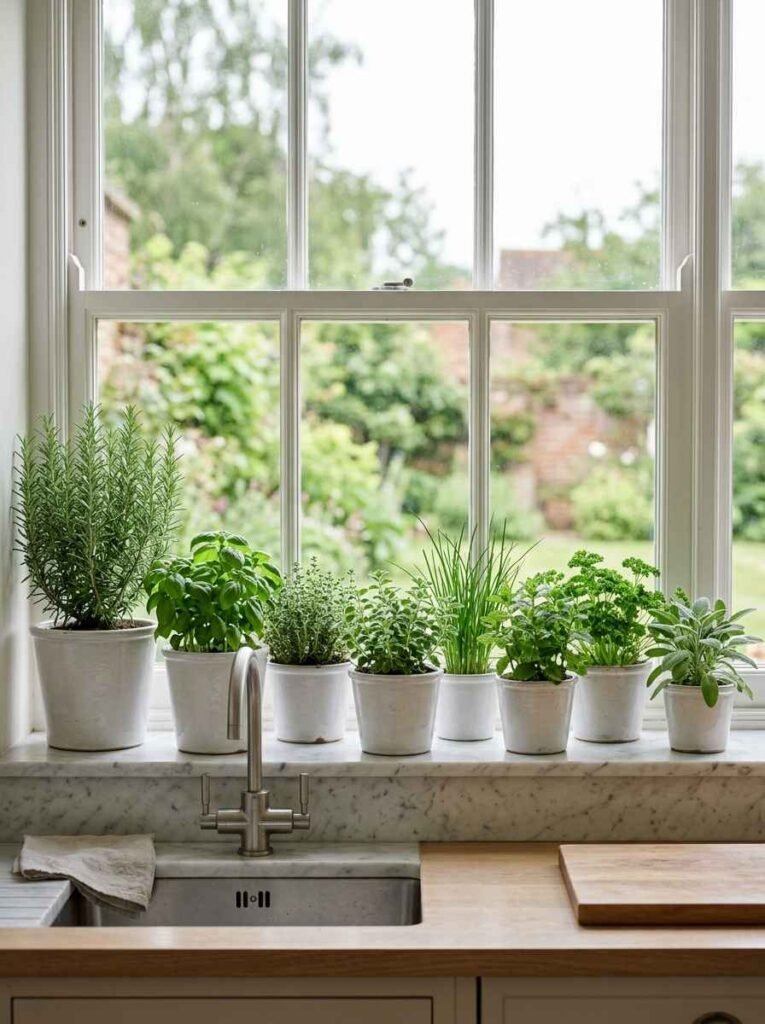
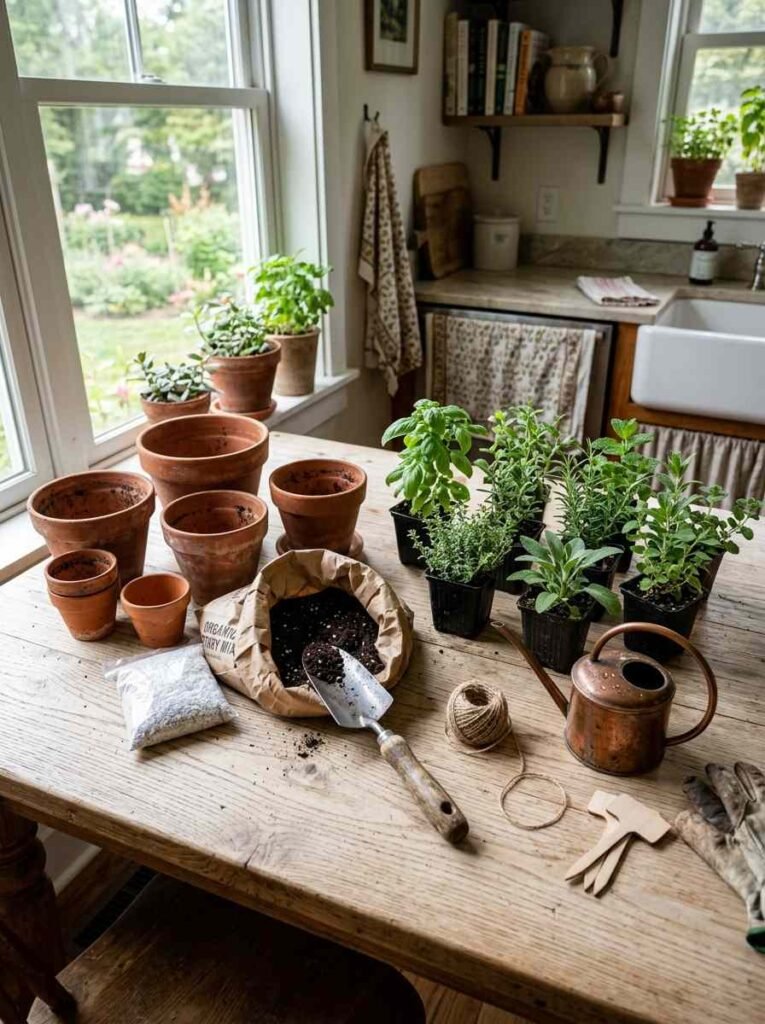
13. Terracotta pots with saucers, grouped together
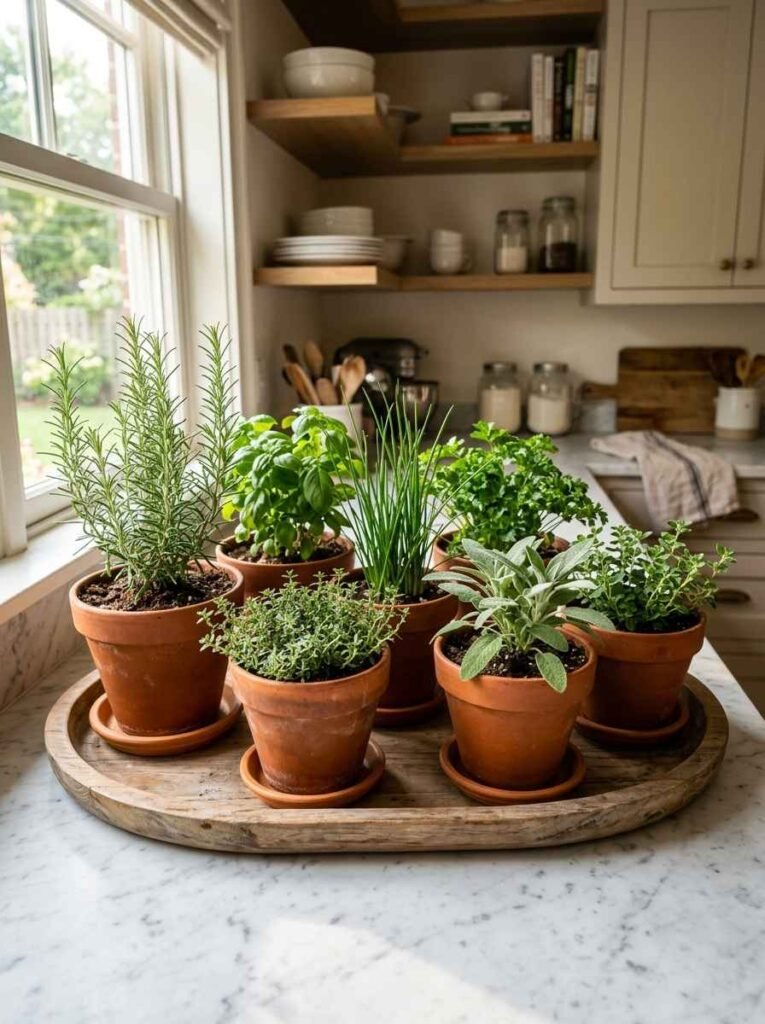
Group 5 to 7 pots of different heights together on a tray. The tray catches water and the grouping creates a microclimate that herbs like (slightly more humidity than a solo pot). Styling trick: odd numbers look better than even.
14. A glass cloche over a single herb
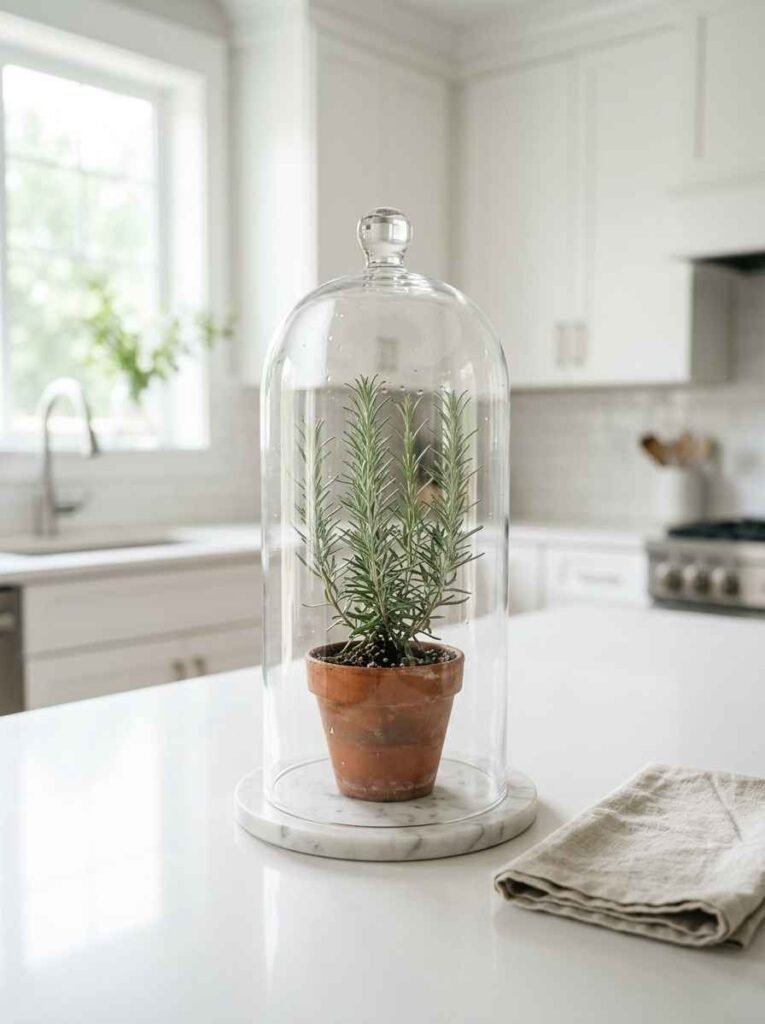
One herb, one beautiful glass cloche, one small tray. This works brilliantly for a single rosemary or thyme plant you want to show off. It’s more décor than garden, but it counts.
15. Hanging rail with S-hooks and planters
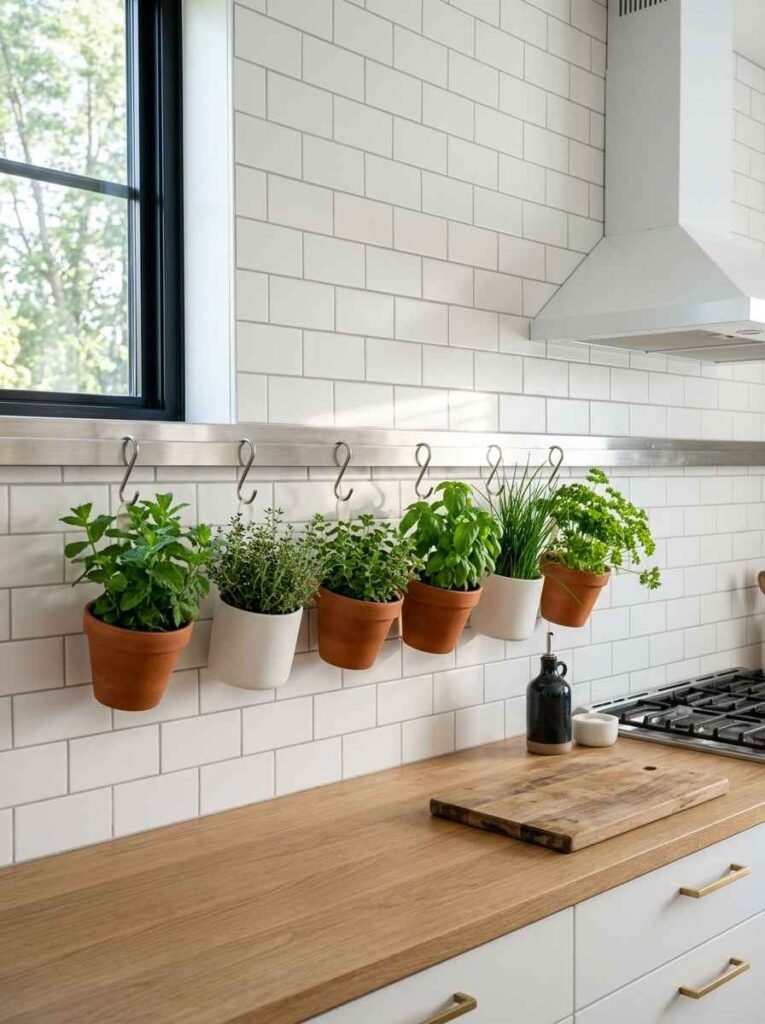
Install an IKEA GRUNDTAL rail (or any kitchen rail) and hang small planters from S-hooks. Easy to rearrange. Great for renters who don’t want to make big holes in walls.
16. A repurposed vintage toolbox
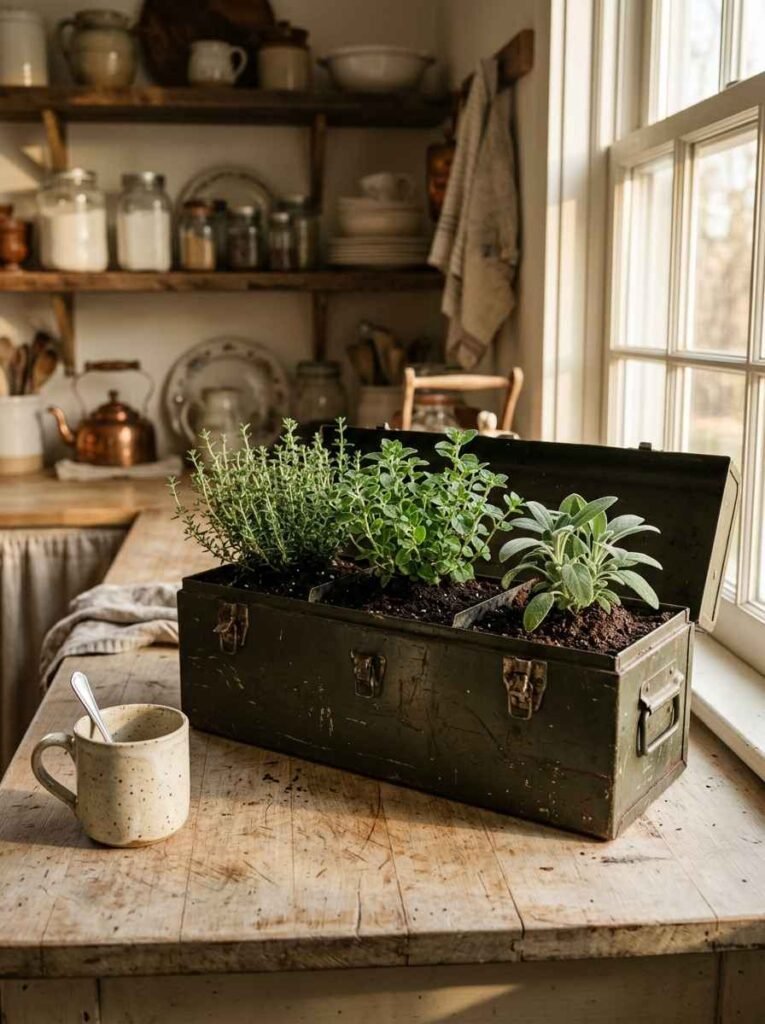
Flat metal or wooden toolboxes make excellent shallow herb planters. Drill drainage holes in the bottom, fill with a mix of potting soil and perlite, and plant a few compact herbs like thyme or oregano.
17. Tall cylindrical pots for rosemary
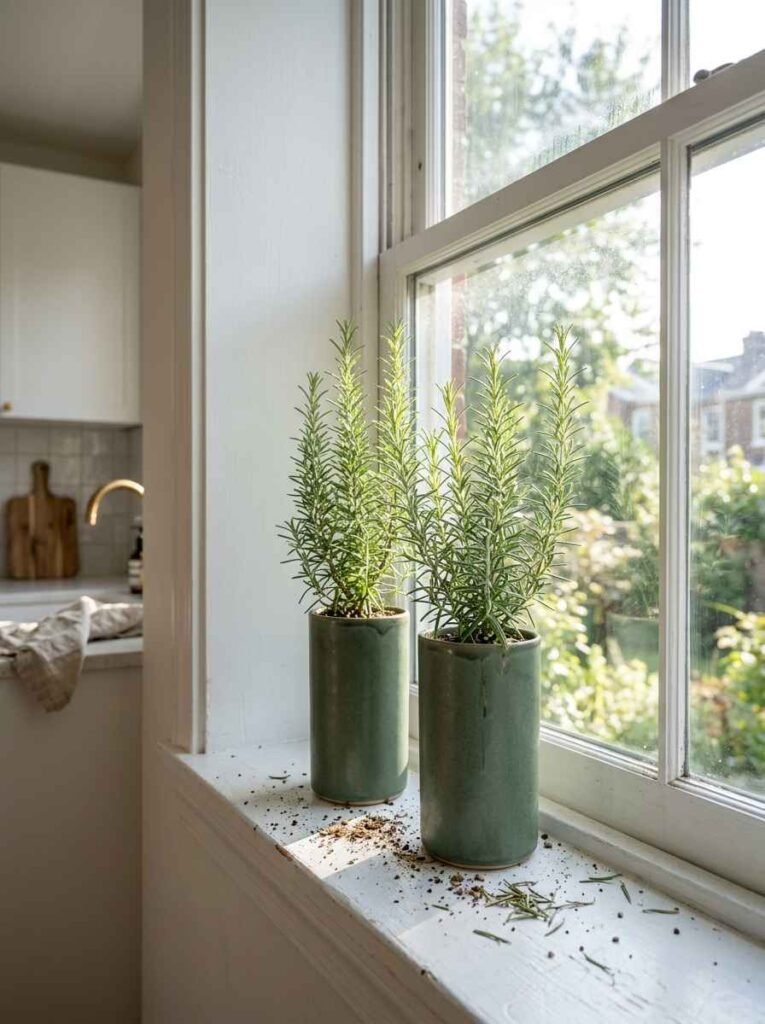
Rosemary grows upright and likes depth. A tall, narrow pot (at least 10 inches deep) lets the roots go where they want. Most people plant rosemary in a shallow pot and wonder why it dies. It wants room downward.
18. A plant shelf with a dedicated grow light
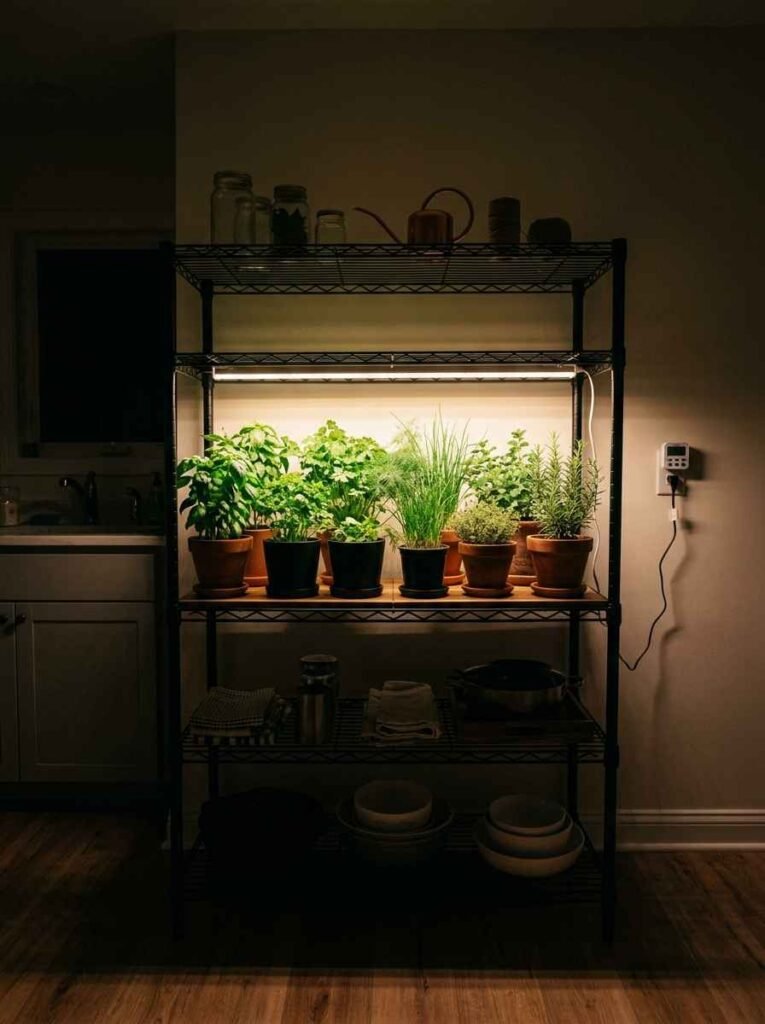
A metal baker’s rack plus one full-spectrum LED bar light on a timer (16 hours on, 8 hours off) gives you a year-round setup regardless of season. This is how I kept basil alive through a Minnesota winter, which felt like a personal achievement.
19. A repurposed bar cart herb trolley
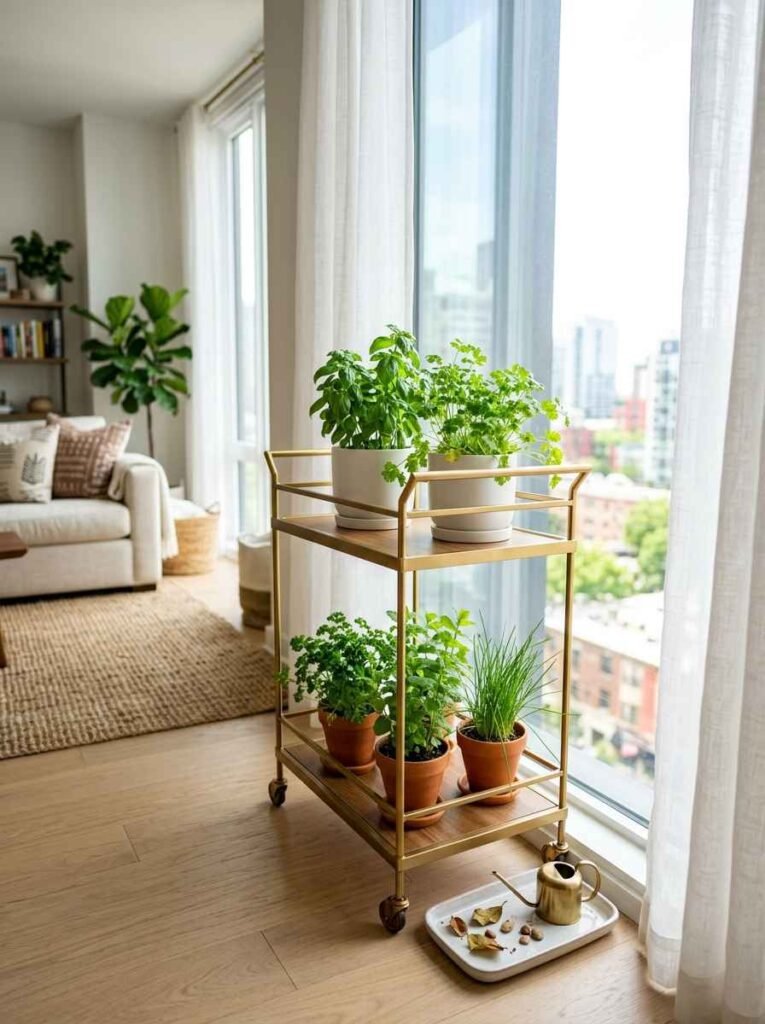
Roll a bar cart near your brightest window. Use the top tier for the herbs that need the most light (basil, cilantro) and the lower tier for shade-tolerant ones like mint or parsley. Roll it back into the room when you’re entertaining. Practical and actually cute.
20. Tin can planters in a row
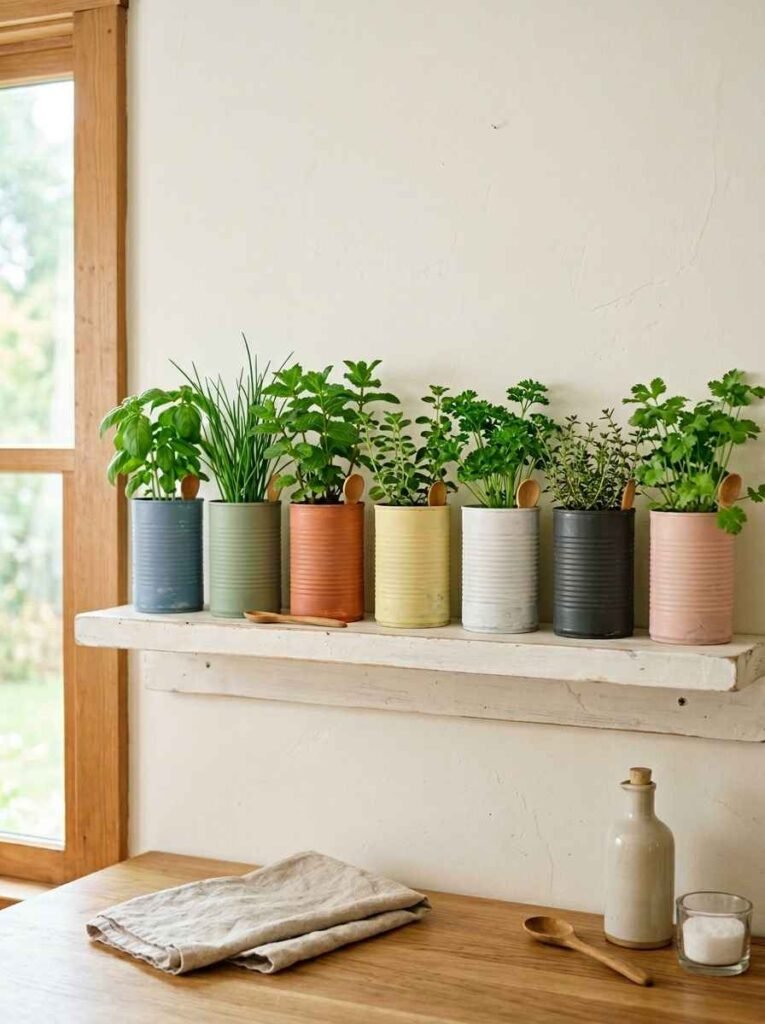
Punch drainage holes in cleaned tin cans (tomato paste tins, coffee cans, whatever). Paint them or leave them raw. Line them up on a shelf. This is the cheapest possible herb garden setup and I’ve seen it look genuinely beautiful.
21. A glass terrarium herb garden
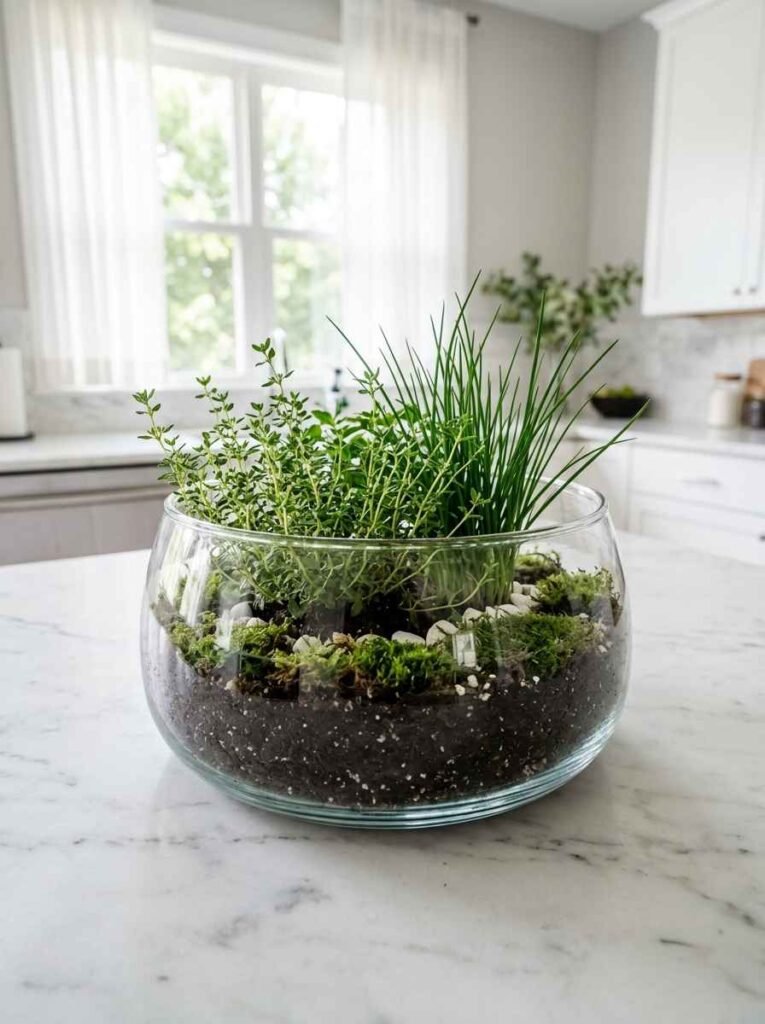
Wide-mouth glass terrariums with no lids make excellent herb containers. The glass walls protect young seedlings from drafts and look stunning. Works well for a single herb variety you want to feature. Thyme and chives do well here.
22. Mounted pocket planters
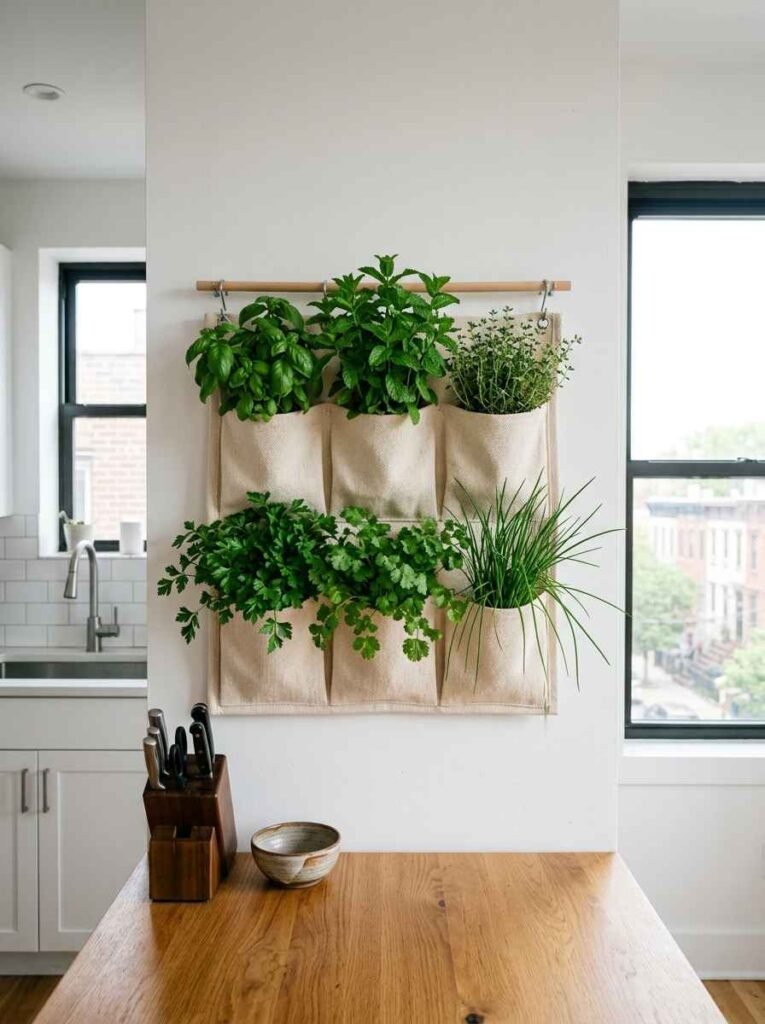
Canvas or felt pocket planters mount to any wall with 2 nails. Each pocket holds one herb. A 6-pocket planter covers a surprisingly large variety without taking up counter space. Good for apartments where every surface is accounted for.
23. A deep windowsill built-out shelf
If your windowsill is too narrow for pots (older homes, this is you), add a thin shelf bracket just below the window to extend it by 4 to 6 inches. Suddenly you have real windowsill space. A $10 bracket and 30 minutes of work.
24. Matching ceramic pots in one color
Pick one color, like matte white or terracotta, and buy 6 to 8 matching pots in different sizes. The visual consistency makes even a crowded windowsill look intentional. IMO this is the easiest styling upgrade with the biggest return.
25. A ladder shelf herb garden
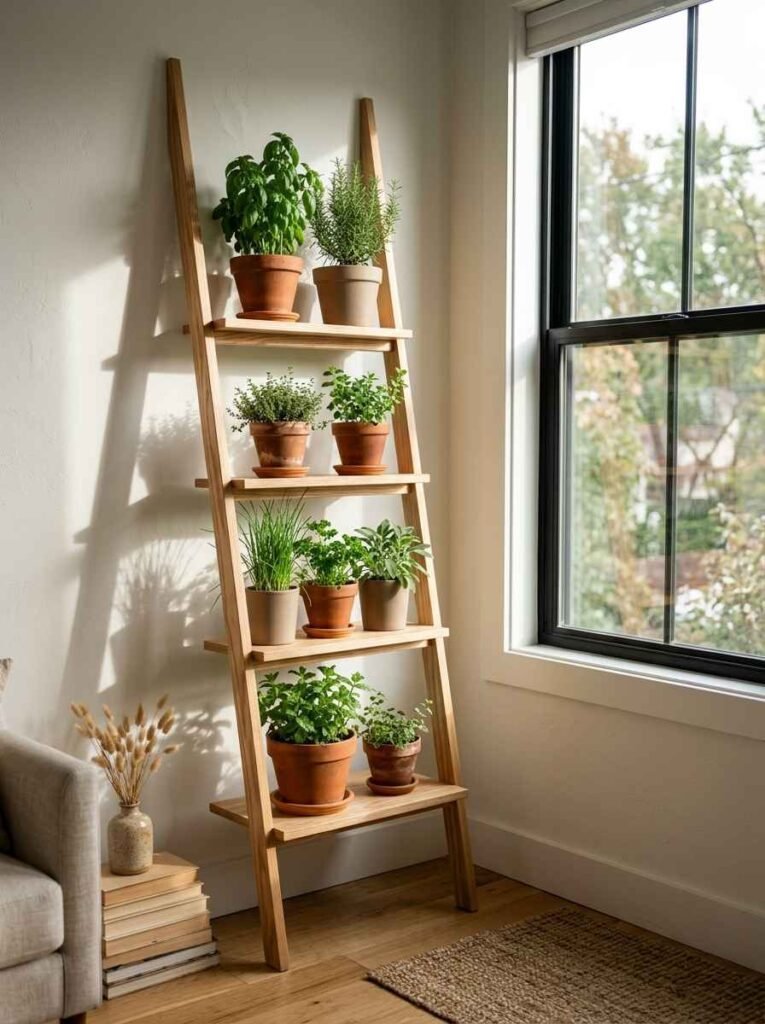
A leaning ladder shelf (the kind sold everywhere) lets you stack herbs at different heights near a window. You get good light variety because each shelf is at a different elevation. Basil up top, mint at the bottom.
26. Seed starter trays for ongoing succession
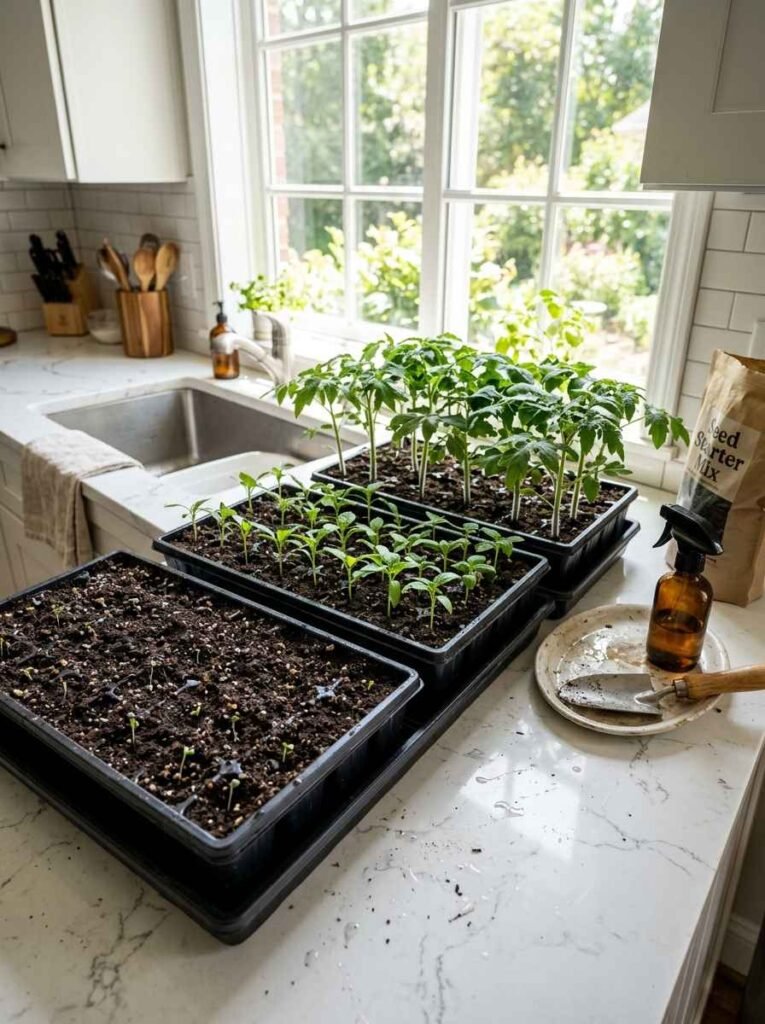
Plant a new tray of fast-growing herbs (basil, cilantro, dill) every 3 weeks. By the time you’ve harvested the first tray, the second is ready. Succession planting keeps you from the “I have too much basil then nothing” cycle. Cilantro especially bolts fast; succession is the only fix.
Quick-reference: herb and light needs
| Herb | Light needed | Min pot depth | Watering frequency |
|---|---|---|---|
| Basil | Full sun, 6+ hrs | 6 inches | Every 2 to 3 days |
| Rosemary | Full sun, 6+ hrs | 10 inches | Every 7 to 10 days |
| Mint | Partial sun, 4 hrs | 6 inches | Every 3 to 4 days |
| Chives | Partial sun, 4 hrs | 4 inches | Every 4 to 5 days |
The setup guide: how to actually get started
Step 1: Pick your spot before you pick your herbs
Most people buy herbs first and find a spot second. That’s backwards. Your available light determines which herbs will thrive. Check which direction your brightest window faces before buying anything.
- South-facing: basil, rosemary, thyme, oregano, sage
- East or west-facing: mint, parsley, chives, cilantro
- Low light: only mint and chives will really survive, and even they won’t be happy
Step 2: Get the soil right
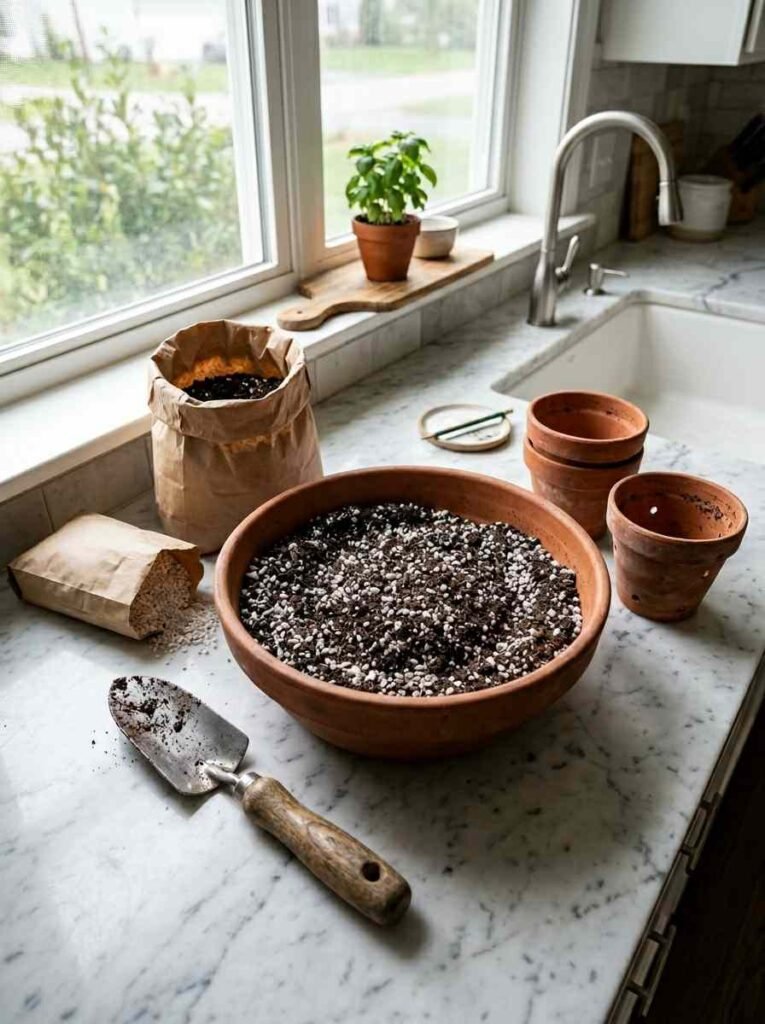
Standard potting mix works, but herbs (especially Mediterranean ones like rosemary and thyme) want excellent drainage. Mix regular potting soil with about 30% perlite. The roots breathe better and you’ll lose far fewer plants to rot.
The University of Minnesota Extension has a solid primer on soil amendments for container herbs if you want to go deeper on this.
Step 3: Pick containers with actual drainage holes
This seems obvious. People still buy cute pots with no drainage and then wonder what happened. If you love a pot that has no hole, drill one (terracotta and ceramic drill easily with a masonry bit) or use it as a cachepot, meaning a decorative outer pot with a plastic grower pot inside.
Step 4: Water correctly, which means less than you think
The most common reason indoor herbs die is overwatering. Stick your finger an inch into the soil. If it’s still moist, come back tomorrow. Most herbs prefer to dry out slightly between waterings.
The one exception: basil. Basil wilts dramatically and fast. Water it when the top of the soil feels dry.
Step 5: Harvest to encourage growth
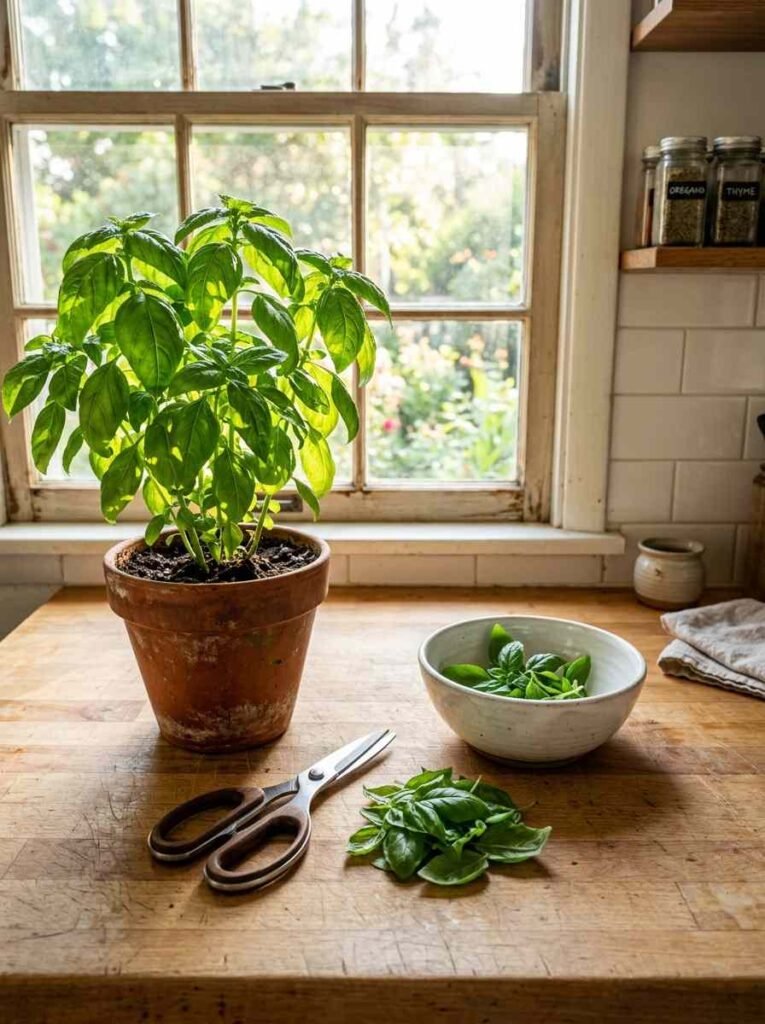
Don’t wait until a plant looks enormous before picking from it. Regular harvesting, taking no more than a third of the plant at a time, actually makes the plant grow fuller. Pinch back any flowering stems immediately. Once an herb goes to seed, the flavor drops off fast.
A quick note on grow lights (since people always ask)

You don’t need to spend $200 on a grow light setup. A basic full-spectrum LED bar like the Barrina T5 (around $30 for a 4-pack on Amazon) is what a lot of small-scale herb growers use. Set it on a timer, about 14 to 16 hours of light per day, and it handles the rest.
The Royal Horticultural Society covers light requirements for herbs if you want guidance from a reliable horticultural source.
Common mistakes worth avoiding
- Grouping mint with other herbs in the same pot. Mint takes over everything. Give it its own container.
- Buying full-grown supermarket herb pots and expecting them to last. Those are usually multiple seedlings crammed into one underpotted container, grown for shelf life, not longevity. Repot them immediately or they’ll struggle.
- Watering on a schedule instead of checking the soil. Every environment is different. Your kitchen in July versus January can have wildly different humidity and temperature, and the watering cadence changes too.
- Harvesting all the leaves at once. The plant can’t recover fast enough. Take a little at a time.
Frequently asked questions
Can I grow herbs indoors without a south-facing window?
Yes, with a grow light. Mint and chives also do reasonably well in east or west-facing windows with 4 hours of light. For basil and rosemary indoors without a south window, a cheap LED grow light on a timer is the realistic answer.
How often should I fertilize indoor herbs?
Every 4 to 6 weeks during the growing season (spring through early fall) with a diluted liquid fertilizer is usually plenty. In winter, cut back to once every 6 to 8 weeks or skip it entirely if the plant isn’t actively growing.
Why does my basil keep dying indoors?
Usually one of 3 reasons: not enough light, inconsistent watering, or it’s a supermarket pot with 15 seedlings crammed in together. Repot into a larger container, give it a south window or a grow light, and water when the top inch of soil is dry.
Final thought
Growing herbs indoors takes maybe 20 minutes of setup and a few minutes a week of attention. The payoff is fresh ingredients on demand, a kitchen that smells good, and (let’s be real) something alive and green to look at when everything outside is grey.
Which of these 26 ideas are you actually going to try? Drop it in the comments, I genuinely want to know.