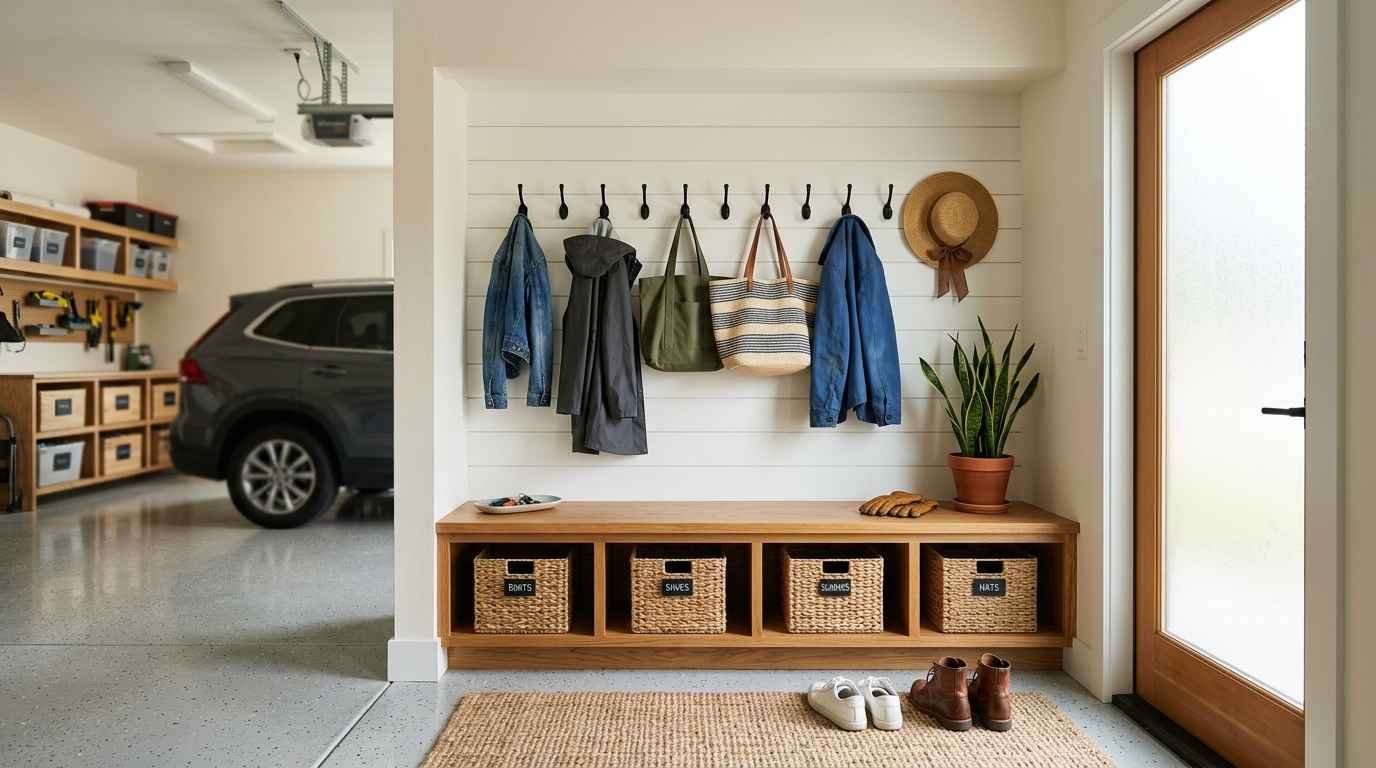
My garage used to eat things. Keys, shoes, sports gear, random tools with no obvious home. Every morning was a small archaeological dig just to get out the door.
Then I finally pulled the trigger on a proper garage mudroom setup, and I genuinely don’t know why I waited so long.
If your garage is currently a black hole where organization goes to die, you’re in good company.
But there’s a real fix, and it doesn’t require a massive renovation budget or a contractor on speed dial.
Here are 31 designs worth stealing.
The locker wall everyone saves on Pinterest
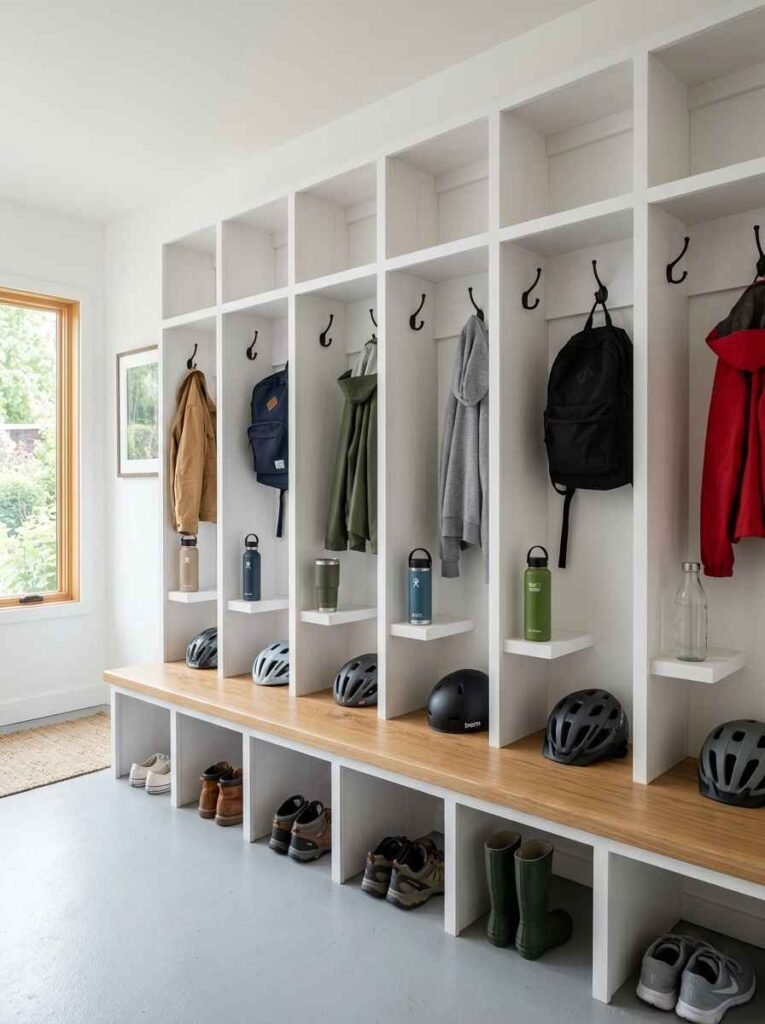
You’ve seen this one a thousand times. A row of tall, open cubbies, each assigned to one person in the house.
Hook at the top for bags and coats, bench at the bottom for shoes, maybe a small shelf in between for a water bottle or helmet.
It works so well because it removes the negotiation. Every family member has their zone.
Nobody touches anyone else’s stuff. My sister did this for her 4 kids and said it basically ended the morning shoe fight, which, if you have kids, you know is worth real money.
The best versions use floor-to-ceiling panels so nothing collects on top. IKEA’s PAX system gets this done for around $400 total if you’re handy with an Allen key.
Built-in bench with cubbies underneath
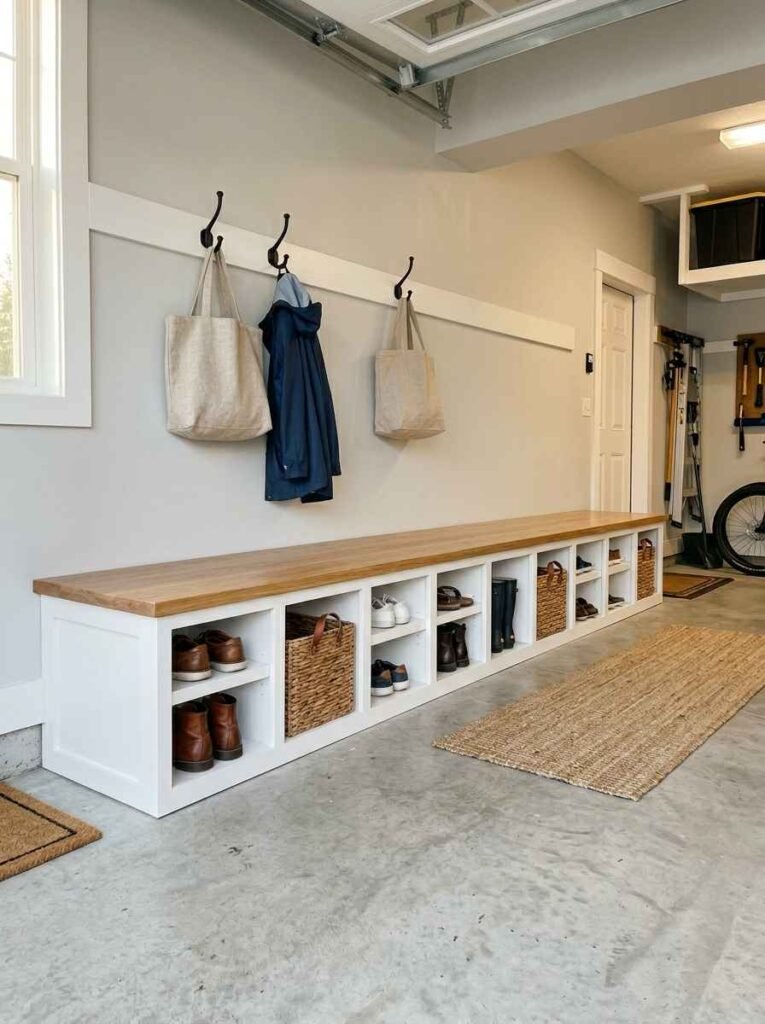
The bench is the workhorse of any mudroom. You sit to pull off boots, you stack things on it while you fish for your keys, you use it as a launch pad before leaving the house.
Adding open cubbies underneath (roughly 12 inches deep, 15 inches wide per cubby) means shoes have an actual home.
Baskets slide in cleanly and hide the chaos. Dimensions matter here: too shallow and adult shoes won’t fit, too deep and stuff disappears into the back.
For a garage setting specifically, think about sealing the wood. Garages get humid in summer and dry in winter, and unsealed pine will warp in about 18 months.
Coat everything with a water-based polyurethane and you’re set.
Pegboard tool wall meets mudroom
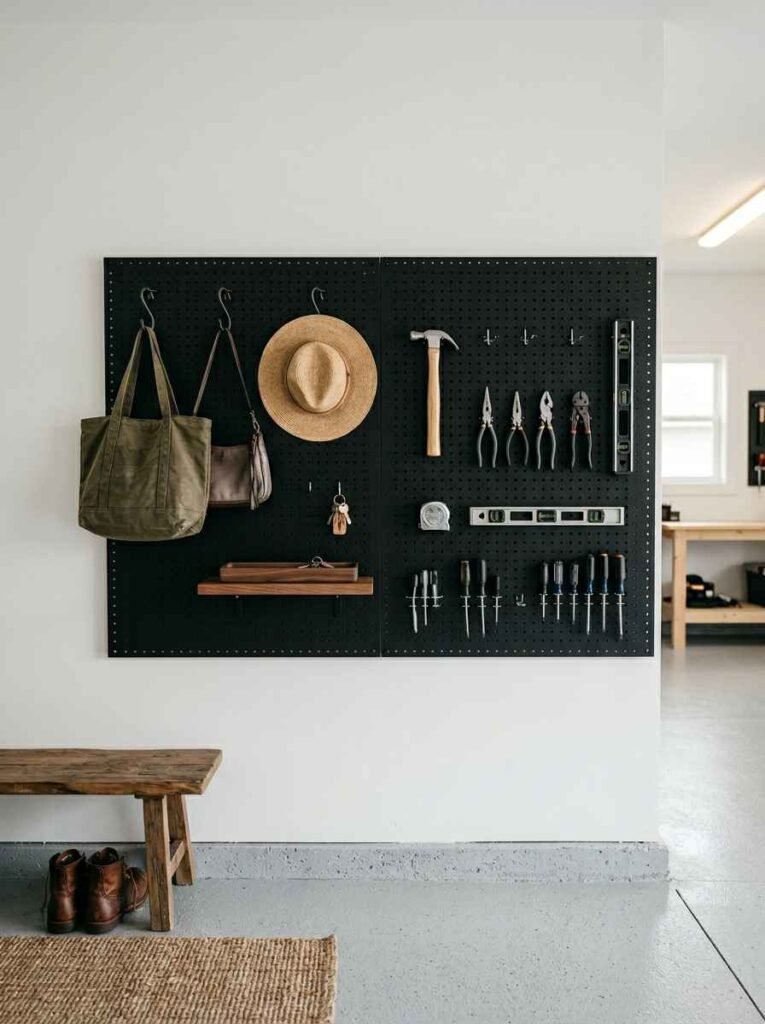
This one’s for people who genuinely use their garage as a workspace and can’t dedicate the whole thing to entry organization.
Run a 4×8 sheet of pegboard along the wall beside your entry door. Left half gets the mudroom hooks and small shelf. Right half gets tools, extension cords, bike pumps, whatever.
It’s one wall doing 2 jobs, which in a tight garage is the whole game.
Paint the pegboard a different color from the wall behind it so the whole thing reads as intentional. I’ve seen this done in matte black against white and it looks genuinely sharp.
Overhead storage with drop-zone below
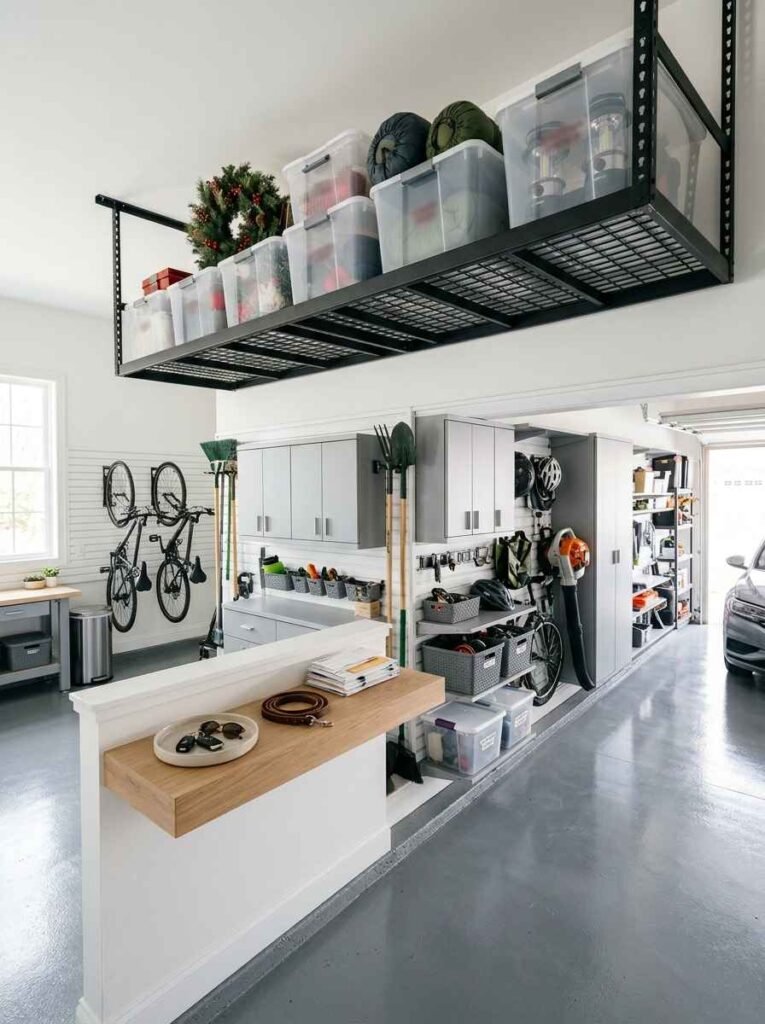
If your ceiling is 9 feet or higher, you’re leaving storage space on the table.
Mounted overhead shelving (the kind that bolts directly into ceiling joists) handles seasonal bins, camping gear, holiday decorations, anything that doesn’t need to be touched weekly.
Below that, a narrow console table or a wall-mounted shelf acts as the drop zone: place for mail, dog leashes, sunglasses, car keys.
The vertical split between overhead long-term storage and eye-level daily access is the thing that makes this work. You stop rummaging.
Companies like Fleximounts make solid ceiling-mounted systems for around $150 to $200. Worth every dollar.
The charging station cubby
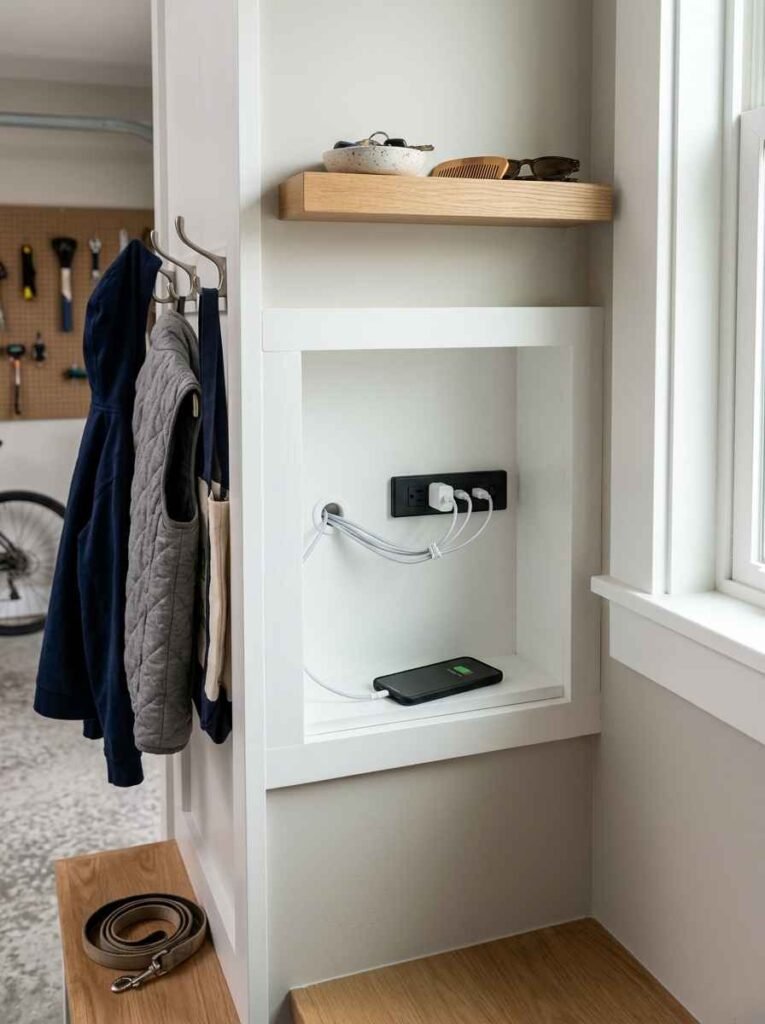
Phones, earbuds, tablets, the occasional gaming controller that somehow migrated to the garage.
Build a small dedicated cubby, maybe 18 inches wide and 12 inches tall, with a power strip mounted inside and a slot in the back panel for cords to pass through.
Everything charges in one spot. You leave the house with a full battery. It sounds almost too simple, but I’ve seen families who’ve done this say it changed their whole morning routine.
Painted concrete floor with area rug
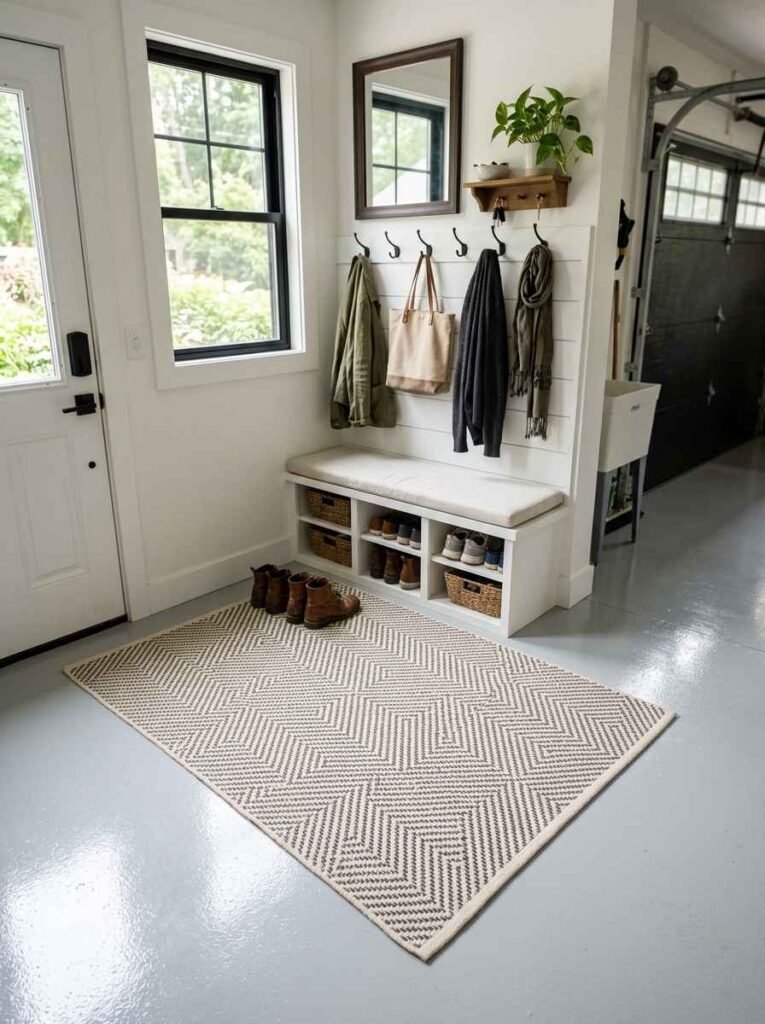
This is more about making the mudroom feel like a room and less like a garage corner. Paint the concrete with a two-part epoxy floor paint (Rust-Oleum’s EpoxyShield is the go-to), then lay a washable flat-weave rug over the entry section.
The rug catches dirt, the epoxy protects the rest of the floor, and the whole zone suddenly looks finished.
This is probably the highest-impact, lowest-cost thing you can do if you’re not ready to do built-ins yet.
Washable rugs from Ruggable run about $100 to $180 and hold up well in high-traffic spots.
Full wall of cabinets with closed fronts
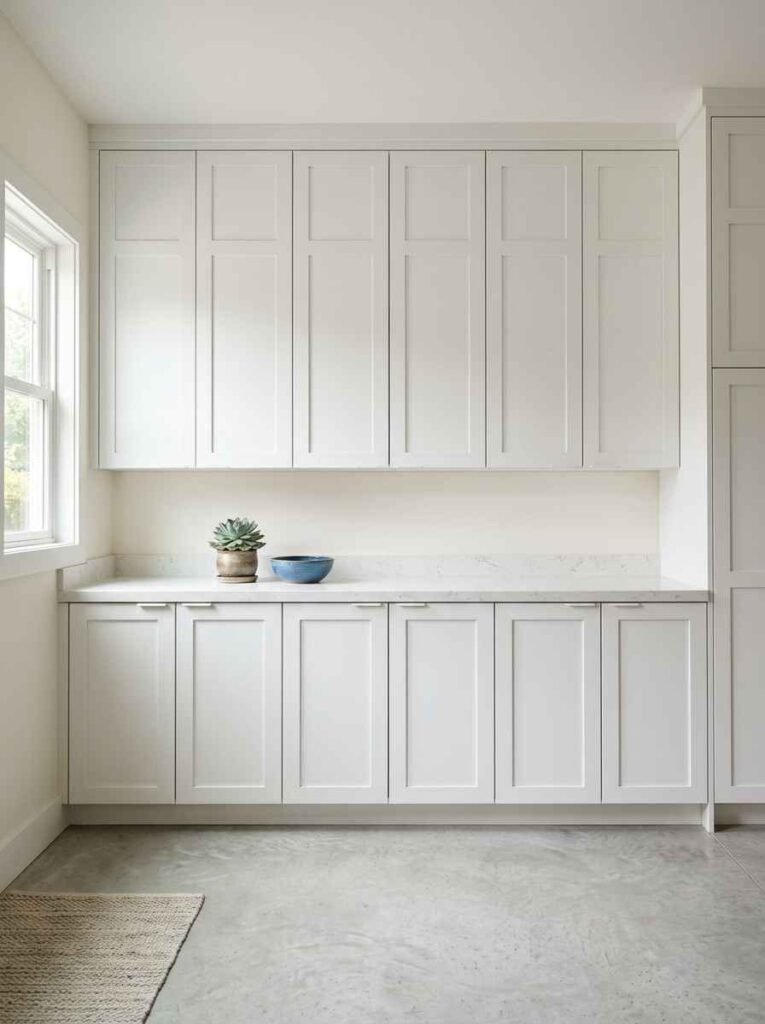
Open shelving is photogenic. Closed cabinets are more livable, especially in a garage where dust and exhaust fumes are real.
A full run of base cabinets with upper cabinets above creates an enormous amount of storage and the whole wall reads clean because you can’t see any of it.
IKEA’s SEKTION kitchen cabinets work well here. They’re designed for wet environments, they’re cheaper than custom cabinetry by a wide margin, and the depth (24 inches for base, 12 inches for upper) suits a garage context well.
A lot of people run them the full width of one wall and add a countertop across the base cabinets for workspace.
If you go this route, spend the extra $80 on soft-close hinges. You’ll thank yourself every single day.
Mudroom in a converted side door entry
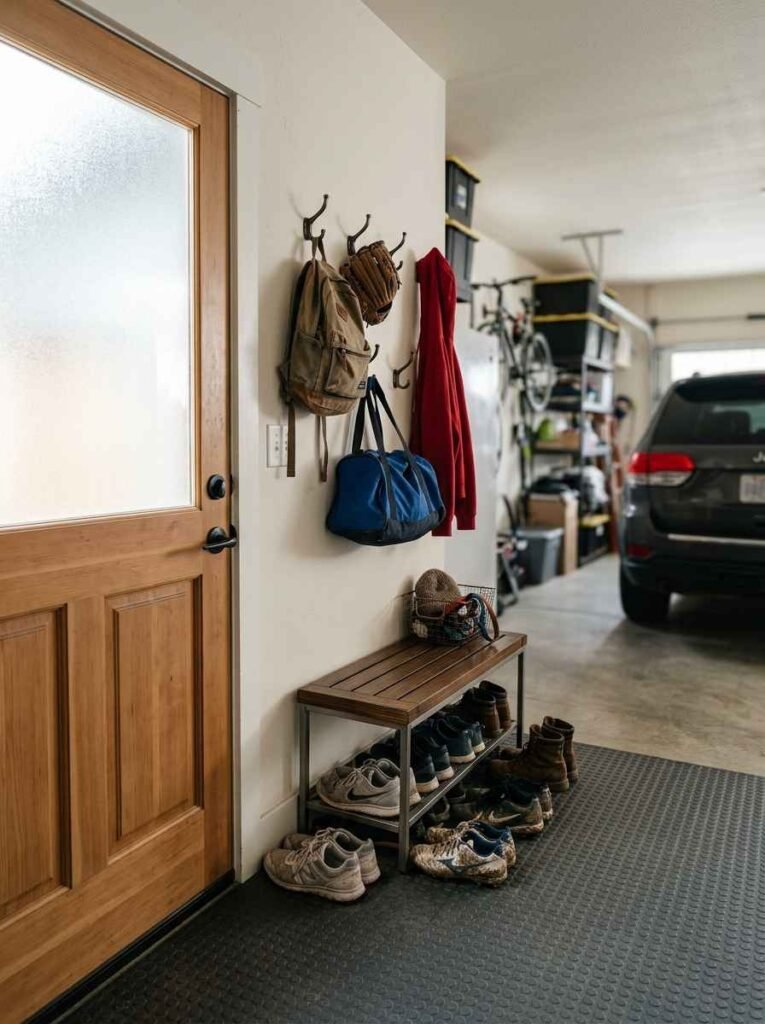
Not every garage mudroom needs to be at the main door. If you’ve got a side entry or a man door, that can become the dedicated mudroom zone while the main garage bay stays clear for cars.
This works especially well for families with kids who play outdoor sports. The side door becomes the “dirty entry”: shoes off here, coats hung here, equipment dropped here. The interior door into the house stays clean.
It’s a traffic flow solution as much as a storage solution.
The sports equipment wall
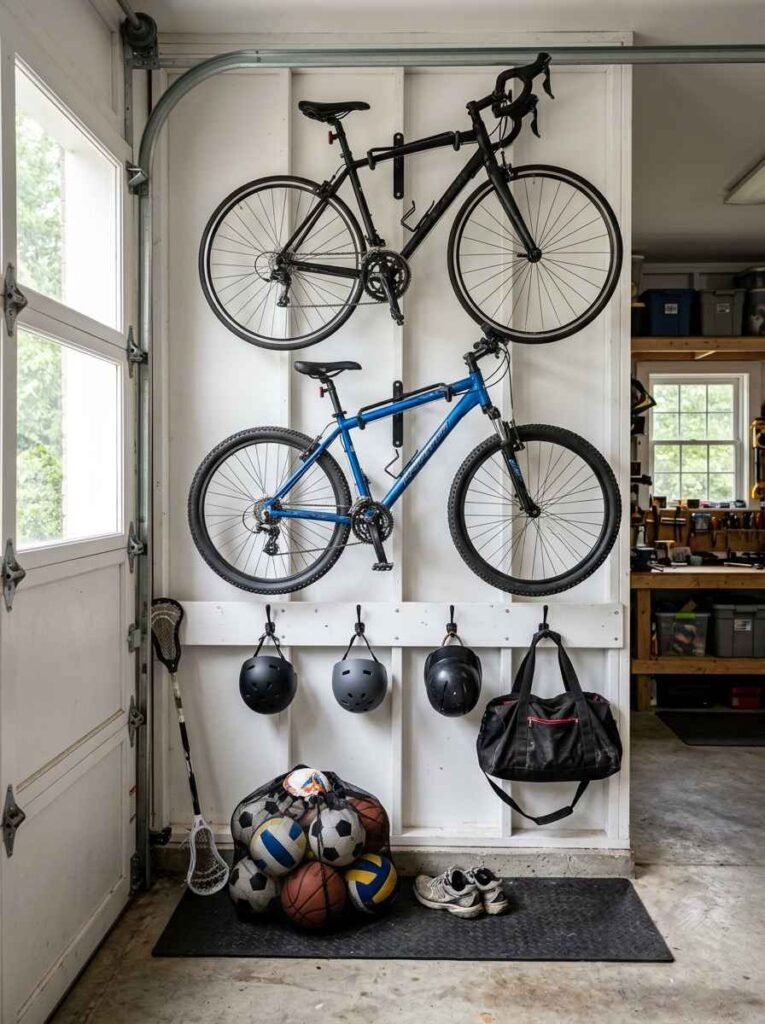
Bikes, helmets, knee pads, baseball bags, lacrosse sticks. If you have kids in sports, you know the equipment sprawl is its own kind of madness. A dedicated sports wall fixes this.
Wall-mounted bike hooks (horizontal, so the bike hangs flat), a row of hooks at different heights for helmets and bags, and a small bin or shelf below for balls and smaller gear.
You can buy a whole modular sports organizer system from places like Sports Rack or Monkey Bar Storage, or you can build your own for about half the price using heavy-duty hooks and a 2×6 board bolted into studs.
The key thing: assign a specific hook or bin to each sport and each kid. If everything has a named spot, things go back to their named spot. IMO, this is more about behavioral design than storage design.
Slim wall-mounted shelving for narrow garages
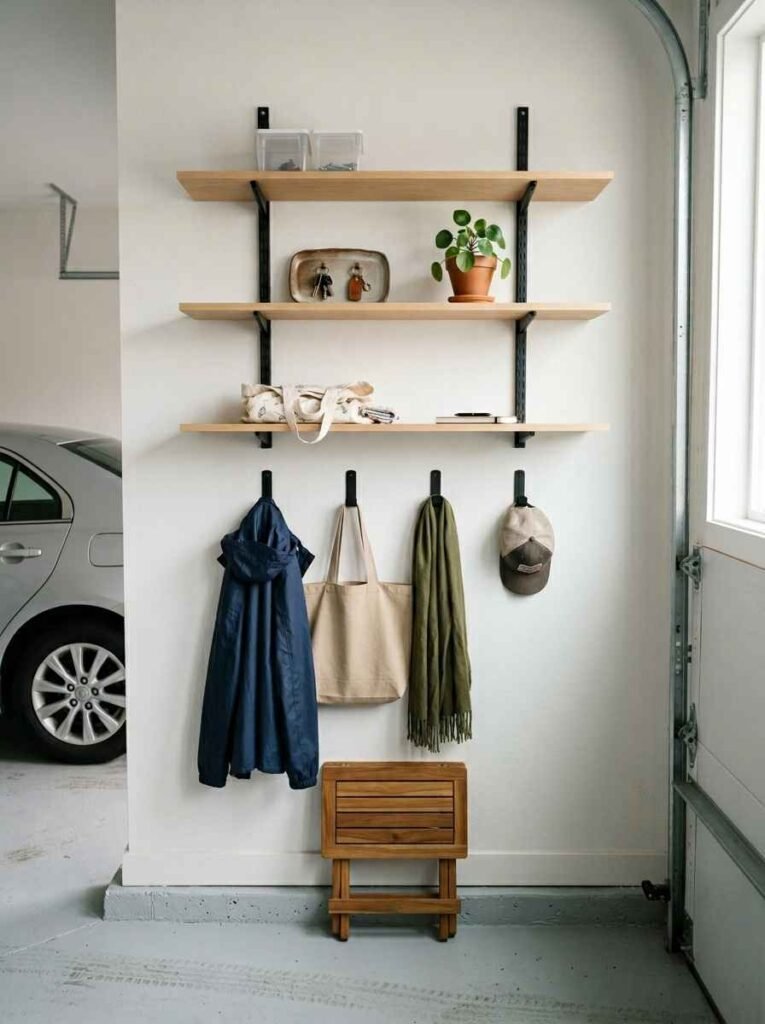
Single-car garages and townhouse garages are often narrow enough that a bench-and-cubby setup would eat too much floor space.
The answer is wall-mounted shelving that doesn’t extend more than 10 to 12 inches from the wall.
A couple of floating shelves at varying heights, a row of wall hooks below, and a small foldable bench (folds flat against the wall when not in use) gives you 90% of the functionality in maybe 25% of the footprint.
Brands like Gladiator and ClosetMaid make adjustable wall-track systems that let you reconfigure without re-drilling. Useful if your storage needs shift year to year (and they will).
Chalkboard or whiteboard panel
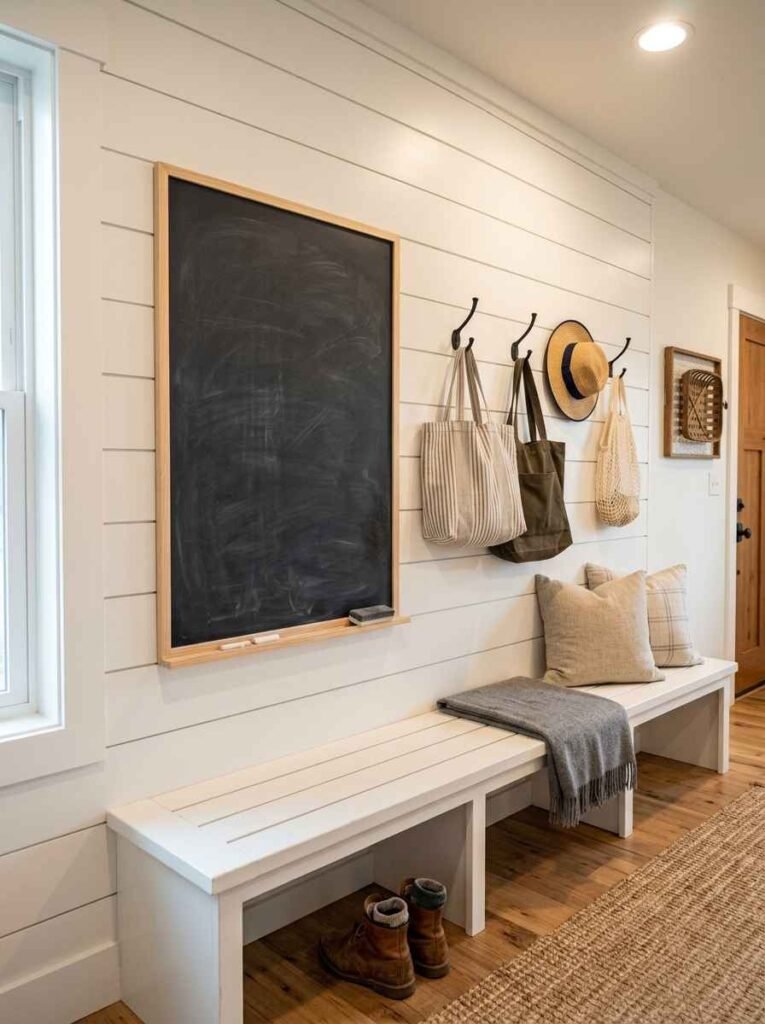
This one’s subtle but genuinely useful. Mount a 24×36 inch whiteboard or chalkboard panel on the mudroom wall.
It’s where you write the grocery list, track after-school pickups, note when the dog was last fed, leave a message for whoever gets home first.
Wow, I know this sounds very 2009 Pinterest, but it works in a way that phone apps don’t, because it’s physical and visible to everyone at the exact moment they’re coming and going. The garage mudroom is the transit hub of the house.
The whiteboard captures all the transit-hub information that otherwise lives in 4 different text threads.
Color-coded bin system
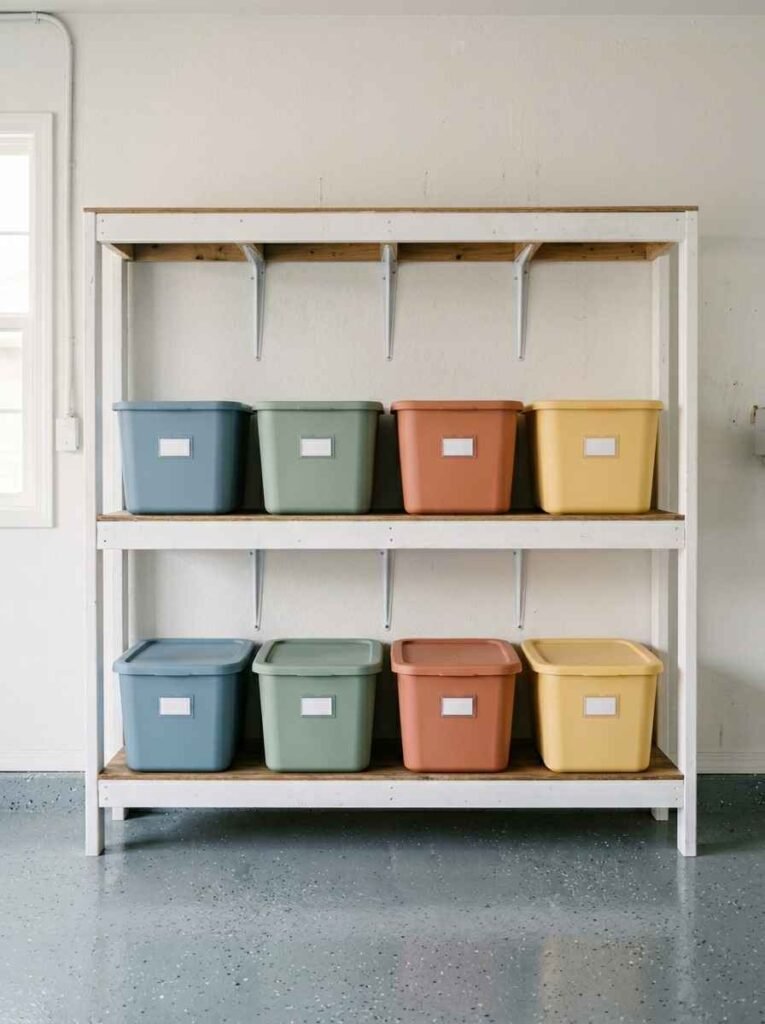
Buy bins in 4 or 5 different colors and assign each color to a category: blue for sports, red for tools, green for outdoor toys, yellow for car stuff, and so on. Label them clearly.
This sounds obvious. But most garage storage fails because the system requires memory (“what bin did I put the jumper cables in?”). Color-coding makes it visual and instant. Even kids get it.
The Container Store’s weathertight bins are good; so are Sterilite’s stacking bins if you’re watching the budget.
Fold-down laundry shelf
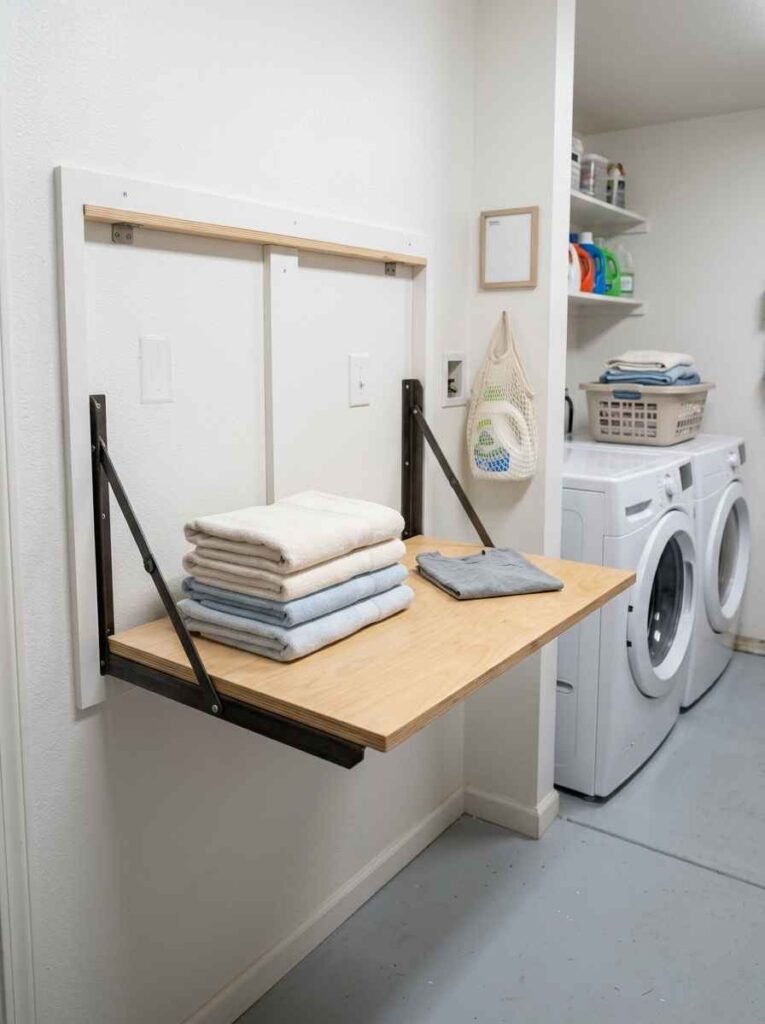
Some people do laundry near the garage. If your washer and dryer are in the garage or just off it, a fold-down shelf (like a Murphy bed, but a shelf) mounted at hip height gives you a folding surface when you need it and disappears flat when you don’t.
This is the kind of small, specific detail that doesn’t photograph particularly well for Pinterest but changes the daily experience of doing laundry in a real and concrete way.
Utility sink station
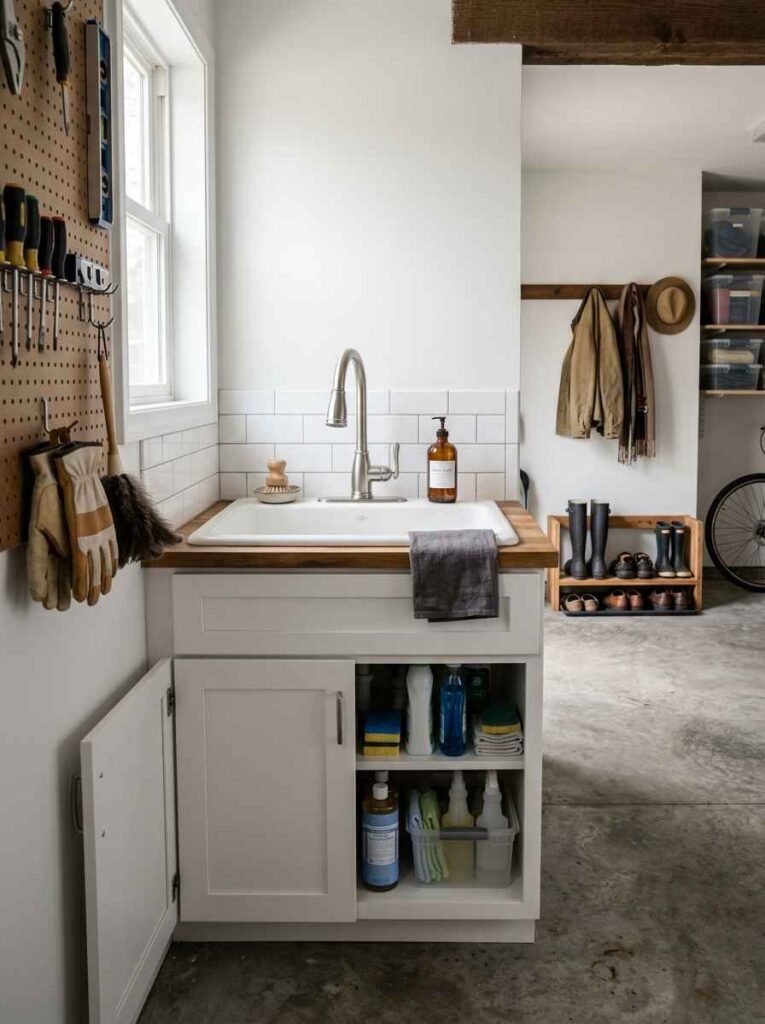
If you do a lot of outdoor projects, gardening, or sports with kids, a utility sink near the garage entry is one of those things you can’t believe you lived without once you have it. Muddy hands get washed before they touch the interior door handle. Wet gear gets rinsed before it comes inside.
A freestanding laundry sink runs $80 to $150 at Home Depot. Plumbing it is the expensive part, obviously, but if you’re already doing a mudroom renovation and the water lines are nearby, it’s worth getting a quote.
A simple comparison: mudroom setup options by budget
| Budget range | Best approach |
|---|---|
| Under $300 | Wall hooks, floating shelves, area rug, pegboard |
| $300 to $800 | Bench with cubby storage, locker wall (IKEA-based) |
| $800 to $2,000 | Full cabinet wall, built-in bench, overhead storage |
| $2,000 and up | Custom millwork, utility sink, full locker system |
Slatwall panels: the modular solution
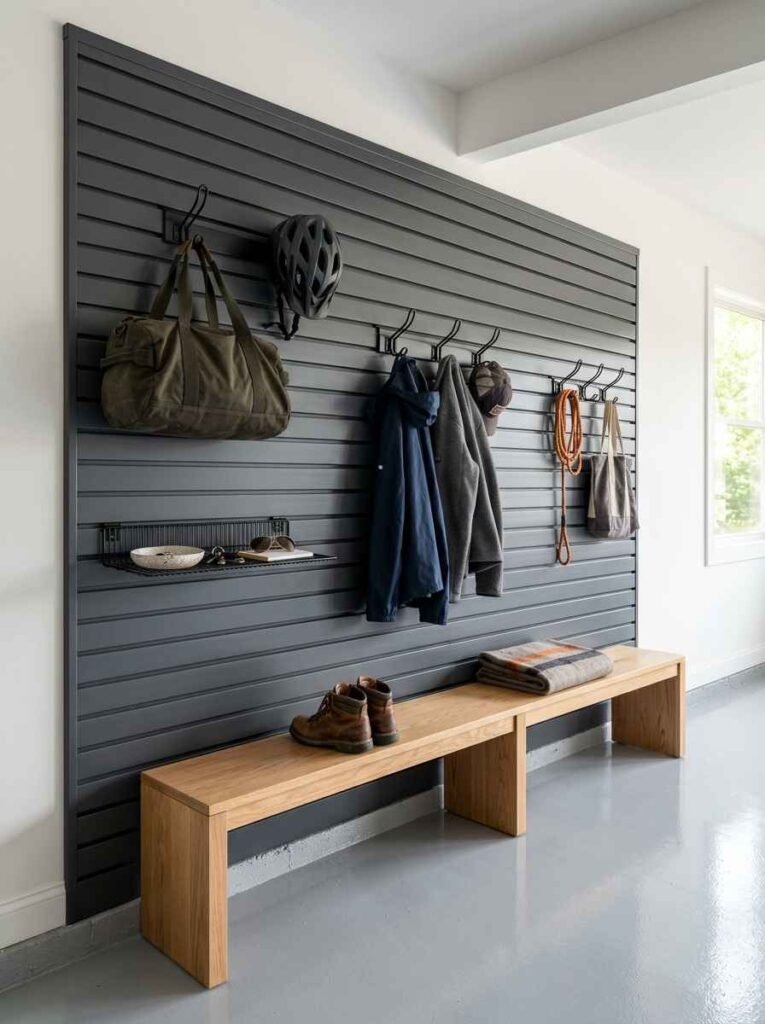
Slatwall is the horizontal-grooved panel material you see in retail stores. It’s kind of ugly on its own, honestly, but it’s incredibly practical: you can hang any compatible hook, basket, or shelf anywhere on the panel without drilling new holes.
For a garage mudroom, a 4×8 section of slatwall runs about $60 to $90. Add a mix of hooks, small baskets, and a couple of shelves, and you’ve got a fully reconfigurable storage wall. Rearrange it whenever your needs change.
I’d paint it before you hang it, by the way. The raw beige color is bleak.
Drop-zone console table
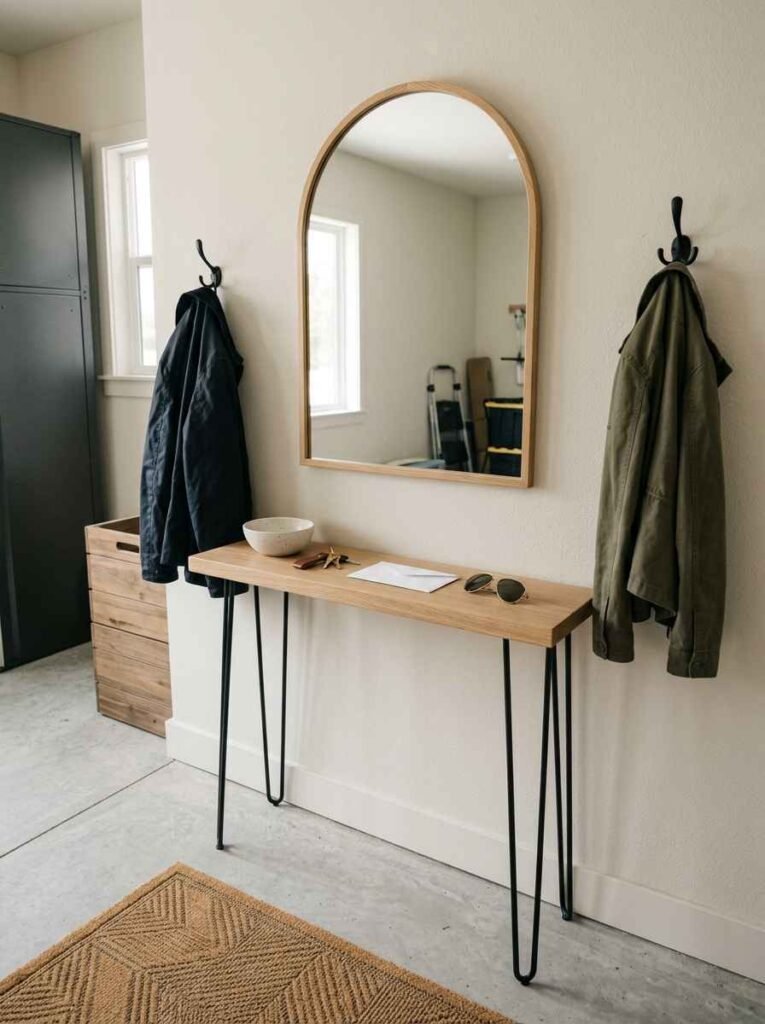
This is the simplest possible mudroom setup: one narrow console table (12 to 14 inches deep) against the wall beside the entry door, with a mirror above and hooks on either side of the mirror.
Keys go on the table. Mail goes on the table. Sunglasses go on the table. Coats go on the hooks.
That’s it. Probably $200 all in. And it works better than 80% of overcomplicated “organization systems” because it has about 5 things you can put on it, which means it never gets truly buried.
Garage mudroom with dog station
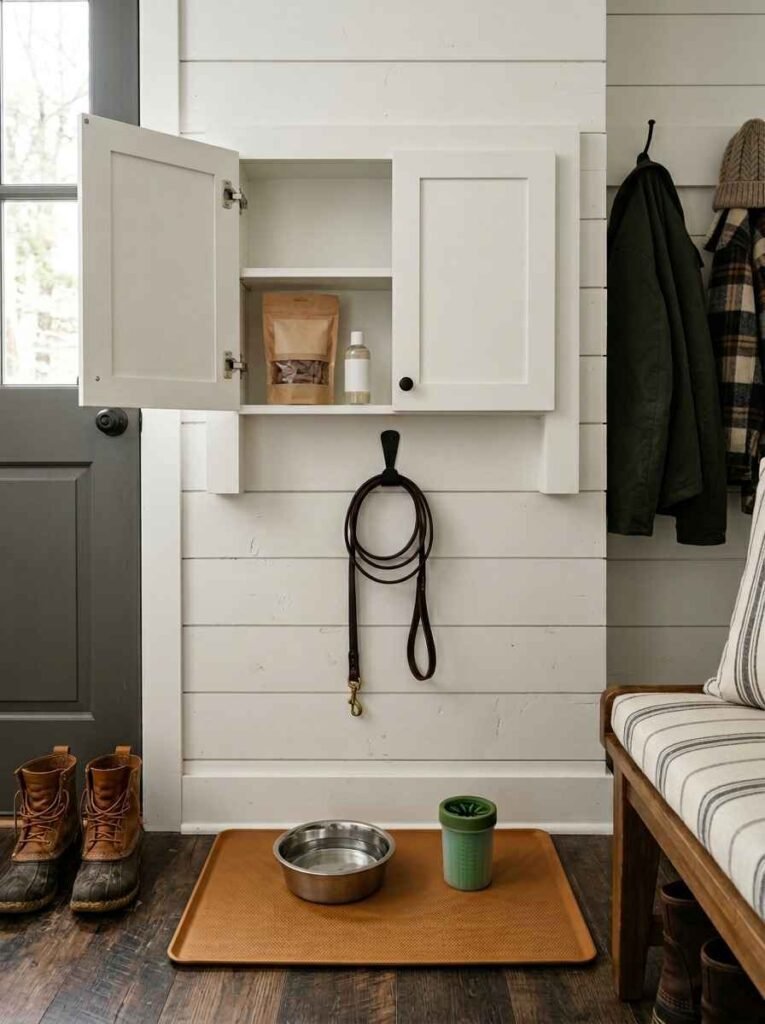
If you have a dog, the mudroom is where you actually interact with the dog most, transitionally speaking. Leash on, leash off, paws wiped, treats given. Build the dog station into the mudroom and life gets measurably easier.
A small wall-mounted cabinet at shoulder height with a hook for the leash and a shelf for treats and poop bags. A mat below for paw wiping. Some people add a low tub or basin for proper paw washing; you can buy a silicone paw cleaner (Dexas MudBuster) for about $20 that works well for this.
The dog will appreciate none of this, obviously. But you will.
Vertical garden tool organizer

Garden tools are long, awkward, and they fall over constantly if you try to store them horizontally. A vertical wall organizer with individual slots for each tool (rakes, shovels, brooms, hoes) keeps them upright and accessible.
Wall-mounted holders like the Rubbermaid FastTrack Garden system handle this well. Or you can drill a row of 1.5-inch holes through a 2×6 board and mount it at head height, tools hanging down through the holes. Costs maybe $15 in materials and works perfectly.
Window in the mudroom wall
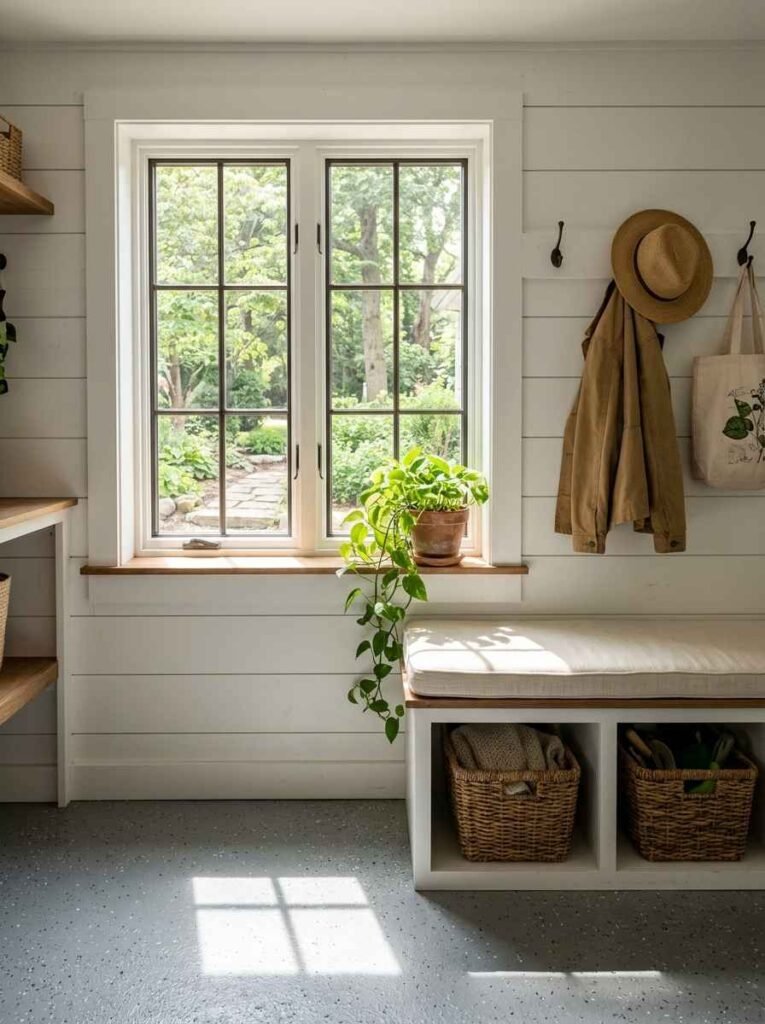
This sounds like a weird suggestion for a garage, but if your mudroom is against an exterior wall, a small window (even a fixed pane) does 2 things: natural light makes the space feel like a room rather than a storage closet, and you can see who’s at the side door before you open it.
If you’re already doing a renovation, adding a window is maybe a $400 to $600 upgrade including installation. The livability difference is real.
The “staging zone” concept
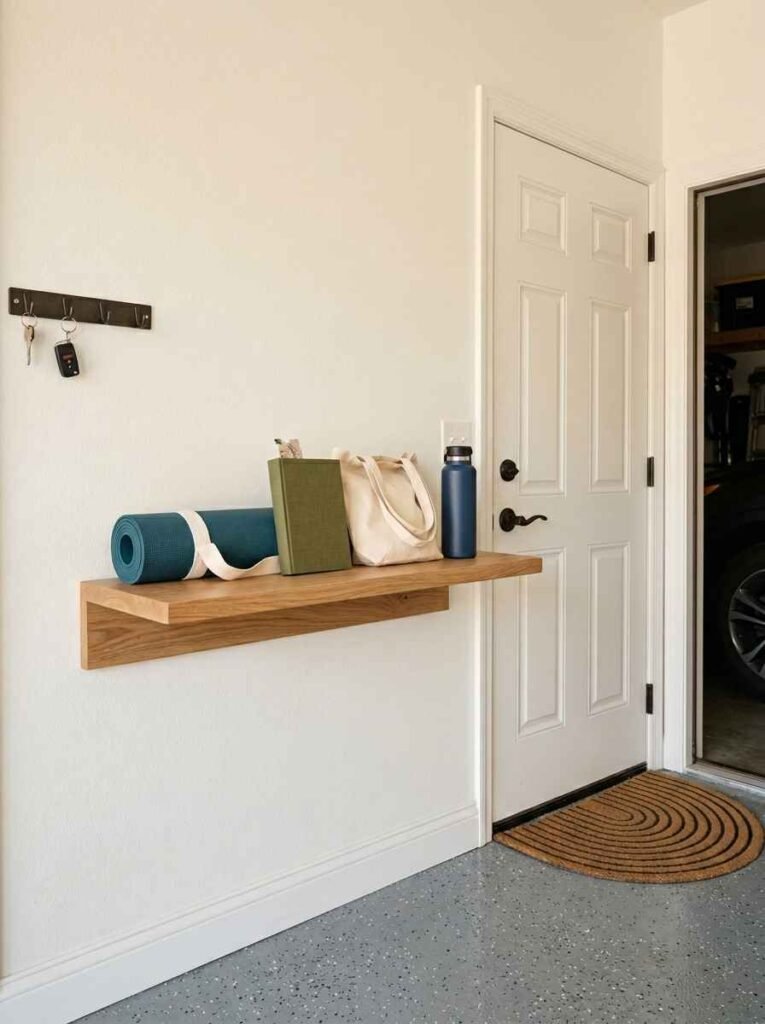
I think this is the most underrated mudroom design principle and almost no one talks about it explicitly. The staging zone is a flat surface at or near the door where you place everything that’s going with you tomorrow: the gym bag, the library books, the thing you need to return to a neighbor.
It’s not a dumping ground (those grow). It’s a specific, bounded, intentional surface. A shelf, a bench, a small table. The rule is that nothing lives there permanently. Things sit there overnight because they’re leaving in the morning.
Build this into your mudroom design and you’ll stop forgetting things. Which is probably the most practical outcome possible from any home organization effort.
Cabinet with charging drawer
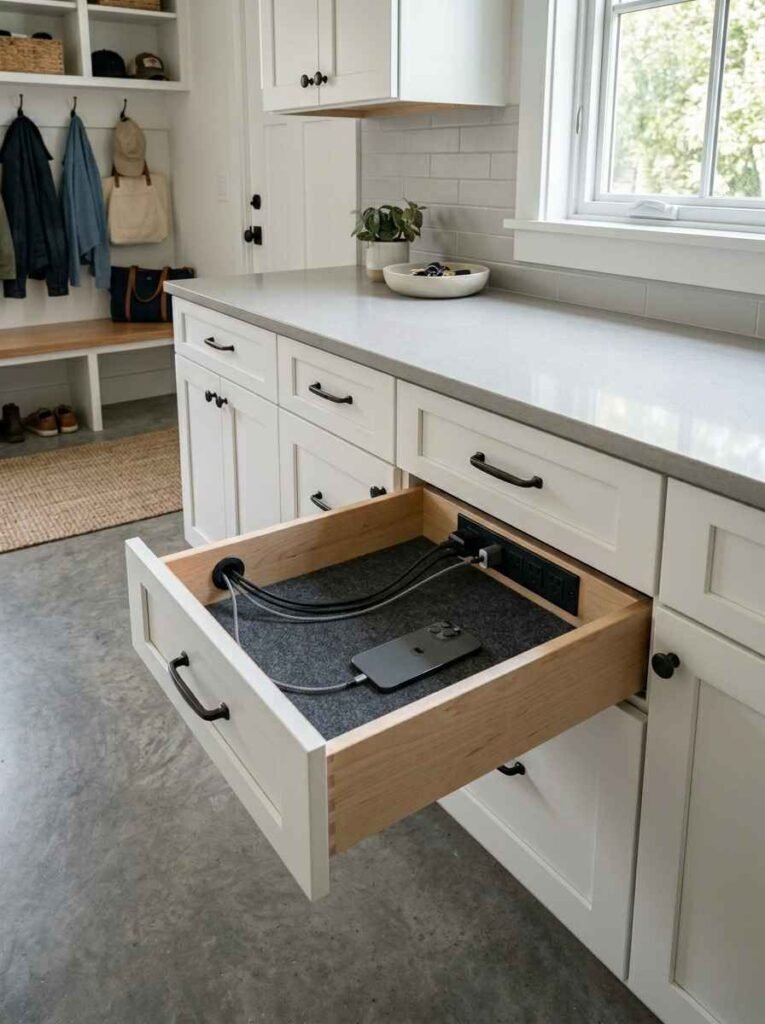
Similar to the charging cubby concept but more discreet: a base cabinet with a shallow top drawer that has a power strip inside and cord pass-throughs at the back. The drawer slides shut and everything charging is hidden.
This is especially good if you’re doing a full cabinet wall and want to keep the visual clean. IKEA kitchen cabinets can be modified for this fairly easily, or you can buy cabinet inserts designed for this purpose from companies like Rev-A-Shelf.
Hooks at kid height
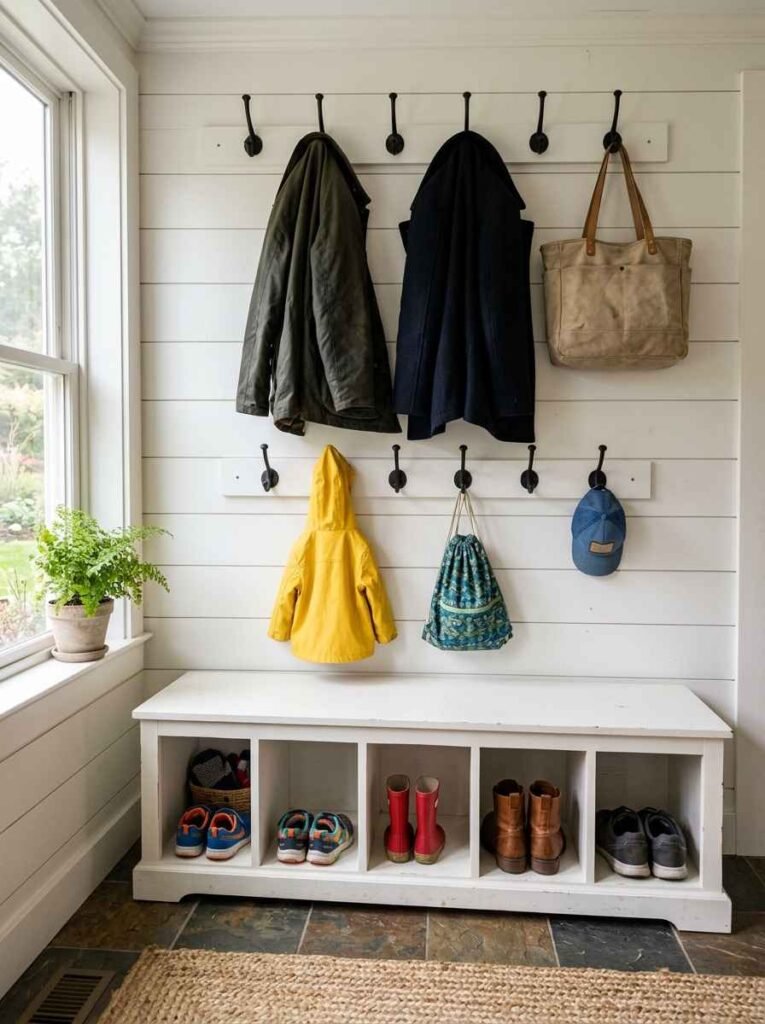
Most mudroom hooks are installed at adult height, which means kids have to reach up or, more likely, just drop everything on the floor. Install a second row of hooks at 36 to 40 inches from the floor (adjust for the actual height of your kids) and they’ll actually use them.
This is such a small thing and it makes a real difference. I’ve seen it in a couple of houses with young kids and the coat-on-the-floor problem basically disappears overnight.
Boot dryer station
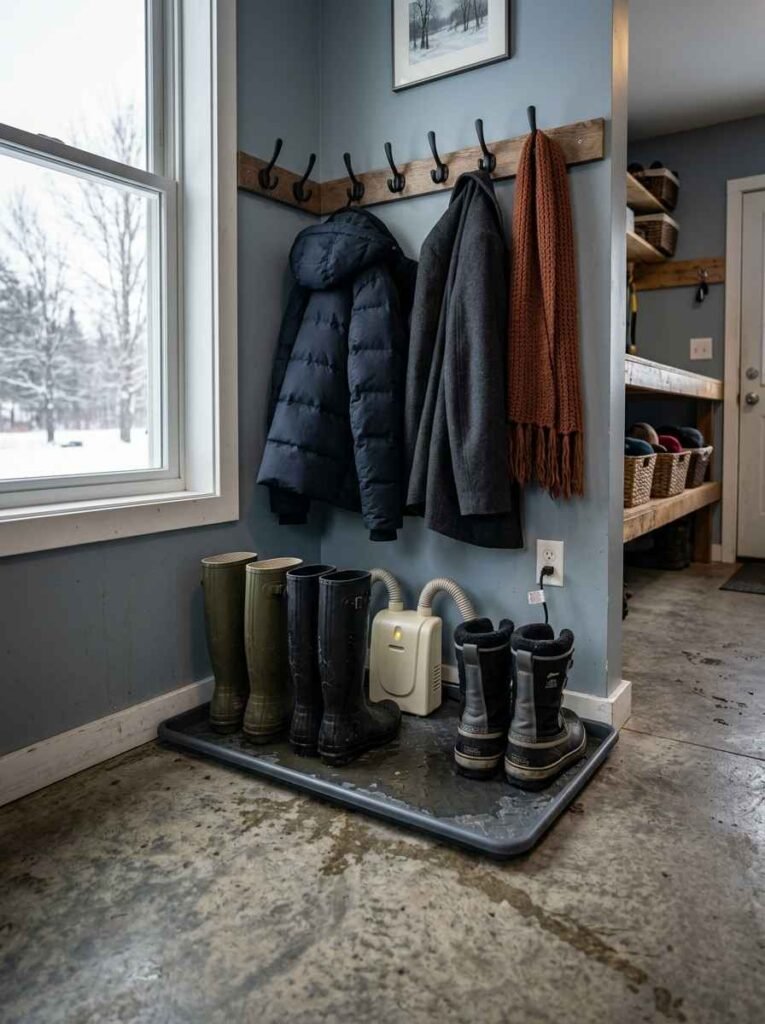
If you live somewhere with snow and rain, wet boots are a perpetual problem. A boot dryer (PEET makes good ones, runs about $30 to $50) mounted or placed at the base of the mudroom dries boots overnight so they’re ready the next morning.
Add a small tray or rubber mat below to catch drips, and you have a contained wet-boot zone instead of a spreading puddle in the middle of the garage. Not glamorous, but genuinely useful for about 5 months of the year depending on where you live.
Reclaimed wood accent wall
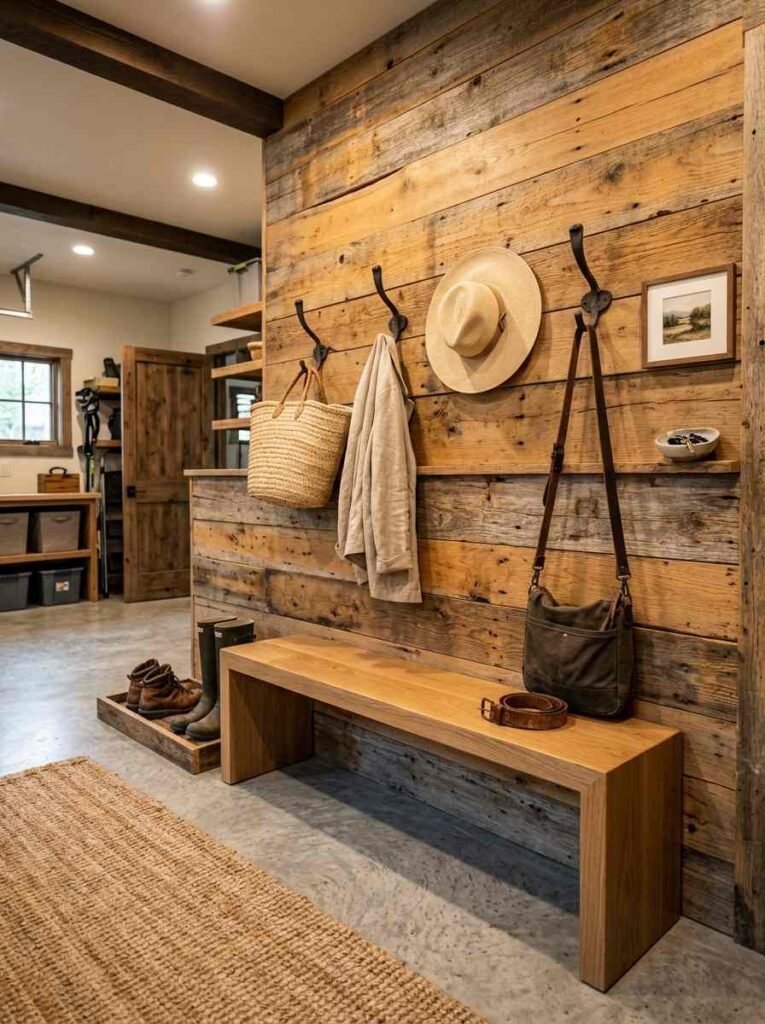
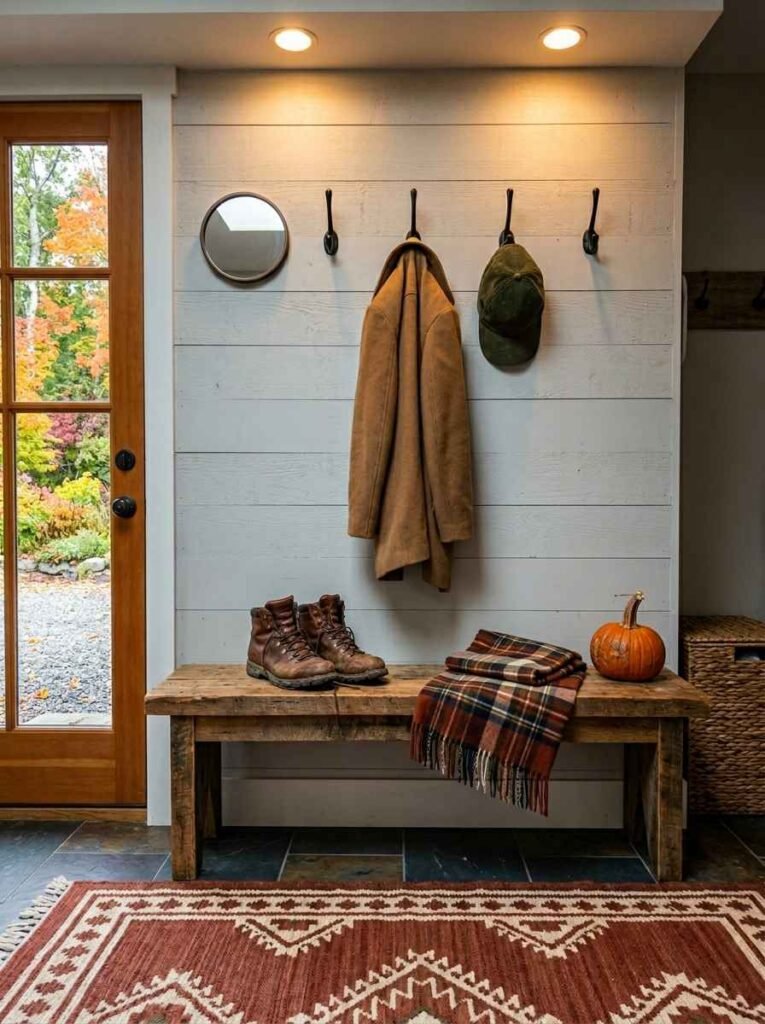
For the Pinterest crowd specifically: a shiplap or reclaimed wood accent wall behind the hooks and bench area photographs well and adds warmth to what’s usually a pretty industrial-looking space.
Peel-and-stick shiplap panels exist now (Stikwood is one brand) and they’re about as much effort to install as wallpaper. For a 6-foot-wide section, you’re looking at $200 to $350 in materials. The result looks like a renovation that cost 5 times that.
Bike storage that doesn’t take floor space
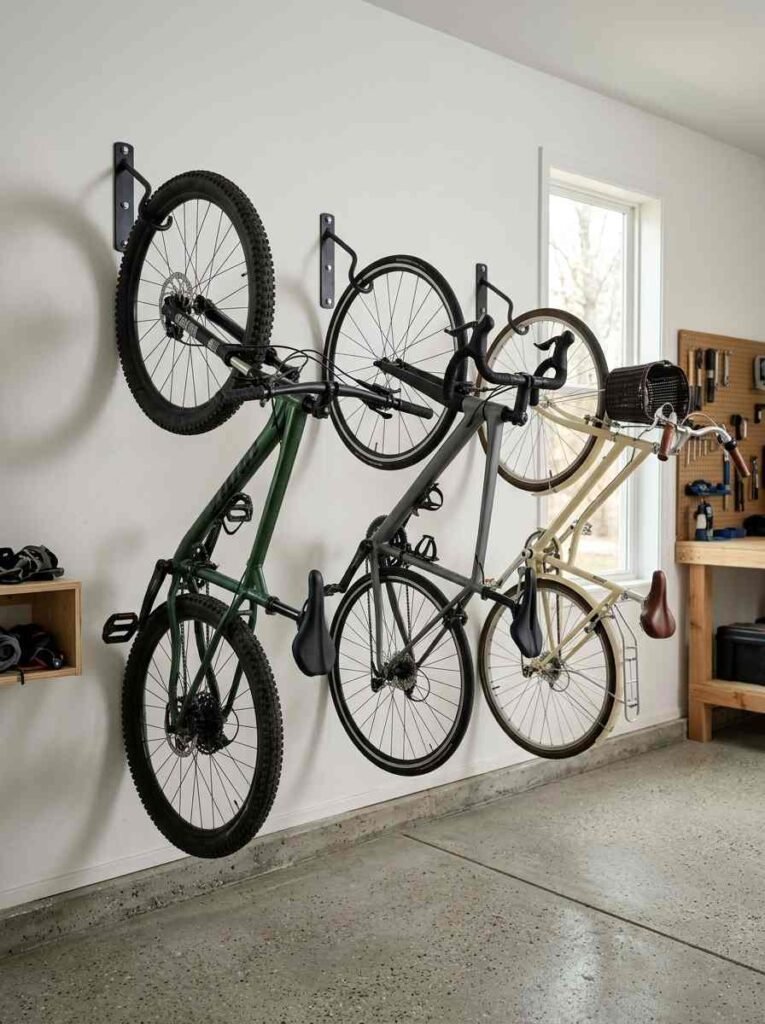
Vertical bike hooks are the move for tight garages. Mount a hook into a stud (use the rated-weight version, not the cheap plastic ones), lift the bike, hang it by the front wheel. The bike takes about 18 inches of floor space instead of 6 feet.
If you have multiple bikes, offset the hooks at slightly different heights so handlebars don’t conflict. You can fit 3 or 4 bikes on a standard 10-foot wall this way.
For a slightly fancier version, a ceiling-mounted pulley system (RAD Cycle makes one for about $40) lets you hoist the bike up completely out of the way. Very satisfying to use, honestly.
Wire basket wall grid
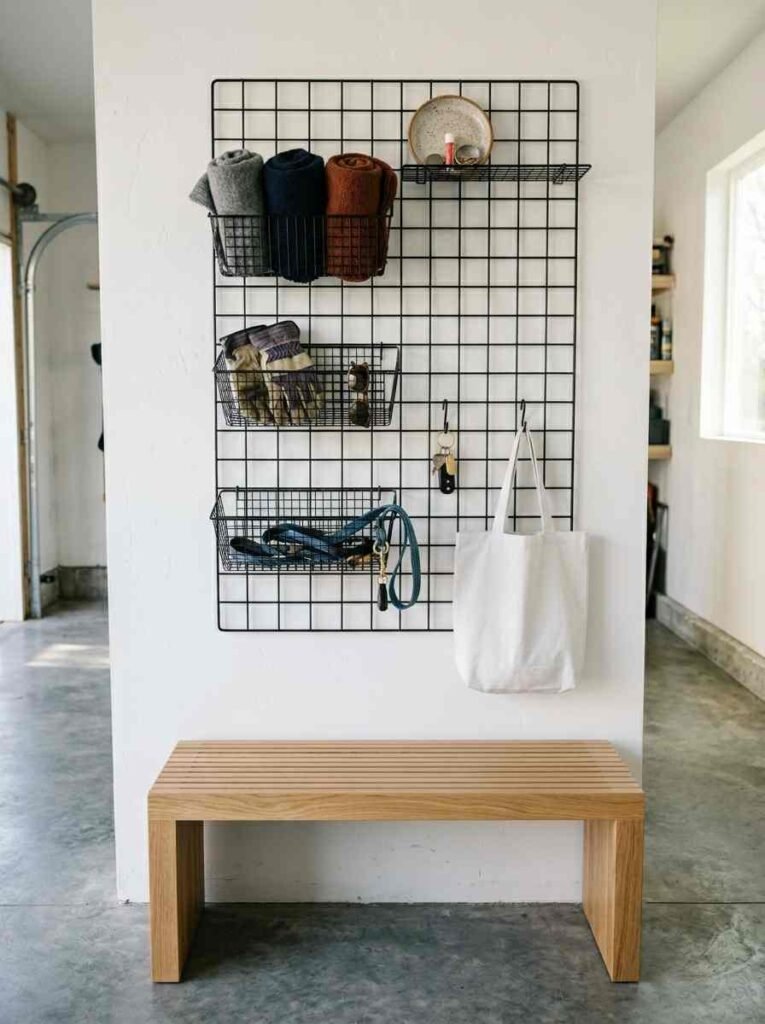
The French cleat is more popular in workshop circles, but the wire grid panel (the kind that’s basically a big mesh of wire squares) works great in a mudroom because you can hang S-hooks, wire baskets, small shelves, and hooks anywhere on the grid without tools.
A 2×6 foot grid panel runs about $30. Hang it, load it up with baskets and hooks, and rearrange whenever you want. It’s not the most beautiful option, but for someone who’s still figuring out their storage system, it lets you experiment cheaply before committing to built-ins.
Mudroom with mini fridge
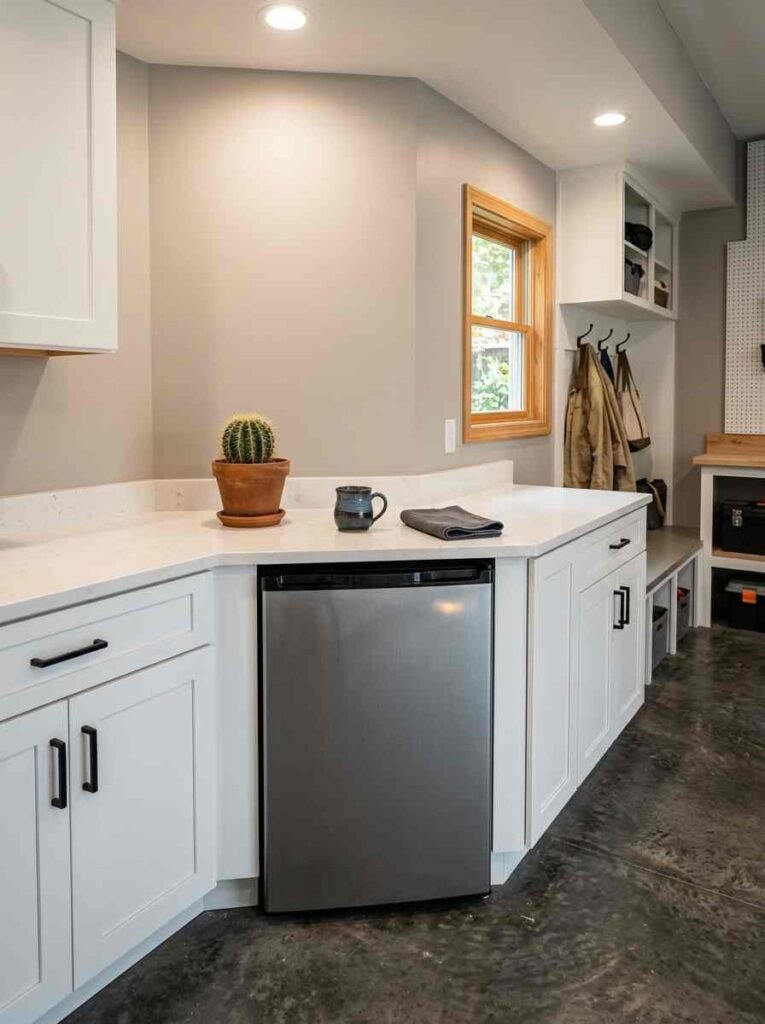
Okay, this one’s specifically for garages that double as a workspace or man cave. A mini fridge in the mudroom zone (or just beside it) means cold drinks without walking through the house, and it pulls double duty for sports drink storage if you have kids in athletics.
I know it sounds indulgent. But I’ve been in several garages with this setup and it genuinely gets used constantly. And if you already have a dedicated garage circuit, the power’s right there.
Message center with mail sorter
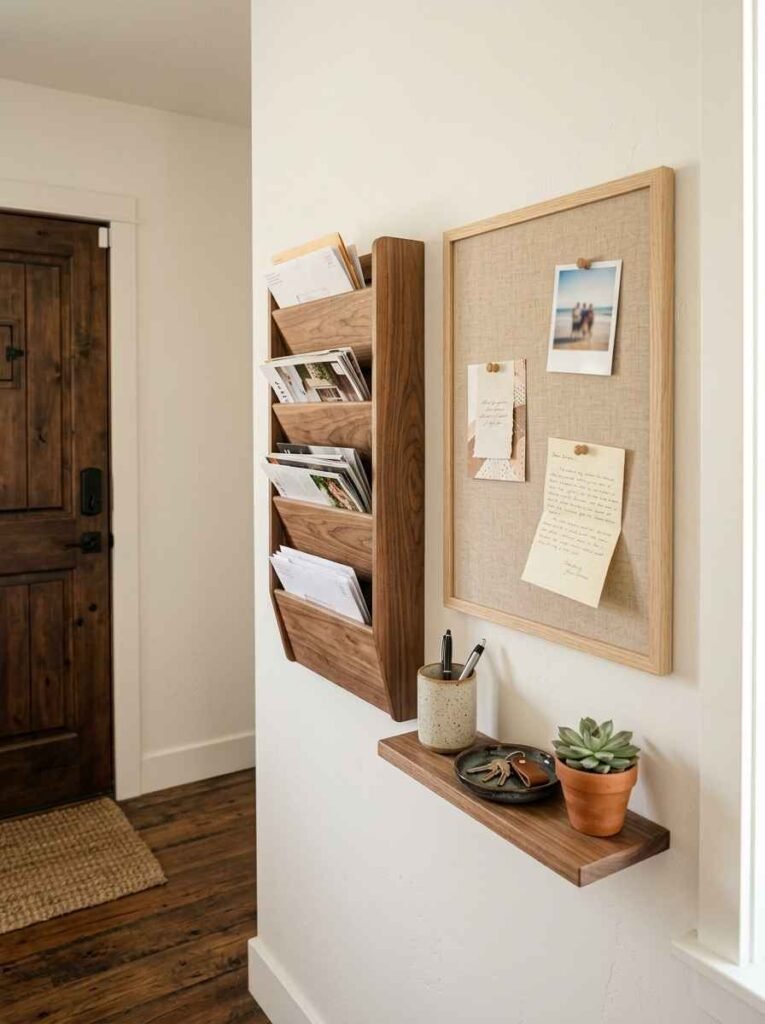
Mount a wall-mounted mail sorter (3 to 4 slots) beside the entry door, and add a small corkboard or magnetic board beside it. Bills go in one slot, kids’ school papers go in another, outgoing mail goes in the third.
This keeps paper off every flat surface in the house, which, if you’ve ever tried to “declutter” and found yourself just moving paper from room to room, you know is the actual root problem.
Epoxy floor with painted border
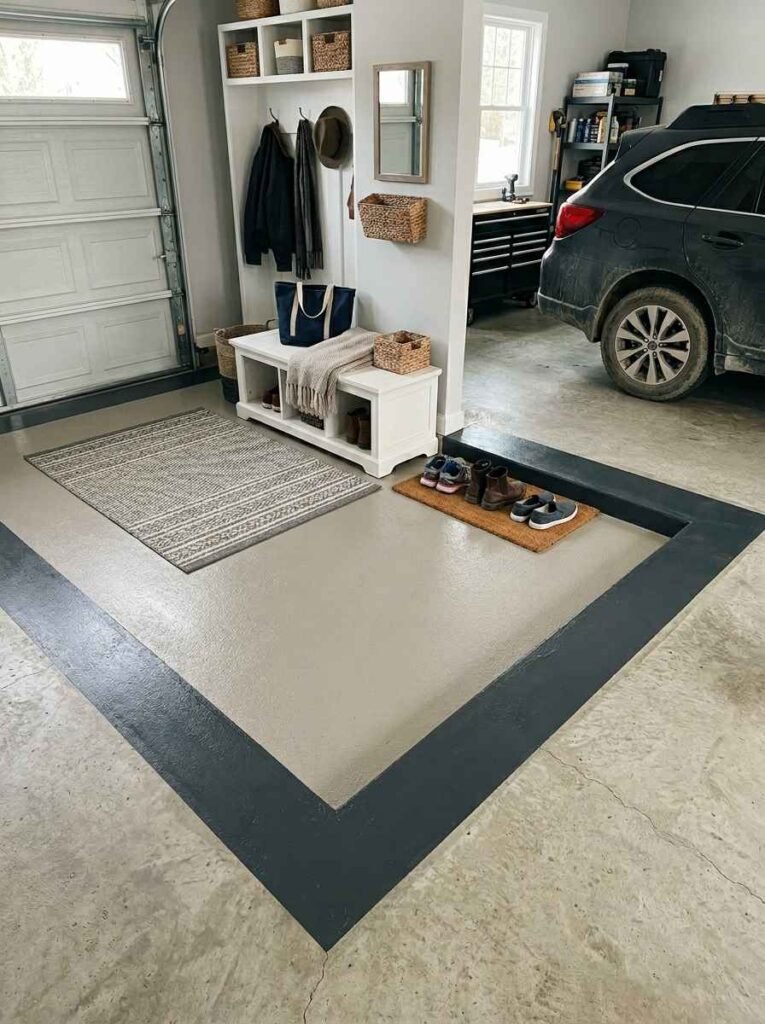
Take the epoxy floor idea a step further: paint a border (maybe 12 to 18 inches wide) in a contrasting color around the perimeter of the mudroom zone. It visually defines the space within the larger garage.
This is a really low-cost way to create a “room within a room” feeling without walls or partitions. The defined zone changes how people use the space; they keep the mudroom area cleaner because it has a clear visual boundary. This is actually a small psychological thing that works.
Enclosed mudroom pod
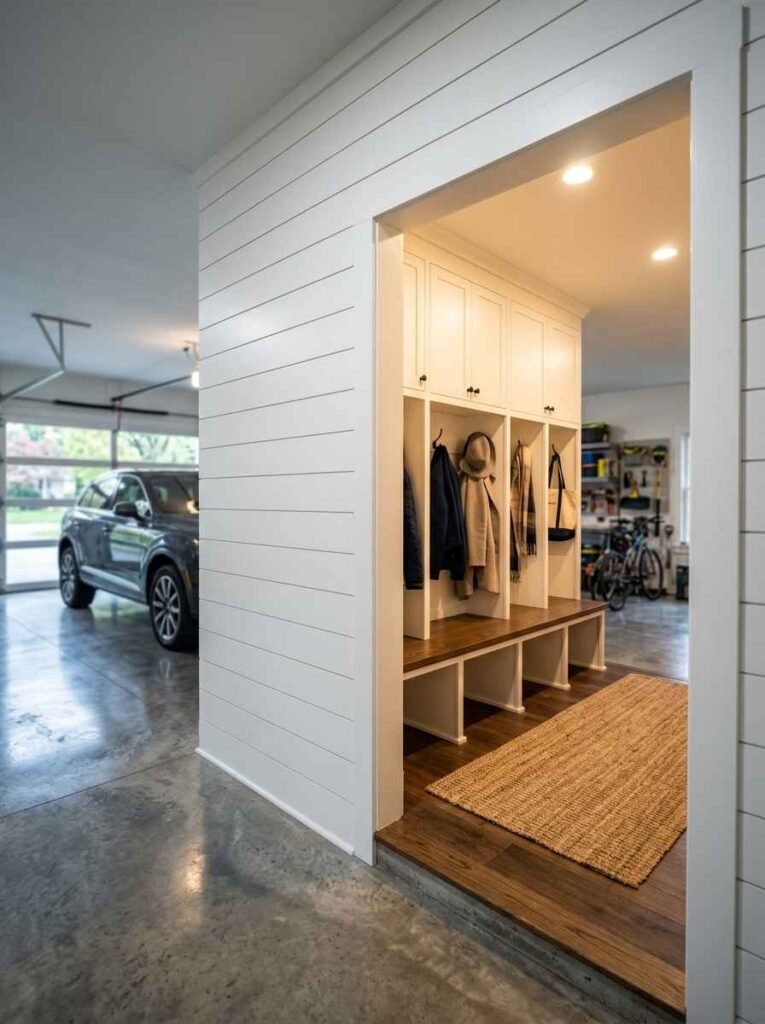
If budget allows, build a partial wall to fully enclose the mudroom area from the rest of the garage. Even a 7-foot-tall partial wall (doesn’t have to reach the ceiling) with a wide opening creates a real room feel.
Add the wall hooks, bench, cabinets, and charging station inside the pod. The rest of the garage stays a garage. The entry experience is completely separate.
This is probably the highest-effort option on the list, but it completely solves the “my garage feels like a storage locker, not a home” problem. Custom builders can do this for $3,000 to $6,000 depending on size and finishes; handy DIYers can do it for $800 to $1,500 in materials.
Labeled clear bins on upper shelves
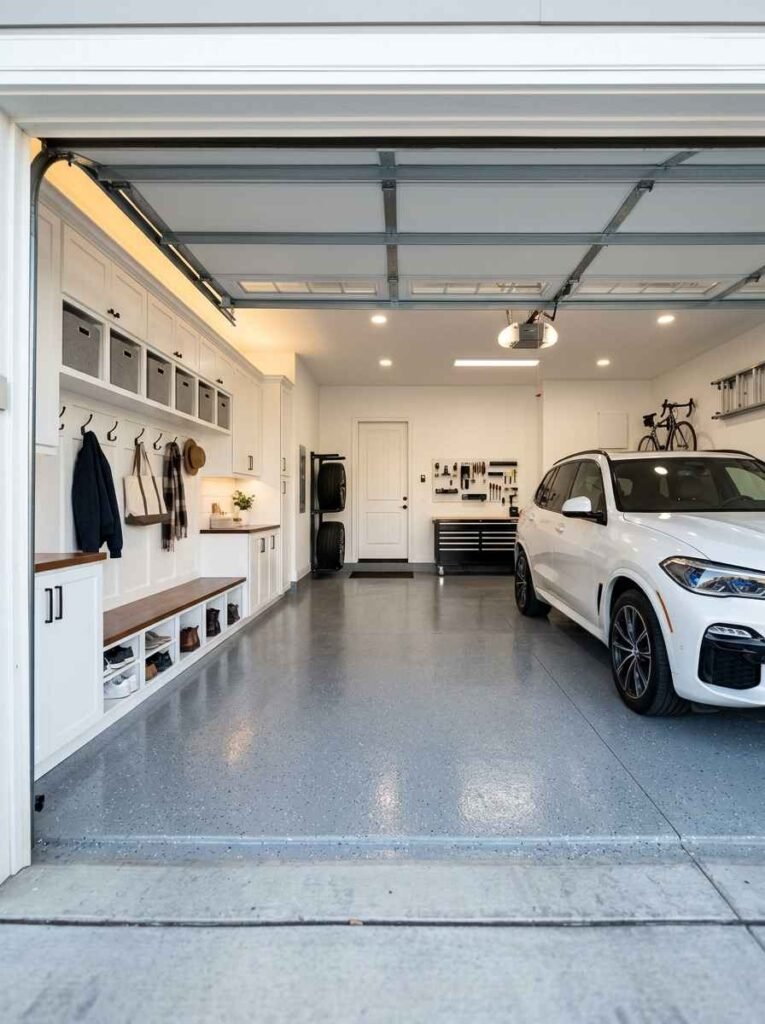
The upper shelves of any mudroom cabinet or open shelving unit tend to become the place where things disappear permanently. Fix this with clear bins, each with a printed label.
Seasonal gear, holiday decorations, sports equipment that’s off-season: everything goes in a labeled clear bin. You can see it, you can find it, you can pull the right bin without opening 4 others.
This is genuinely the single most useful organizing principle and it costs almost nothing. A pack of 6 Sterilite clear bins runs $25. A label maker is $20 at Target. Total investment: $45 and about 2 hours.
Using vertical space with a ladder shelf
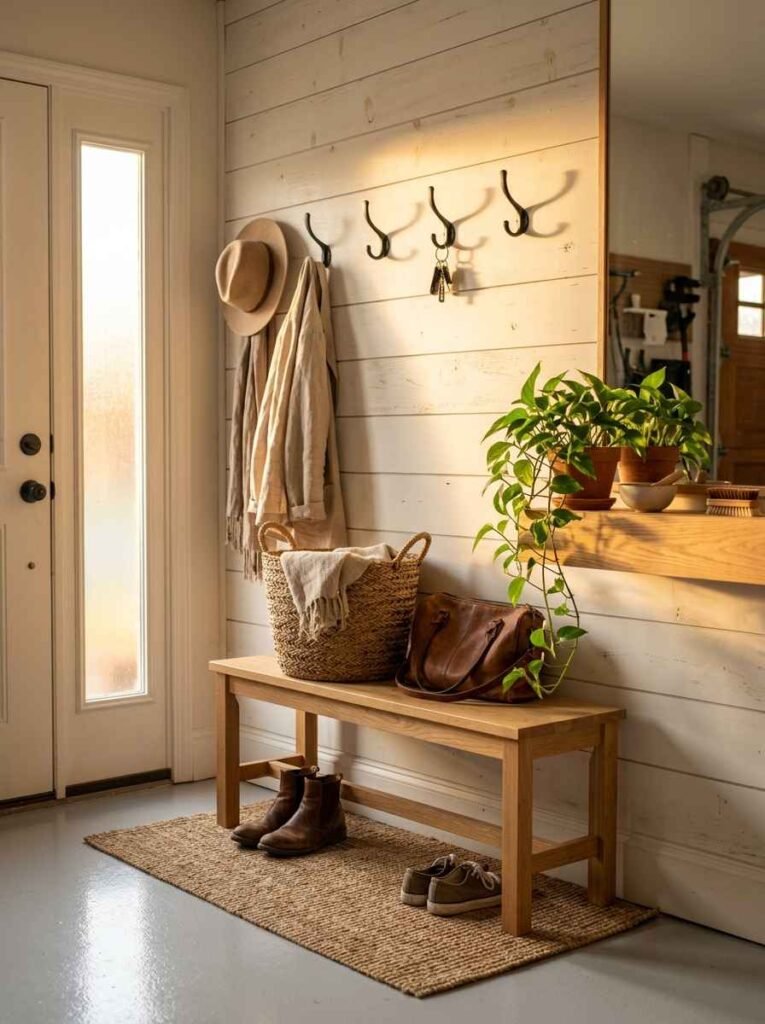
A leaning ladder shelf (the kind you’ve definitely seen in every home decor store for the past decade) works in a garage mudroom for a surprising reason: it fits into corners and doesn’t require any mounting.
Lean it in a corner. Top rungs hold lightweight stuff (hats, light bags), bottom rungs hold heavier bins. It’s completely rearrangeable and you can move it out of the way when you need to. Good option for renters or anyone who doesn’t want to put holes in the wall.
Final thoughts
The thing I keep coming back to after doing all this research and having lived with a proper garage mudroom for a couple of years now: the best design is the one that removes the daily decisions. You shouldn’t have to think about where your keys go or where your kid’s backpack lives. The space should tell you.
Pick the designs from this list that fit your actual situation: your budget, your square footage, your household’s specific chaos. Start with the hooks and a bench if that’s all you can do right now. Add the cabinets later. The overhead storage later still. It compounds.
For more inspiration, the Houzz garage mudroom gallery has thousands of real homes worth browsing. And This Old House’s mudroom guide has solid practical building advice if you’re going the DIY route.
What’s the one thing in your garage entry that drives you the most insane? Start there.
FAQ
Q: How much space do I actually need for a functional garage mudroom?
A wall section that’s 6 feet wide and uses the full wall height can do a lot. Realistically, even 4 feet of dedicated wall space with deep hooks and a small bench handles the daily-use items for most households. Floor space of about 3 feet in front of the wall lets you actually use it without bumping into cars.
Q: What’s the best material for garage mudroom cabinets?
Moisture-resistant options are worth the slight extra cost: MDF with a laminate face, plywood with a sealed finish, or thermofoil cabinets. Unfinished pine or particle board cabinets warp in garage humidity within a year or two, which is frustrating when you’ve put real effort into the installation.
Q: Can I build a garage mudroom without professional help?
Most of it, yes. Wall hooks, floating shelves, pegboard, bench construction, and cabinet installation are all within reach for someone who’s comfortable with a drill and a level. Plumbing a utility sink and electrical work for a dedicated circuit are the 2 things worth hiring out unless you have specific experience.
