
So your mud room is basically a black hole where coats, shoes, backpacks, dog leashes, and random Amazon packages go to die?
Yeah, same. I’ve been there. My old entryway was maybe 4 feet wide and looked like a garage sale exploded inside it every single day. No hooks, no bins, no logic. Just chaos.
The good news? You don’t need a big space to get a killer mud room setup. You need the right ideas.
And I’ve rounded up 24 of them, pulled from real makeovers, designer tricks, and a few things I personally tried (some worked beautifully, one flopped spectacularly — I’ll tell you which).
Pinterest is absolutely packed with mud room inspo right now, so I figured let’s actually break down what works, what’s realistic, and what’s just pretty for the ‘gram but terrible in real life. 🙂
Why small mud rooms are actually easier to organize

Here’s the thing about tiny entryways: they force you to be intentional. Big spaces let you get lazy.
When you only have 6 square feet to work with, every hook, shelf, and bin has to earn its spot.
I talked to a few organizers and designers who specialize in small homes, and they all said the same thing:
the biggest mistake people make is buying storage furniture before measuring. Like, bro, measure twice, buy once. Please.
A small mud room done right can actually work better than a large one done wrong.
24 mud room makeover ideas for small spaces
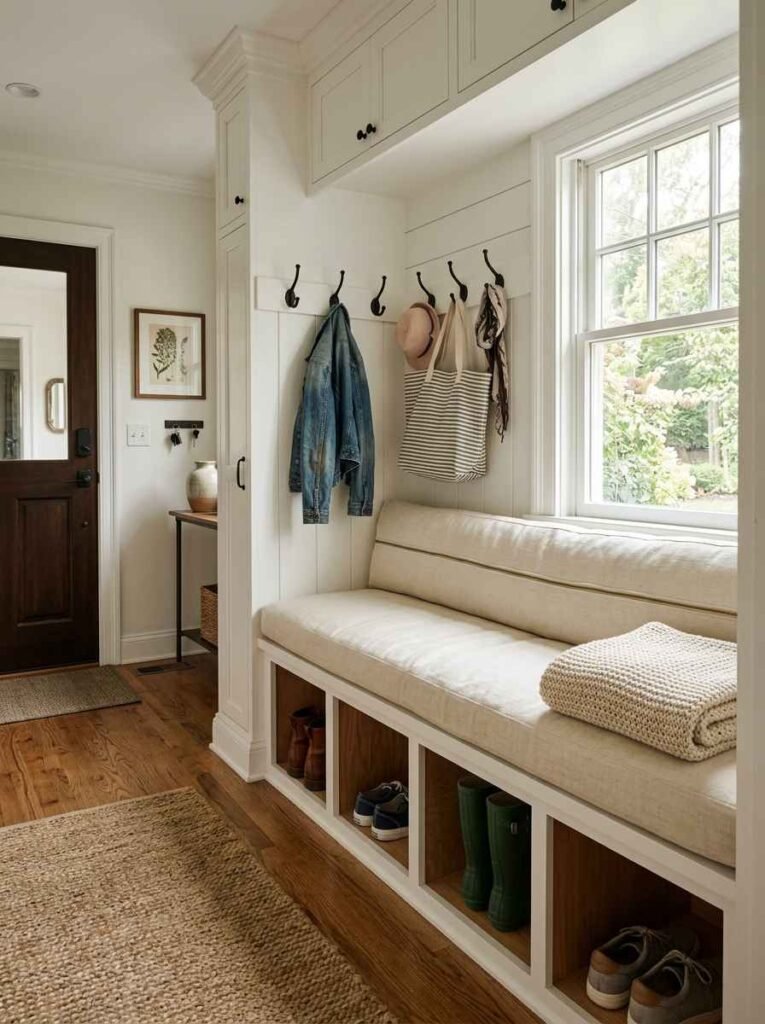
1. Floor-to-ceiling hooks instead of a traditional rack
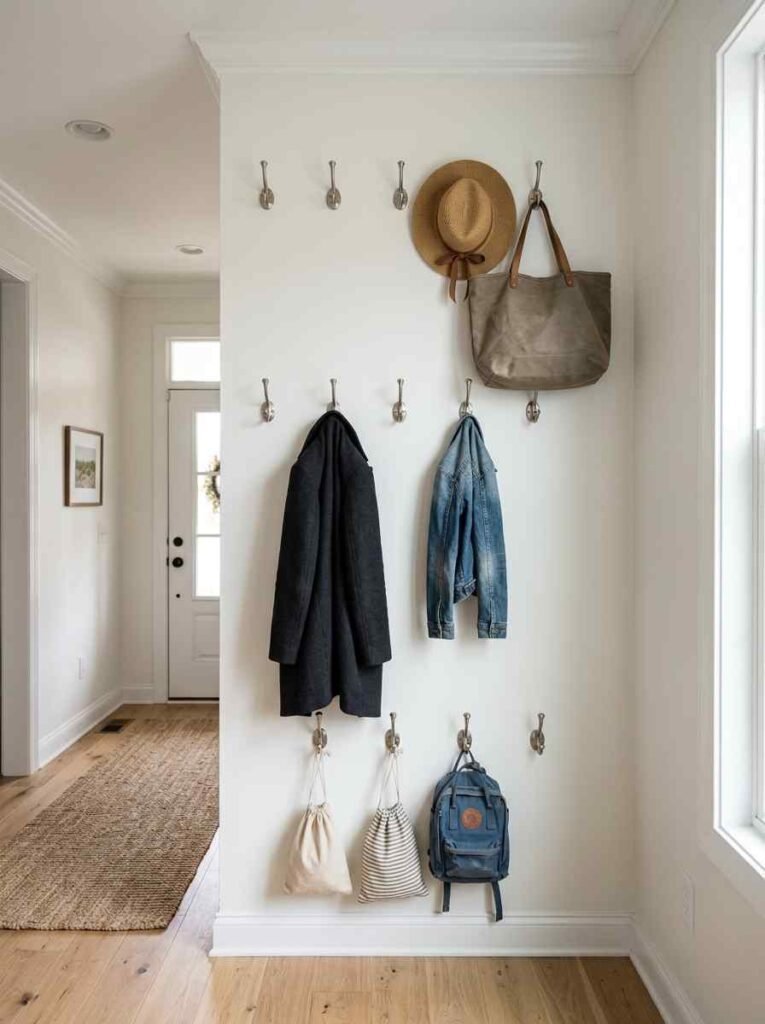
Most people buy a 4-hook rail and call it a day. Wrong move. Install hooks all the way from about 18 inches off the floor to near the ceiling, at different heights.
Low ones for kids’ bags, middle for adult coats, top for seasonal stuff nobody grabs daily.
I did this in my own entryway using simple brushed nickel hooks from IKEA, spaced about 8 inches apart.
Cost me under $40. The vertical space most people completely ignore is genuinely the best square footage in any mud room.
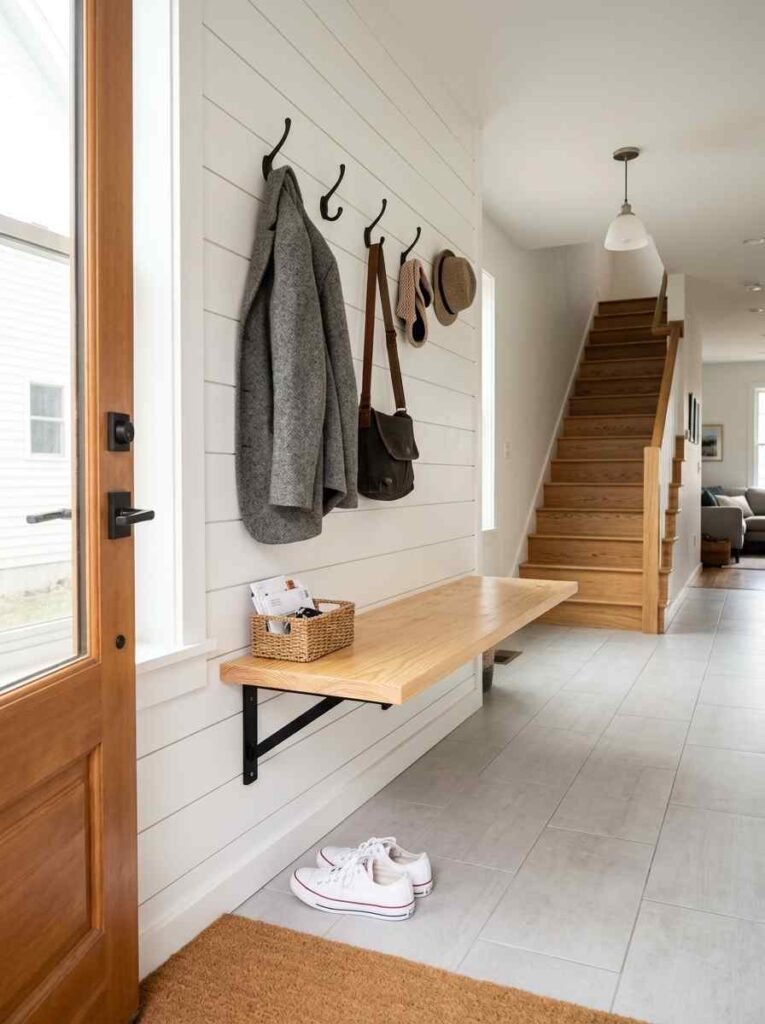
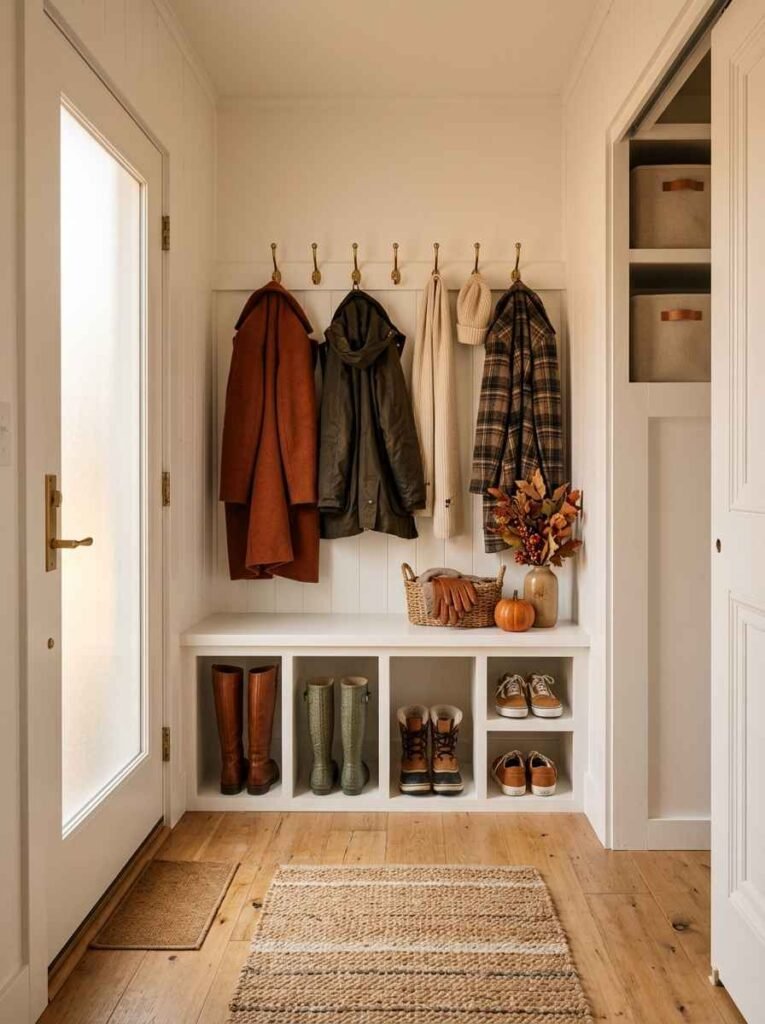
2. Built-in bench with cubbies underneath
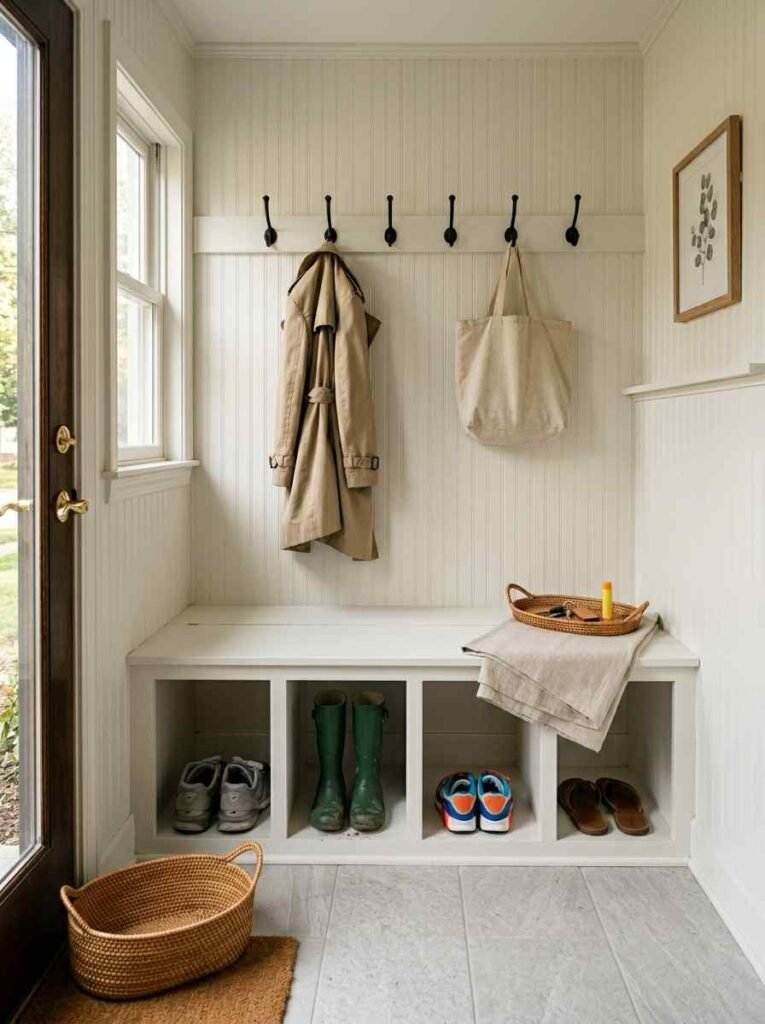
A bench with open cubbies below pulls double duty: seating to put shoes on, and storage for those shoes once they’re off.
The sweet spot is a bench height of 18 inches, which works for both adults and kids.
Honestly, this was the single upgrade that changed my entryway the most.
I found a pre-built unit at Home Depot for $180, bolted it to the wall studs, and it’s held up through 2 years of daily abuse from 3 kids and a Labrador.
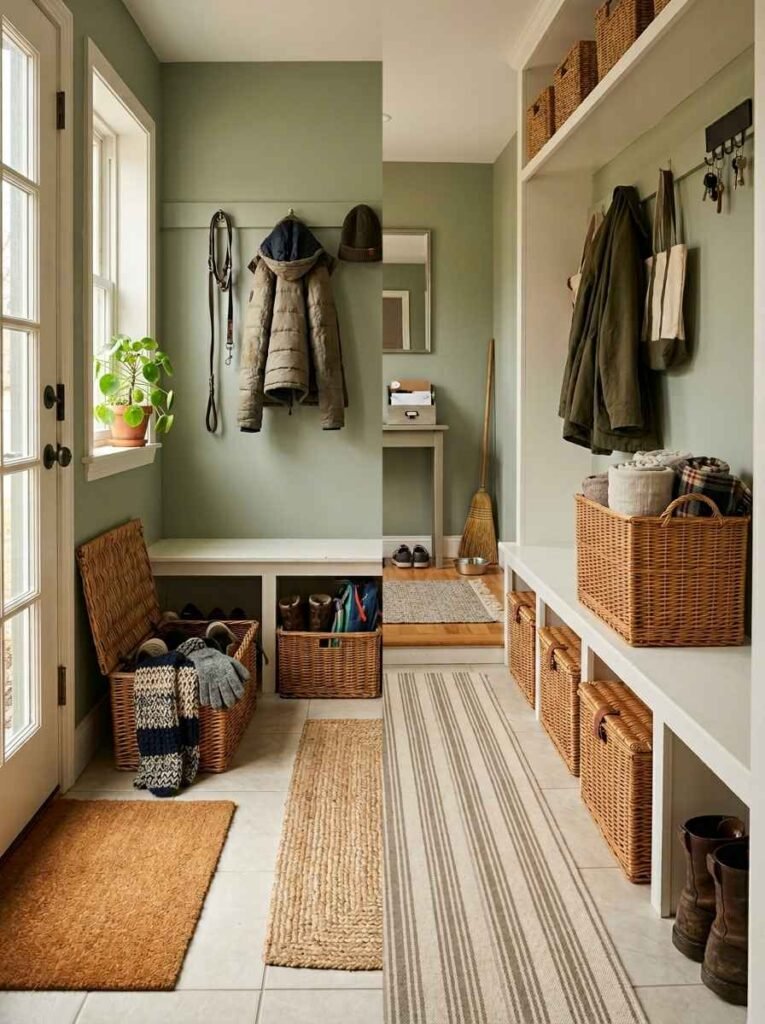
3. Slim console table with baskets below
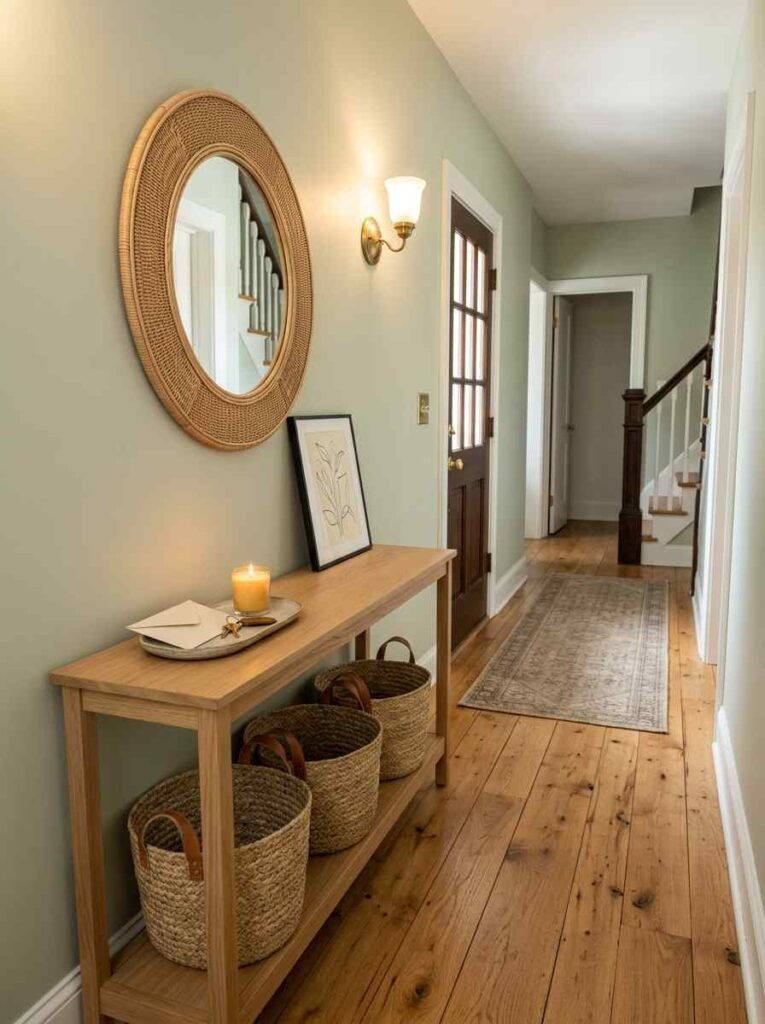
If you can’t do a full built-in, a slim console (like, 10-12 inches deep) with wicker baskets underneath gives you surface space on top and basket storage below.
Works great for narrow hallways. Look for ones with a shelf height of at least 10 inches so standard baskets actually fit.
4. Peel-and-stick wallpaper for visual depth
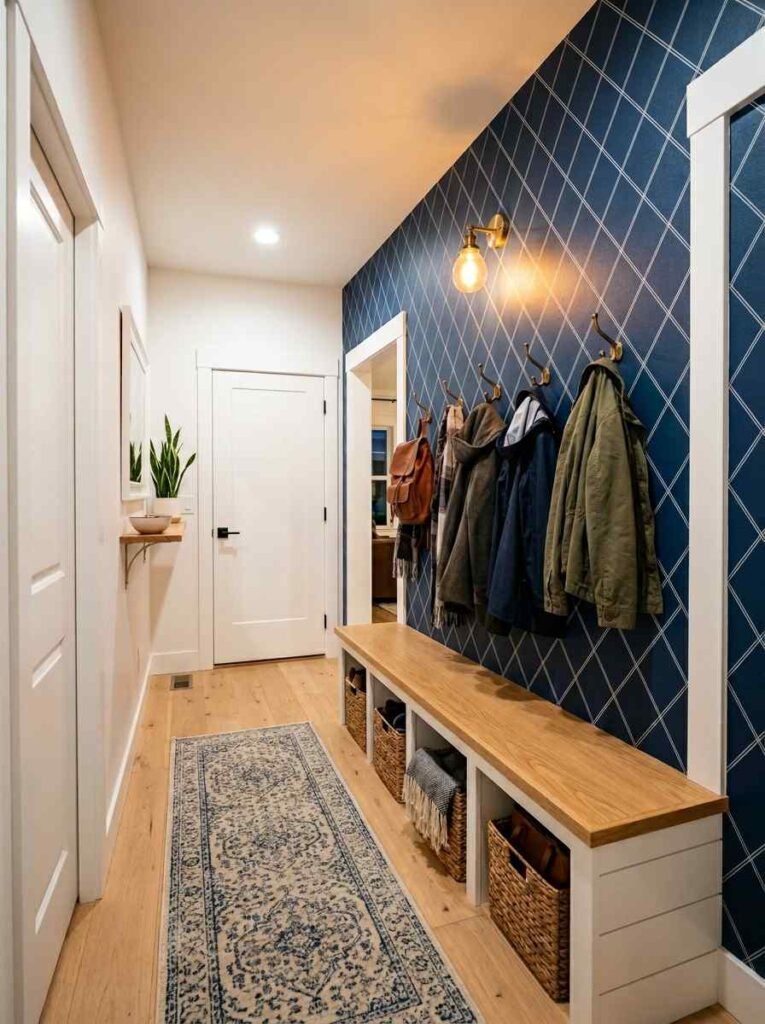
Okay, this one sounds like a Pinterest cliché. And honestly? It kinda is. But it genuinely works in small spaces because a bold pattern or faux shiplap wallpaper makes a tiny entryway feel intentional, not cramped.
I tried a dark navy geometric peel-and-stick on one accent wall. Took 45 minutes. Looked like I hired someone.
The Spoonflower peel-and-stick collection has some killer options if you want patterns that don’t look cheap.
5. Over-door organizers on every door
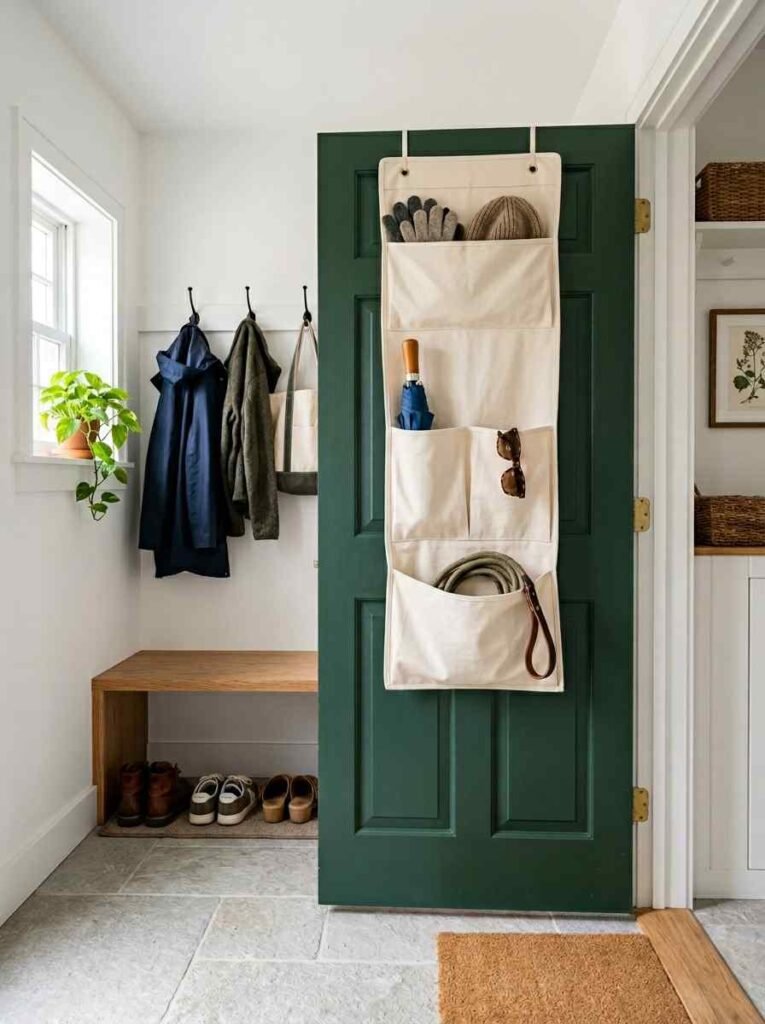
The back of your mud room door is prime real estate that 90% of people completely waste. Hang an over-door organizer with pockets for gloves, sunglasses, dog treats, spare keys.
You can fit an insane amount on the back of one door with a $20 organizer from Amazon.
6. A pegboard wall panel
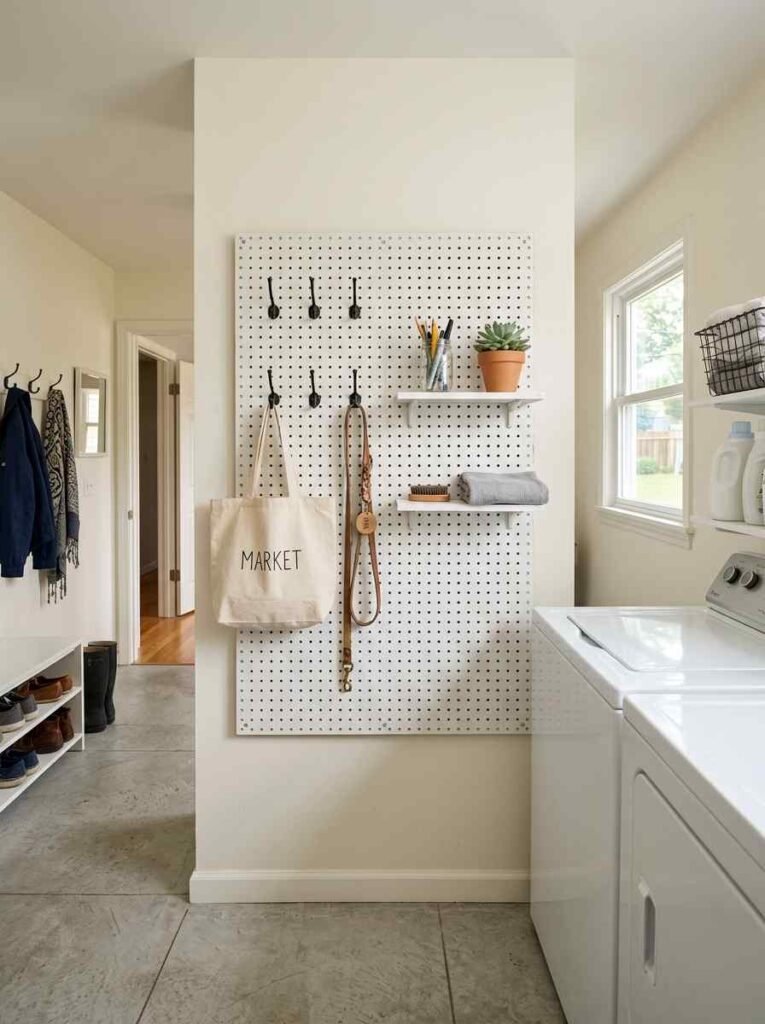
Pegboard gets a bad rap for looking like a garage, but hear me out: painted white or black, with uniform accessories, a pegboard panel looks clean and actually cool.
You can rearrange it whenever your needs change, which is more than you can say for a fixed shelf.
I installed a 2×4 foot white pegboard panel in my laundry/mud room combo. Put hooks on one section, small shelves on another.
Took a Saturday morning. The Rev-A-Shelf pegboard system is worth the extra few dollars if you want it to look polished.
7. Floating shelves with labeled bins
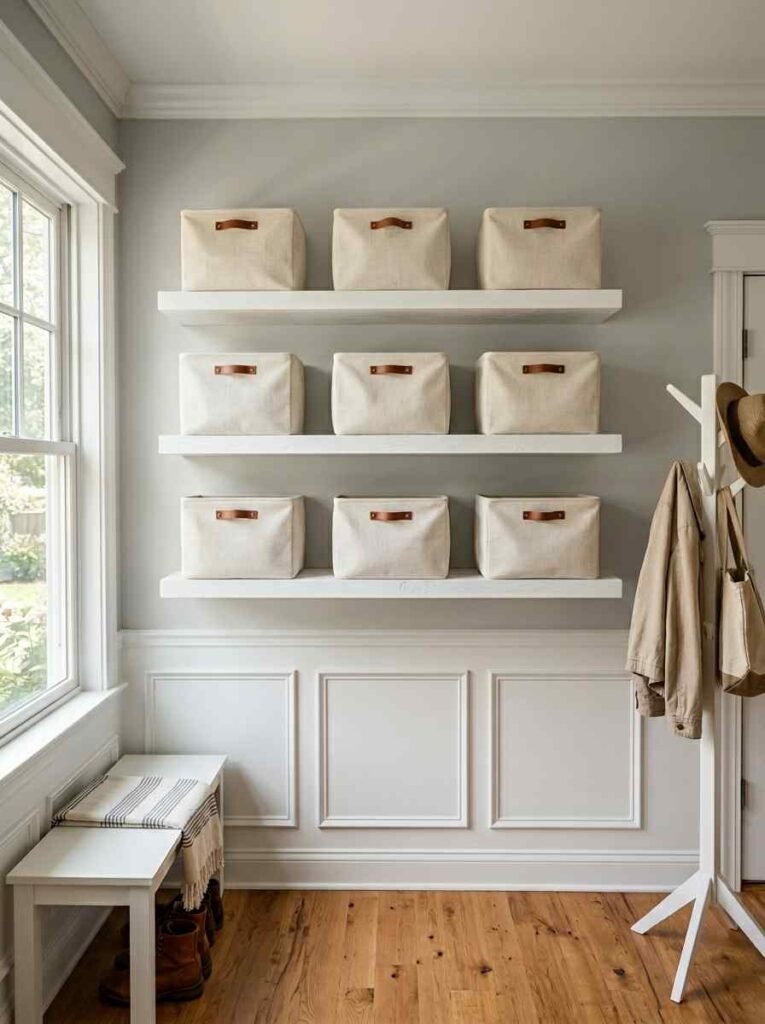
3 floating shelves, labeled bins, done. This is the most Pinterest-y idea on the list and also genuinely one of the most functional.
Labels matter more than people think. When your kids know exactly where their stuff goes, they actually (sometimes) put it there.
Use bins that are all the same size and color. Mismatched bins make even organized spaces look messy. The KALLAX inserts from IKEA are perfect for this.
8. Magnetic chalkboard paint strip
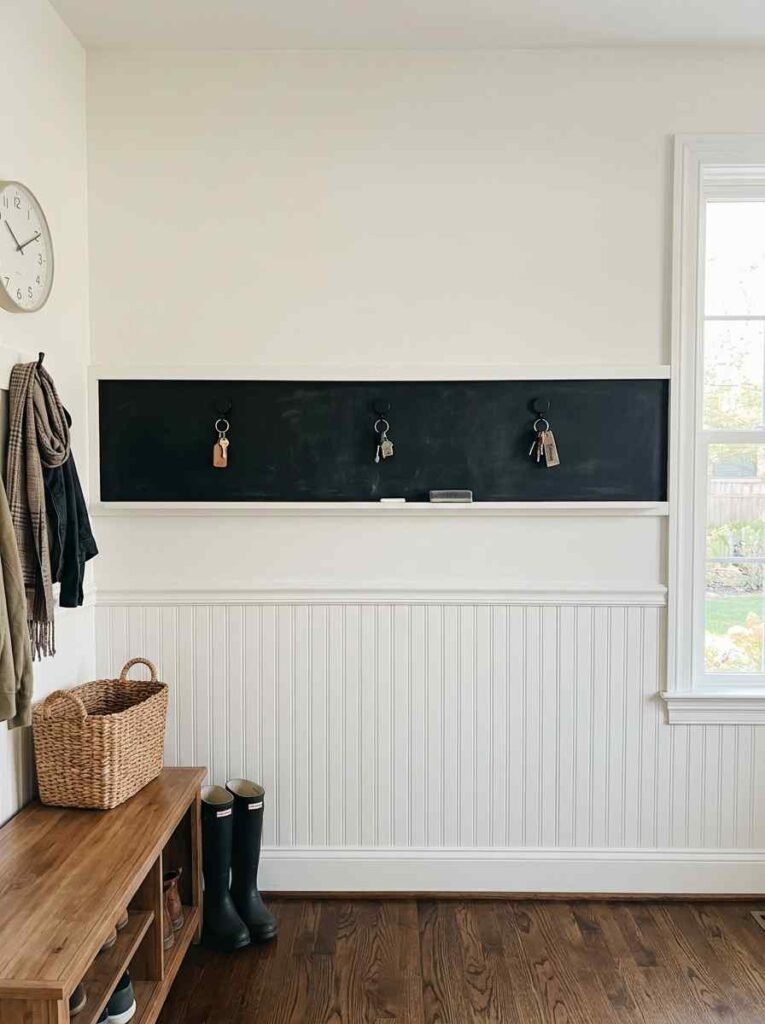
Paint a 6-inch horizontal strip of magnetic chalkboard paint at eye level across one wall. You can hang keys on small magnetic hooks, write the week’s schedule, clip school papers.
My neighbor did this and it’s lowkey the smartest thing I’ve seen in a mud room. Functional and kind of awesome.
9. A fold-down wall bench
If floor space is the issue, a fold-down bench is your answer. It’s mounted to the wall and folds flat when you don’t need it, just like those Murphy beds.
You get the seating when you need it, you get the floor space back when you don’t.
These run about $80-$150 online and most are pretty easy to install if you find a stud. The Rockler fold-down bench hardware is solid if you want to build your own for less.
10. Shoe drawers instead of open shoe racks
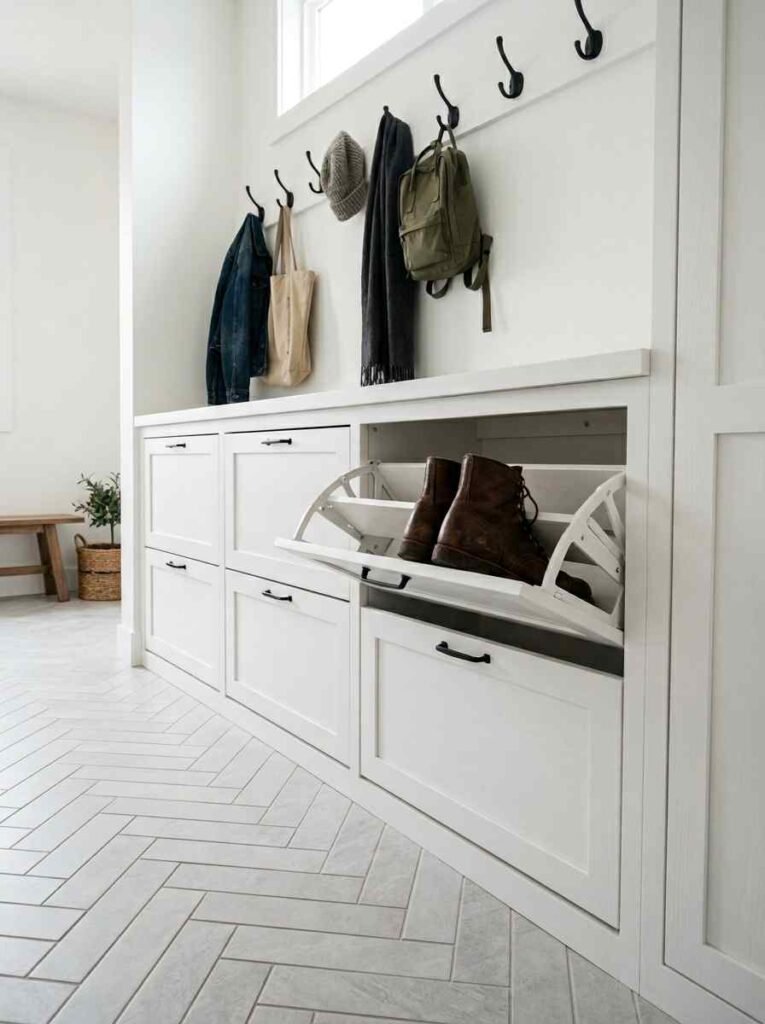
Open shoe racks look good in the store and terrible in real life after day 3. Closed shoe drawers keep the visual noise down.
For small spaces, look for shallow drawers (about 5 inches deep) that slide out at an angle; they take up way less floor space than traditional pull-out drawers.
11. A narrow locker-style unit per family member
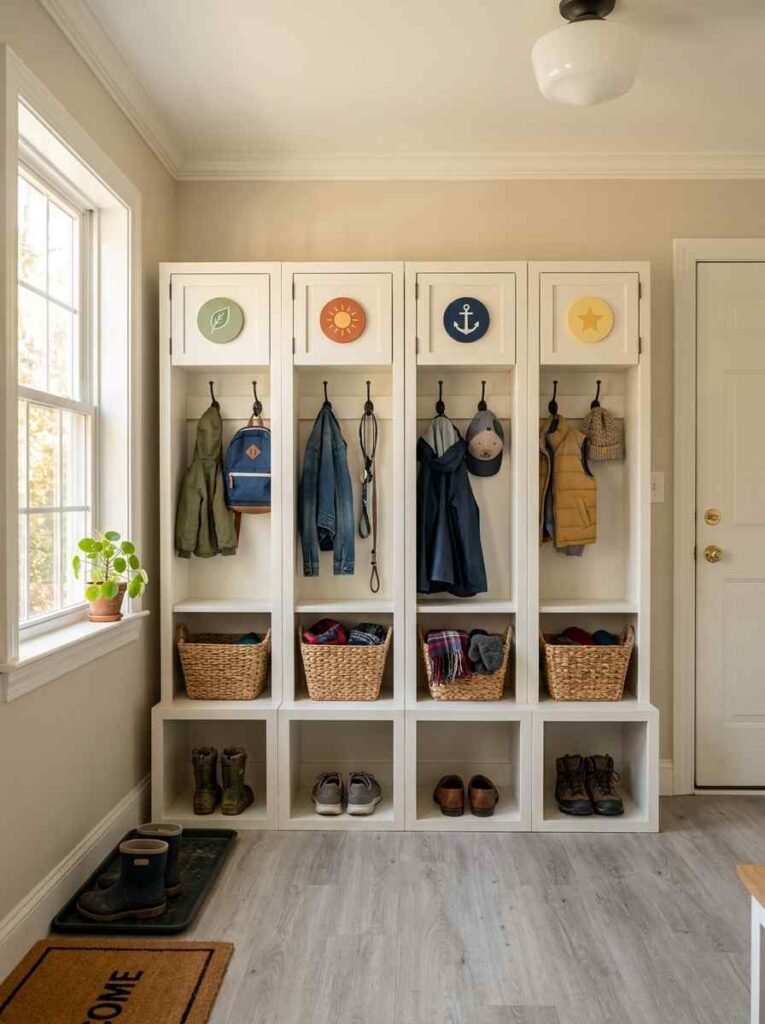
This works especially well for families. Give each person their own narrow locker column: one hook at top, a small shelf in the middle, a cubby at bottom for shoes.
It’s personal, it’s contained, and when someone’s stuff overflows, it’s obviously their problem. IMO this is the best system for houses with 3 or more people.
12. Command center wall with charging station
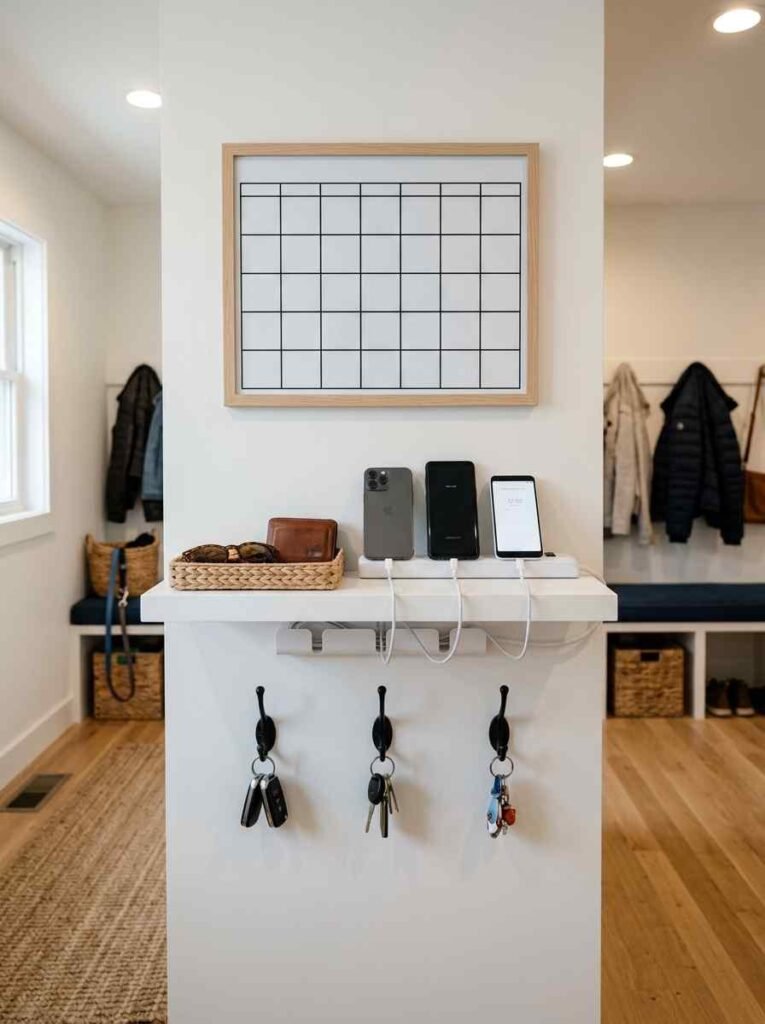
One section of wall, a small shelf for a power strip, some cable management clips, and labeled spots where phones charge.
This sounds overly specific but the amount of “where’s my phone” chaos it eliminates is kind of unreal.
Takes about 2 hours to set up, saves you 10 minutes of searching every single morning.
13. Ladder shelf leaned against the wall
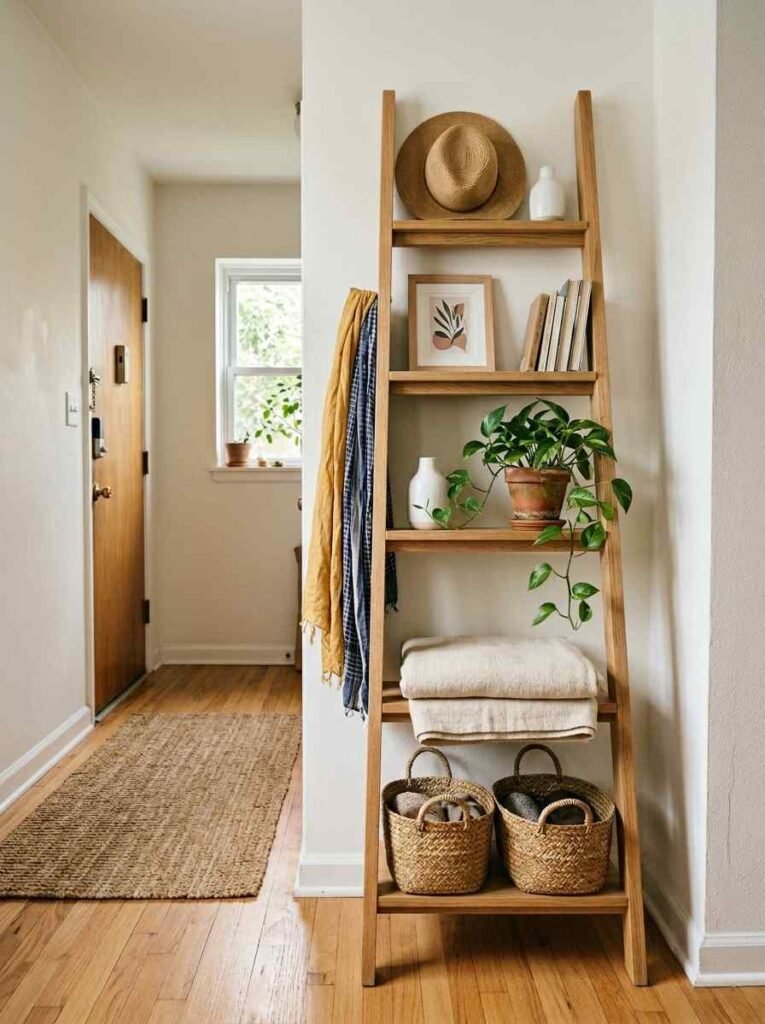
A leaned ladder shelf takes up almost no floor space, needs zero wall damage, and gives you 4-5 tiers of storage. Style it with
baskets on lower rungs, plants or decor on top, hooks draped on the sides. My sister did this in her apartment entryway and it looked like something from an interior design magazine.
14. Cabinet doors with interior organizers

If you already have a cabinet in or near your mud room, the inside of those doors is completely unused storage.
Door-mounted organizers, small baskets on command strips, or even just a row of small hooks inside can double what a cabinet holds.
15. A boot tray with a mat system
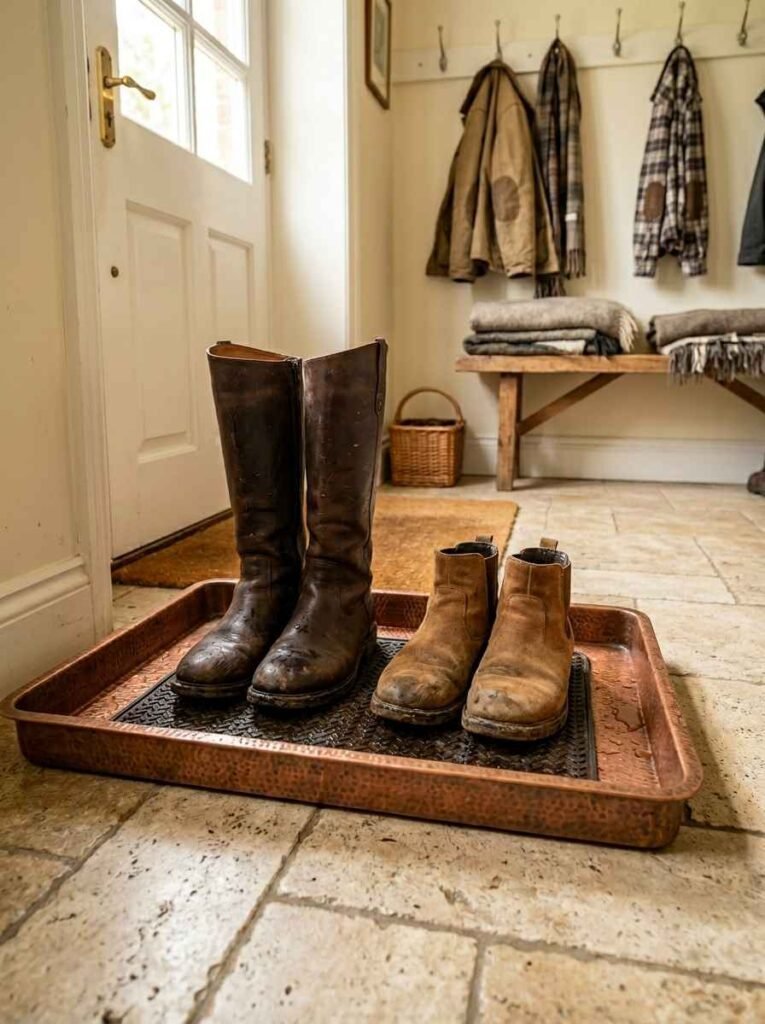
Boots and wet shoes are the mud room’s biggest nemesis. A boot tray (a shallow metal or plastic tray) with a textured mat inside catches mud and water before it spreads.
Get one that fits your space exactly; a tray that’s too small just redirects the problem.
I bought a copper-finish boot tray from Target for $22. It’s been in service for 3 winters. Looks great, works great.
16. Color-coded family system
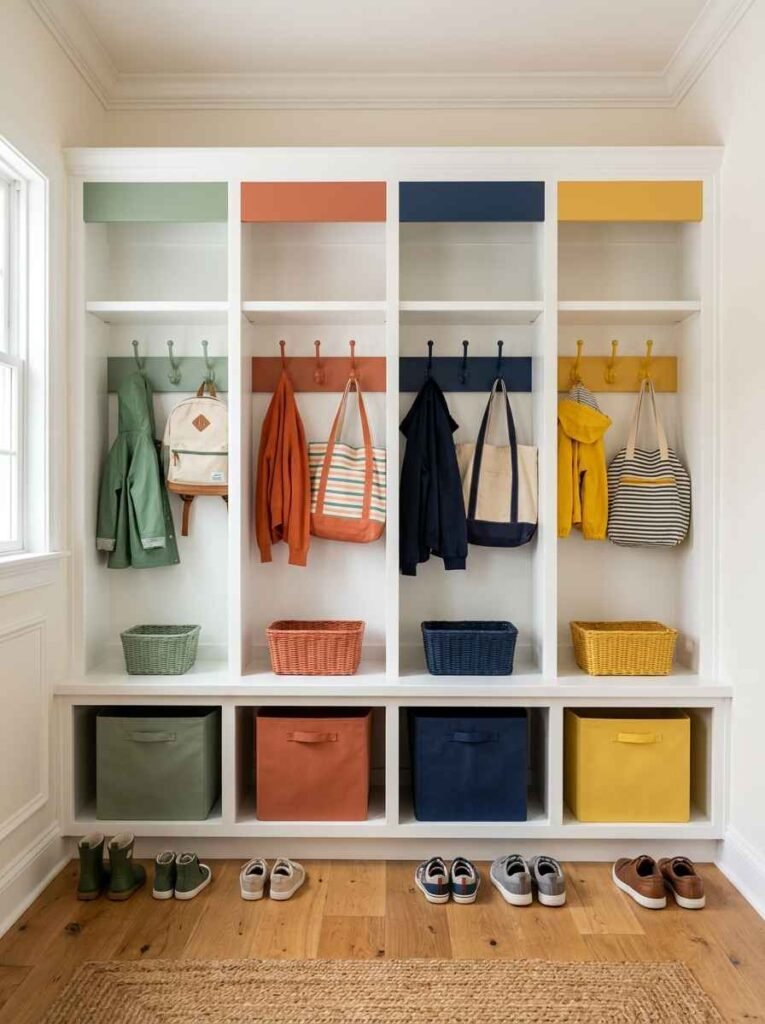
Assign each family member a color. Their hooks, bins, labels, even their shoe cubby are in that color.
This actually works because even little kids can figure out “my color = my stuff.” I’ve seen this in a few organized homes and it’s one of those ideas that feels obvious once you see it.
17. Recessed wall niche for extra depth
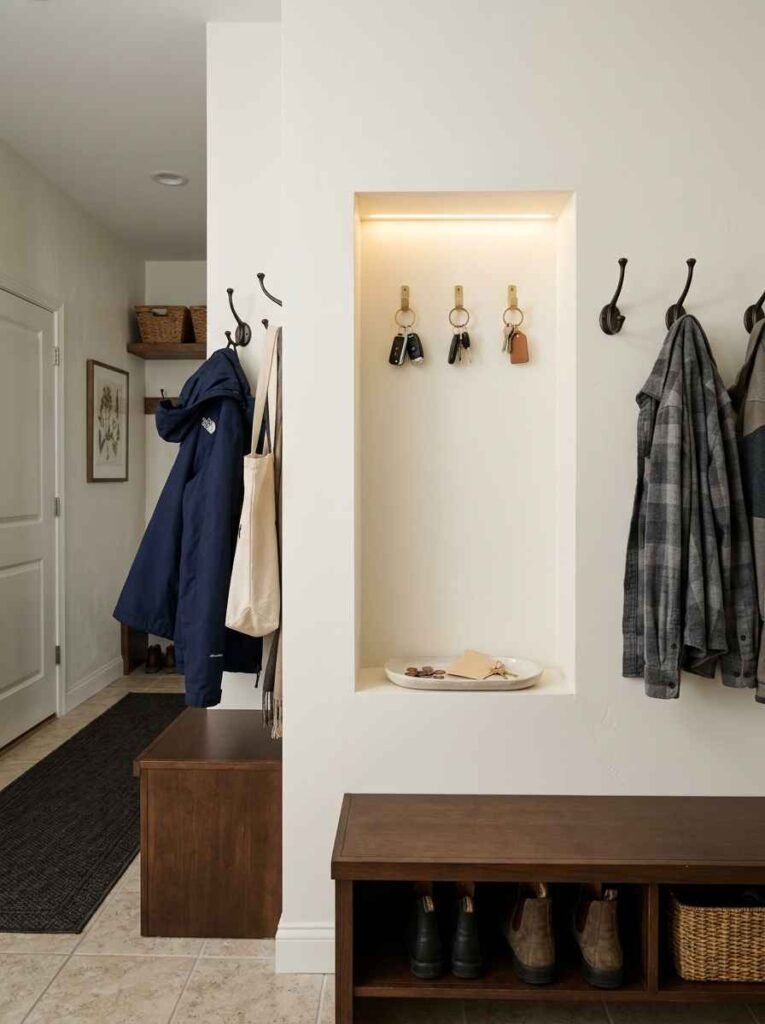
If you’re willing to do a little drywall work, cutting a recessed niche between wall studs gives you 3.5 inches of depth without eating into floor space.
Perfect for a key hook, a small charging station, or a row of hooks for thin items like scarves and hats.
Honestly, this trend feels a bit overdone on Pinterest right now, but it genuinely works if you have the right wall placement.
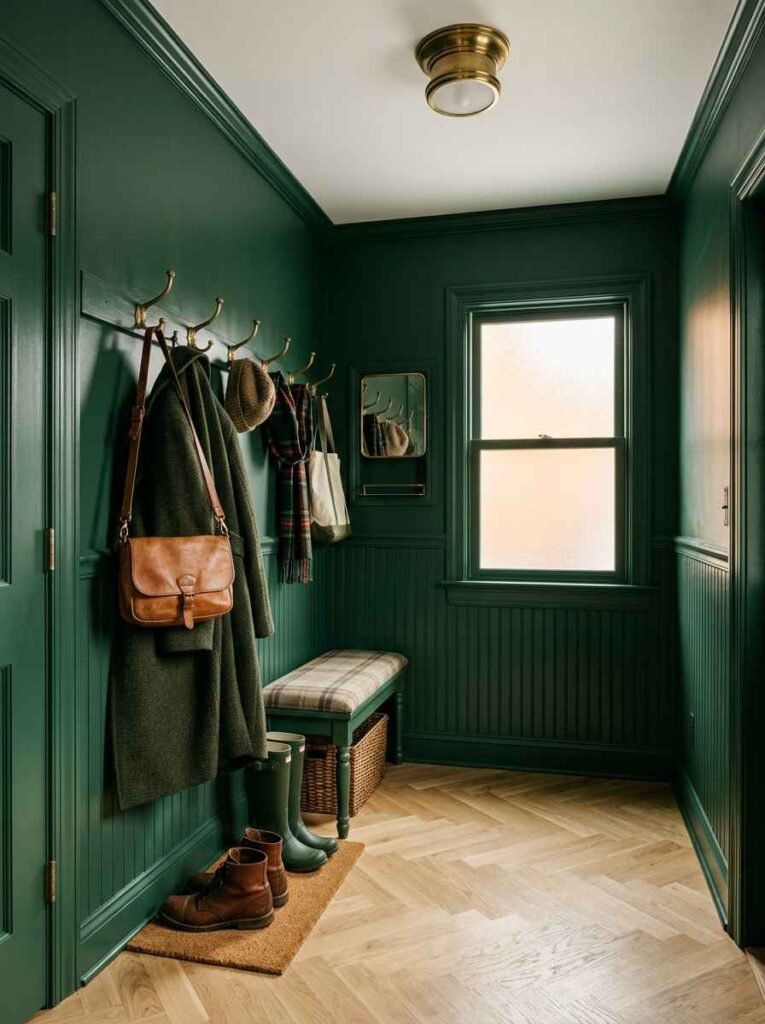
18. Wainscoting or bead board for durability
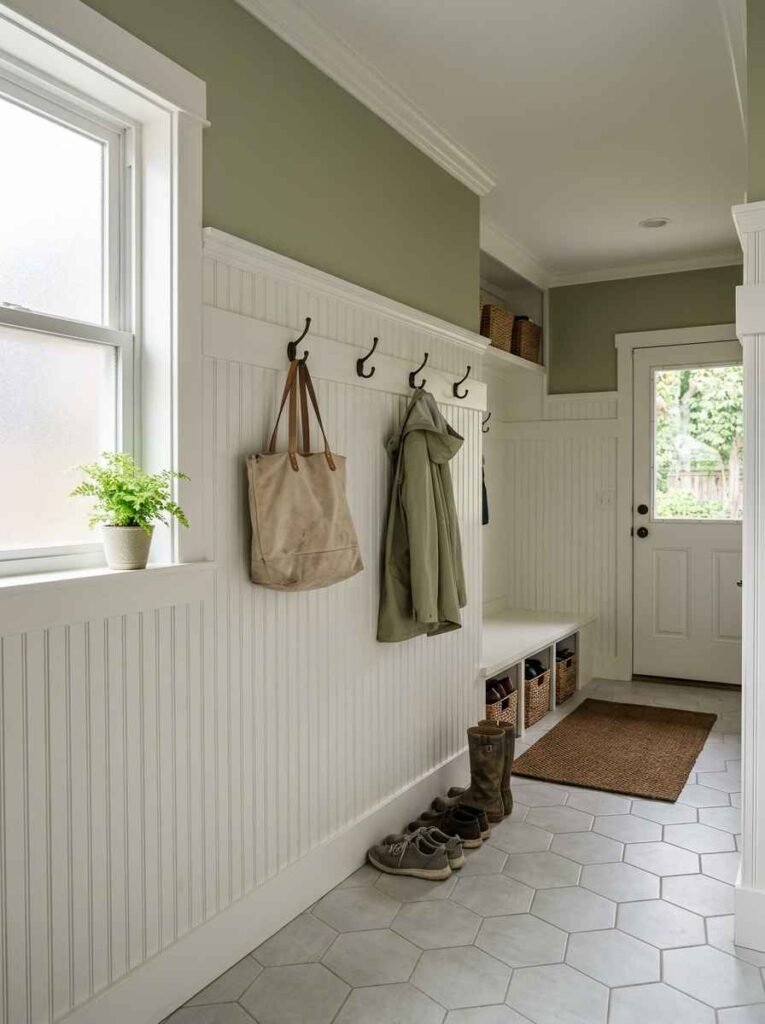
The lower portion of mud room walls takes an absolute beating: backpacks slamming, wet boots, muddy dog paws.
Wainscoting or bead board paneling on the bottom 3 feet protects your drywall and looks clean.
Paint it a semi-gloss finish so you can actually wipe it down. This was a $60 DIY weekend project at my house and I’d do it again immediately.
19. A slim rolling cart
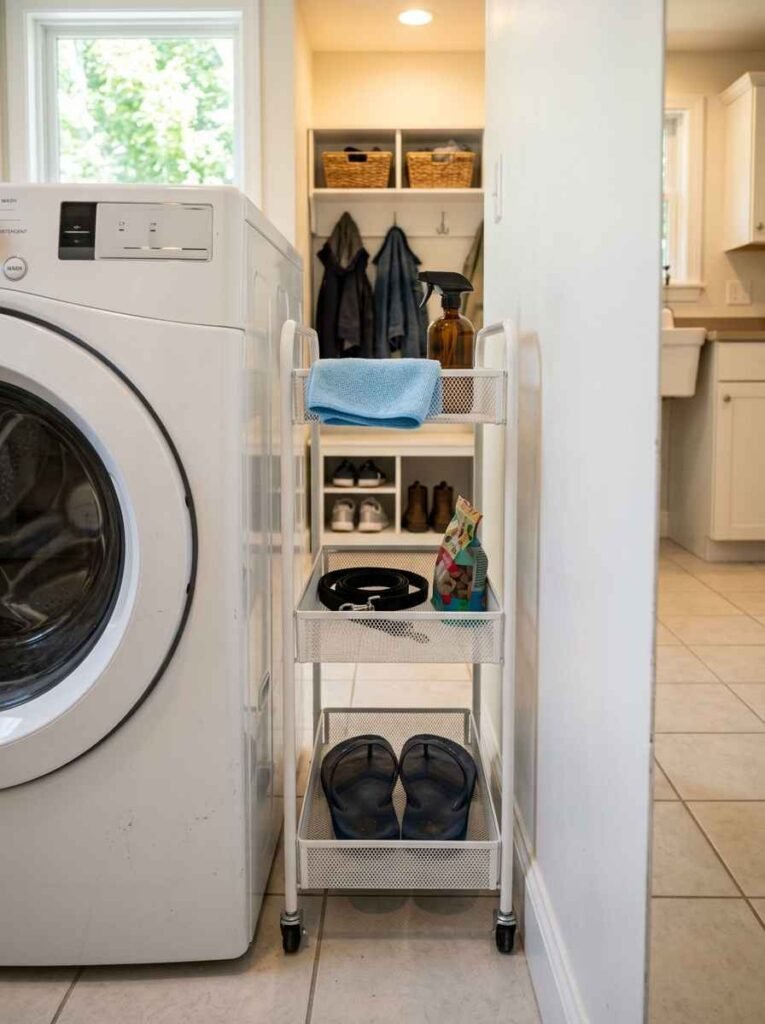
A rolling utility cart (the narrow kind, about 12 inches wide) fits in gaps that nothing else can use: beside a washer, between a door and a wall, next to a cabinet. Use it for dog supplies, sports gear, cleaning products.
The Ikea RÅSKOG cart is $30 and does exactly this job.
20. Wall-mounted mail organizer
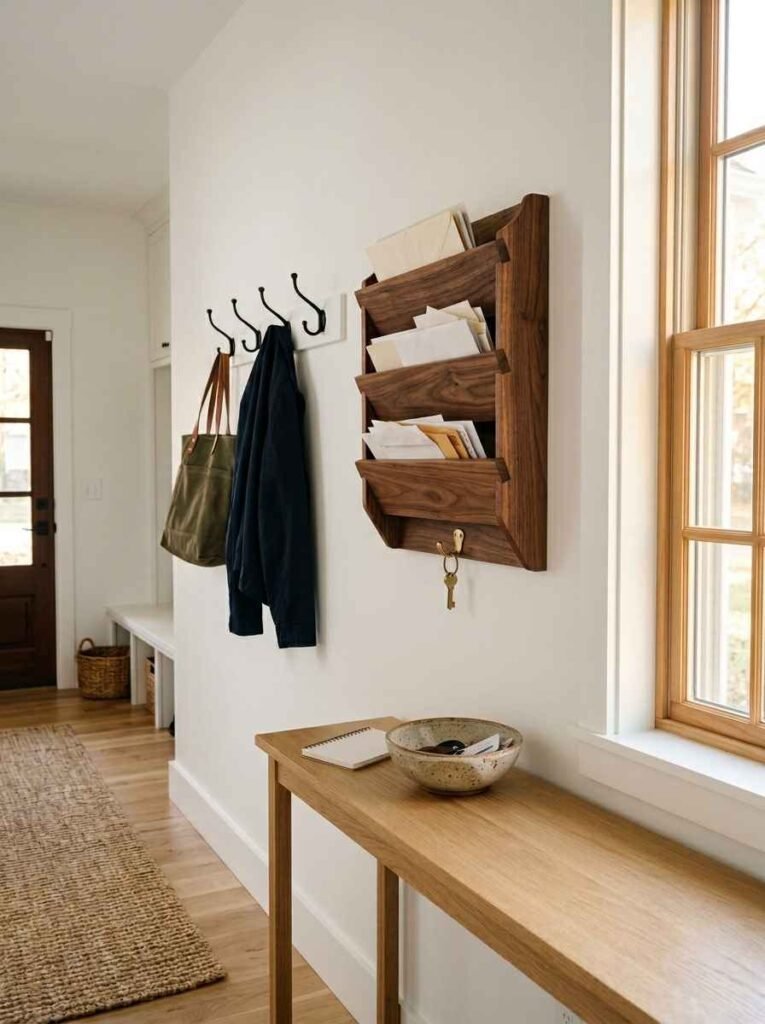
Mail is the silent chaos creator in most entryways. A 3-slot wall-mounted organizer (inbox, to-do, outgoing) keeps paper clutter from taking over surfaces.
Mounted at eye level, it takes up zero floor or counter space. This is a $15-$25 fix that makes a visible difference immediately.
21. Mirrored cabinet door
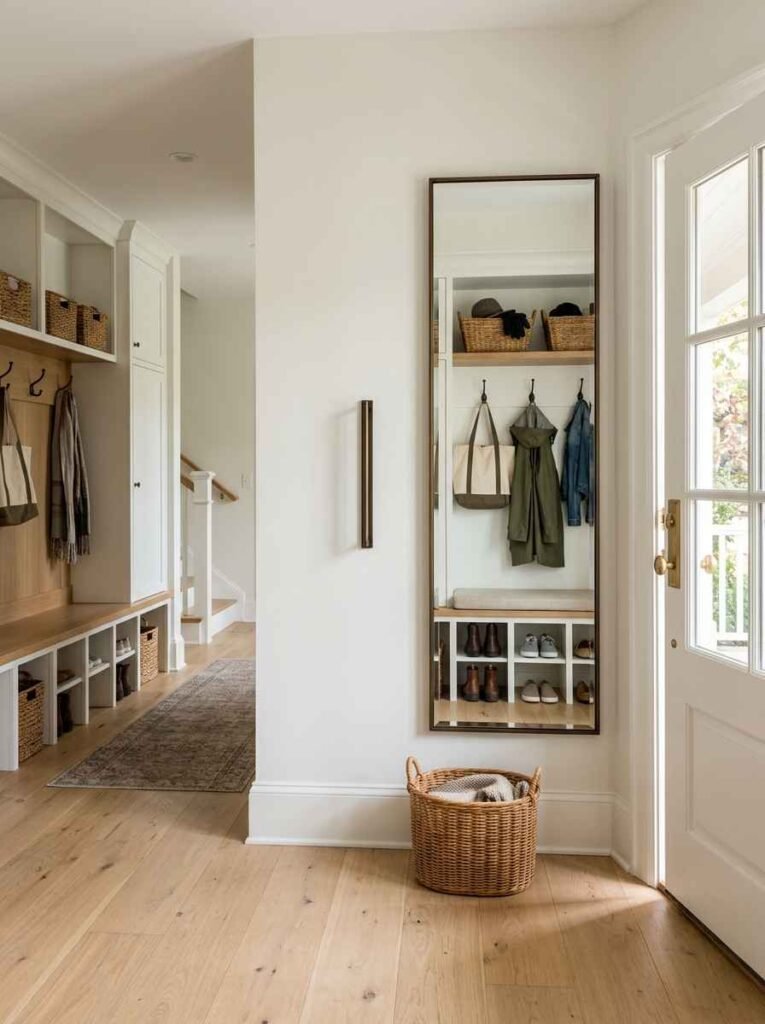
Add a mirror to the inside of a cabinet door or install a slim wall mirror near the exit.
You’ll use it every single morning to check yourself before leaving (because nobody wants to show up somewhere with their collar up and not know).
In a small space, a mirror also makes the room feel bigger. Win-win.
22. Bench cushion with washable cover
If you’ve got a wood or built-in bench, add a cushion with a zipper-off washable cover.
After a year of sitting on the hard wood version, I added a $35 foam cushion with a canvas slipcover. Life-changing level of comfort improvement for a very unsexy $35.
23. Under-stair mud room conversion
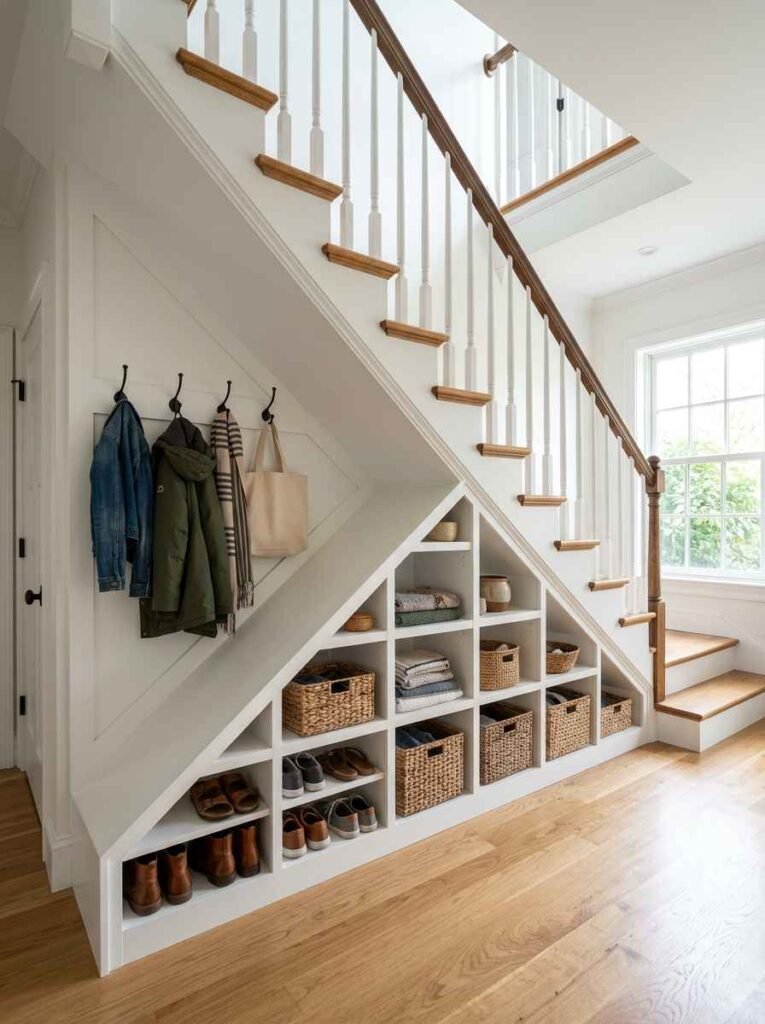
If your mud room happens to be near or under a staircase, use that angled underside space. Built-in cubbies or shelving that follows the stair angle looks custom, fits stuff no furniture ever could, and uses space that was probably just collecting holiday decorations.
This is a bigger project but one of the most satisfying transformations I’ve seen. Wow, the before-and-afters on Pinterest for this one are genuinely insane!
24. Seasonal rotation system
Final one, and it’s more of a habit than a physical product. Keep only the current season’s gear in your mud room. Everything else goes into a labeled bin in storage. When winter hits, winter stuff comes out; summer stuff goes away.
Your mud room immediately has twice the storage capacity because it’s only holding what you actually need right now.
Quick comparison: storage solutions for small mud rooms
| Solution | Approximate cost | DIY-friendly? | Best for |
|---|---|---|---|
| Floor-to-ceiling hooks | $30-$60 | Yes | Coats, bags, leashes |
| Built-in bench with cubbies | $150-$400 | Medium | Families, shoes |
| Pegboard wall panel | $25-$80 | Yes | Flexible, changing needs |
| Fold-down wall bench | $80-$150 | Medium | Very tight spaces |
Things that look great on Pinterest but annoy me in real life
Open wicker baskets without lids. They look beautiful in photos and collect visible mess in actual homes. Get baskets with lids, or at minimum ones with tall sides.
Also: tiny hooks that can only hold one item. You will always need to hang 3 things on every hook.
Buy hooks that have a double or triple arm. Single-arm decorative hooks are for decor blogs, not real people.
And honestly, the “all-white mud room” trend? Gorgeous. Also insane to maintain if you have kids, dogs, or any dirt in your life whatsoever.
Paint your mud room a color that hides scuffs. Warm gray, deep green, navy. You’ll thank yourself.
What actually makes a small mud room work
A system beats aesthetics every time. You can have the prettiest hooks and bins, but if your family doesn’t know what goes where, the space fills up with random stuff within a week.
Spend 30 minutes actually thinking about: who uses this space, what do they bring in daily, where do those things need to land? Then design around those answers. For more inspiration on practical home organization, The Spruce’s mud room organization guide is genuinely worth reading.
One more resource that I keep bookmarking: Apartment Therapy’s small entryway section has some really honest before-and-after content from real people, not staged shoots. Good for reality-checking what’s actually possible in a small space.
Quick FAQs
How do I make a mud room in a tiny apartment entryway? Focus on vertical space: hooks on the wall, an over-door organizer, and one slim shelf or console table. You don’t need square footage; you need height and systems.
What’s the best flooring for a mud room? Porcelain tile or luxury vinyl plank. Both are water-resistant, easy to mop, and hold up to heavy foot traffic. I’d skip carpet entirely in any mud room, regardless of how warm it looks in photos.
Can I DIY a built-in bench without carpentry skills? Yes, honestly. Most pre-built bench units from IKEA or Home Depot just need to be anchored to wall studs. If you own a drill and can find a stud, you can do it. There are good step-by-step tutorials on Family Handyman if you want to go custom.
A small mud room done right is genuinely one of the most satisfying home projects you can do, because you feel it every single day. Every morning when you grab your keys and know exactly where they are. Every evening when backpacks actually land on hooks instead of the floor.
Pick 3 ideas from this list. Try them. See what works for your family’s actual habits. Then adjust.
Have you tried any of these? Drop your favorite mud room hack in the comments. I’m always looking for ideas I haven’t thought of yet!